How To Fix Termite Damaged Wood Floors In Campervans
Termite infestations can cause significant damage to wood structures, and the wooden floors of campervans are particularly vulnerable. The confined, often humid environment inside a van can create ideal conditions for termite colonies to thrive. Addressing termite damage promptly is critical to prevent further structural weakening and costly repairs. This article outlines a systematic approach to assessing and repairing termite damage in campervan wood floors.
Identifying Termite Damage
The first step in addressing termite damage is accurate identification. Termites often work from the inside out, making detection difficult until significant damage has occurred. Regular inspections are crucial for early detection. Signs of termite infestation can include:
-
Visible Damage:
Look for hollowed-out or damaged wood, particularly along floor edges, near plumbing, and in damp areas. Probing the wood with a screwdriver or awl can reveal soft or crumbling sections indicative of termite activity.-
Mud Tubes:
Termites build mud tubes to travel between their colony and the food source (wood). These tubes are typically found along walls, foundations, or exposed wooden surfaces.-
Frass (Termite Droppings):
Termites leave behind small, granular droppings called frass. The appearance of frass near wooden structures is a strong indicator of termite activity.-
Hollow Sounds:
Tapping on the floor in suspected areas can reveal hollow sounds, indicating that the wood has been eaten away internally.-
Swarming Termites:
During certain times of the year, termites will swarm, sending out winged reproductives. Swarming termites near or inside the campervan are a definitive sign of infestation.If any of these signs are present, a professional pest control inspection is recommended to confirm the presence of termites and assess the extent of the infestation. A professional can also determine the specific type of termite involved, which can influence the treatment approach.
Assessing the Extent of the Damage
Once termite damage is confirmed, a thorough assessment of the extent of the damage is necessary. This involves carefully inspecting all areas of the wood floor, including those that appear to be undamaged. Key areas to focus on include:
-
Perimeter of the Floor:
Termites often enter through gaps or cracks in the foundation or along the edges of the floor.-
Areas Near Plumbing:
Moisture attracts termites, so areas near water pipes, sinks, and showers are particularly susceptible.-
Areas Underneath Cabinets and Appliances:
These areas are often dark and damp, providing ideal conditions for termites to thrive. Accessing these areas may require temporary removal of cabinets or appliances.-
Support Beams and Joists:
Inspect the structural support elements of the floor, as damage to these components can compromise the integrity of the entire floor system.The assessment should involve both visual inspection and probing of the wood. Areas that sound hollow or crumble easily should be marked for further investigation. Documentation of the damage, including photographs and notes, is important for planning the repair work.
Depending on the severity of the damage, the assessment may require removing sections of the flooring to gain access to hidden areas. This is best performed with caution to avoid causing further damage. Consider consulting with a structural engineer if the damage appears extensive or if there are concerns about the structural integrity of the floor.
Repairing Termite Damaged Wood Floors
The repair strategy depends on the extent and location of the termite damage. Minor damage may be addressed with localized repairs, while extensive damage may require replacing entire sections of the floor.
Treatment Before Repair:
Before any repair work begins, it is paramount to eliminate the termite infestation. This usually involves professional pest control services utilizing chemical treatments designed to eradicate the termite colony. Borate-based wood preservatives can also be applied to surrounding wood to prevent future infestations. Ensure proper ventilation during and after the application of these treatments.Repairing Minor Damage:
Minor surface damage can often be repaired using wood fillers or epoxy resins. These materials are used to fill voids and restore the structural integrity of the wood. The process typically involves:*
Cleaning:
Removing any loose debris, dirt, and frass from the damaged area.*
Preparation:
Slightly enlarging the damaged area to create a clean, stable surface for the filler.*
Application:
Mixing and applying the wood filler or epoxy resin according to the manufacturer's instructions. Overfill the area slightly to allow for sanding.*
Sanding:
Once the filler has dried completely, sand it smooth to match the surrounding surface. Start with a coarse grit sandpaper and gradually move to finer grits.*
Finishing:
Apply a matching stain and sealant to protect the repaired area and blend it with the rest of the floor. Ensure the sealant is compatible with the existing floor finish.Replacing Sections of Flooring:
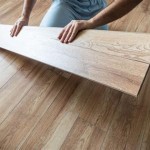
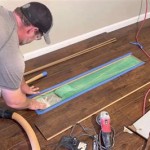
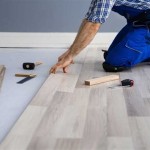
More extensive damage requires replacing sections of the floor. This involves carefully removing the damaged boards and replacing them with new ones. The process includes:*
Cutting:
аккуратно вырезать и удалить поврежденные доски пола, убедившись, что при этом не будут повреждены соседние доски. Используйте циркулярную пилу или многофункциональный инструмент для создания чистых надрезов.*
Support Structure Review:
Inspect the underlying support beams (joists) for damage and repair or replace them as needed. Ensuring the joists are structurally sound is crucial for the stability of the new flooring section.*
Measurements and Cutting:
Take precise measurements of the removed section and cut replacement boards to the correct size and shape. It is often best to use the original boards as templates.*
Installation:
Install the replacement boards using appropriate fasteners, such as nails, screws, or construction adhesive. Ensure the boards are properly aligned and secured to the joists.*
Finishing:
Sand the new boards to match the surrounding floor and apply a matching stain and sealant. Pay close attention to blending the transition between the old and new flooring.Replacing Entire Floor:
In cases of severe and widespread termite damage, replacing the entire floor may be the most practical solution. This involves removing all existing flooring, addressing any damage to the subfloor or support structure, and installing a new floor. This is a significant undertaking and may require professional assistance.*
Subfloor Inspection:
After removing the existing floor, thoroughly inspect the subfloor for any signs of damage, moisture, or rot. Repair or replace any damaged sections of the subfloor before installing the new flooring.*
Moisture Barrier:
Install a moisture barrier to protect the new floor from moisture damage. This is particularly important in campervans, where humidity levels can fluctuate significantly.*
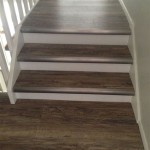
New Flooring Installation:
Install the new flooring according to the manufacturer's instructions. Choose a flooring material that is durable, water-resistant, and suitable for the demands of a campervan environment.Preventing Future Termite Infestations
After repairing the termite damage, it is crucial to take steps to prevent future infestations. Prevention strategies include:
-
Regular Inspections:
Conduct regular inspections of the campervan, paying close attention to areas prone to moisture and termite activity.-
Moisture Control:
Eliminate sources of moisture inside the campervan. Repair leaks promptly, ensure adequate ventilation, and consider using a dehumidifier in humid climates.-
Wood Treatment:
Treat vulnerable wood surfaces with borate-based wood preservatives. These preservatives are effective at preventing termite infestations and are relatively safe for use in enclosed spaces.-
Soil Treatment:
Consider treating the soil around the campervan with a termiticide. This can help to create a barrier that prevents termites from entering the van. This is more applicable if the van is parked long-term in one location.-
Proper Ventilation:
Ensure adequate ventilation underneath the campervan to prevent moisture buildup and discourage termite activity. This may involve installing vents or improving airflow.-
Remove Wood Debris:
Remove any wood debris or vegetation from around the campervan. Termites are attracted to decaying wood, so keeping the area clean can help to prevent infestations.-
Professional Pest Control:
Schedule regular preventative treatments with a professional pest control company. They can provide ongoing monitoring and treatment to protect the campervan from termite infestations.By taking these preventative measures, it is possible to significantly reduce the risk of future termite infestations and protect the wood floors of the campervan.

Telltale Signs That Your Rv Has Termites

Telltale Signs That Your Rv Has Termites

Effective Termite Treatment For Your Camper

Last Refinishing Fixes Most Of Buyer S Wood Floors

Is Dry Rot Caused By Termites Thediyplan

Triad Rv Repair Updated June 2025 Request A Quote 939 Welcome Arcadia Rd North Ina Phone Number Yelp

Vintage Campers The Comet Camper Page 3

Testimonies Masterpiece Flooring Llc

2024 03 11 Newsletter Fitting Solar Panels Living On A Narrowboat

Testimonies Masterpiece Flooring Llc
See Also