How to Level Chipboard Subfloor
Chipboard, also known as particleboard or oriented strand board (OSB), is a common material used for subfloors in residential and commercial construction. While relatively inexpensive and easy to install, chipboard can be prone to unevenness due to factors like moisture exposure, improper installation, or settling of the building's foundation. An uneven subfloor can create problems when installing finished flooring, leading to issues like creaking, flexing, and an unsightly appearance. Therefore, accurately leveling a chipboard subfloor is crucial for achieving a stable and professional-looking finished floor.
This article will explain the process of leveling a chipboard subfloor, detailing the necessary tools, materials, and techniques to ensure a smooth and even surface ready for your chosen flooring. This process involves careful assessment, preparation, and the application of appropriate leveling compounds or shims.
Identifying the Problem Areas and Assessing the Severity
The first step in leveling a chipboard subfloor is a thorough inspection to identify all uneven areas. This requires a systematic approach to ensure no problem spots are overlooked. Accurate identification and severity assessment will dictate the leveling method and materials required.
Begin by visually inspecting the entire subfloor surface. Look for obvious dips, humps, or areas where the chipboard sheets meet unevenly. Pay close attention to seams and areas near walls, as these are common locations for unevenness to develop. Utilize a strong light source to cast shadows across the surface, highlighting subtle variations in elevation.
Next, employ a long, straight edge or a level, preferably at least six feet in length. Place the straight edge on the subfloor in various directions (lengthwise, widthwise, and diagonally) to identify high and low spots. A gap between the straight edge and the subfloor indicates an uneven area. Record the locations and approximate depths of these gaps. A carpenter’s square can also be used to check for squareness, especially in corners.
A spirit level or laser level can provide a more precise measurement of unevenness. A spirit level placed on the straight edge will indicate the degree of slope. A laser level projects a horizontal line across the room, allowing for easy identification of high and low points relative to the laser line. Mark these points directly on the subfloor for future reference.
For larger areas of unevenness, a self-leveling compound might be necessary. Smaller, localized dips can often be addressed with patching compounds or shims. The severity of the unevenness will determine the volume of leveling material needed and the appropriate application technique. Severe warping or widespread damage may necessitate subfloor replacement.
Consider utilizing a moisture meter to assess the moisture content of the chipboard. High moisture levels can cause swelling and warping, which contribute to unevenness. Addressing moisture issues proactively is essential before proceeding with any leveling efforts. Allow the chipboard to dry completely before applying any leveling compounds.
Preparing the Subfloor Surface
Proper preparation of the chipboard subfloor surface is paramount for the successful adhesion of any leveling compounds or shims. A clean, stable, and appropriately primed surface will ensure a durable and long-lasting finished floor.
Begin by thoroughly cleaning the subfloor. Remove all debris, including dust, dirt, paint, adhesive residue, and any loose particles. Use a vacuum cleaner with a brush attachment to remove surface dust. For stubborn debris, use a scraper or putty knife to gently remove it without damaging the chipboard. A damp cloth can be used to wipe away remaining dirt, but ensure the subfloor is completely dry before proceeding.
Inspect the chipboard for any loose or protruding fasteners. Countersink any screws or nails that are not flush with the surface. Replace any damaged or stripped screws. Secure any loose chipboard sheets to the joists below using appropriate screws. Proper fastening helps to stabilize the subfloor and prevent future movement.
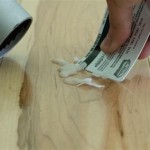
Address any damaged areas of the chipboard. Small holes or gouges can be filled with a wood filler or patching compound specifically designed for wood or chipboard. Allow the filler to dry completely according to the manufacturer's instructions before sanding it smooth and flush with the surrounding surface. For larger areas of damage, consider replacing the affected section of chipboard entirely.
Priming the subfloor is crucial for promoting adhesion of leveling compounds. Use a primer specifically designed for wood or chipboard subfloors. The primer creates a bond between the subfloor and the leveling compound, preventing it from peeling or cracking over time. Apply the primer evenly using a paint roller or brush, following the manufacturer's instructions regarding drying time and application thickness.
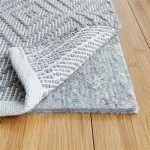
For self-leveling compounds, it is often recommended to create a dam around the perimeter of the area to be leveled. This prevents the compound from flowing into adjacent rooms or down gaps in the subfloor. Use foam sealant tape or caulk to create a watertight barrier. Ensure the dam is securely attached to the subfloor and is high enough to contain the volume of self-leveling compound being used.
Applying Leveling Compounds or Shims
The choice between using leveling compounds or shims depends on the size and severity of the unevenness. Leveling compounds are suitable for larger areas and gradual slopes, while shims are better for addressing localized dips or supporting weak spots. Both methods require careful application and attention to detail.
When using a self-leveling compound, follow the manufacturer’s instructions meticulously. This usually involves mixing the compound with water to the correct consistency. Use a mixing drill with a paddle attachment to thoroughly combine the ingredients, ensuring there are no lumps or dry patches. Pour the compound onto the prepared subfloor, starting in the deepest areas.
Use a gauge rake or notched trowel to spread the compound evenly across the subfloor. The gauge rake helps to maintain the desired thickness of the compound and ensures a consistent level. Work quickly and efficiently, as self-leveling compounds typically have a limited working time. Allow the compound to dry completely according to the manufacturer’s instructions before proceeding with the installation of the finished flooring.
For smaller, localized dips, a patching compound can be used. Apply the compound to the affected area with a putty knife or trowel, feathering the edges to blend it seamlessly with the surrounding subfloor. Allow the compound to dry completely before sanding it smooth. Repeat the application process if necessary to achieve the desired level.
When using shims, cut them to the appropriate size and shape to fill the gaps between the subfloor and the finished flooring. Wood shims are commonly used, but plastic or rubber shims may also be suitable depending on the application. Position the shims strategically to provide support and eliminate any flexing or movement in the subfloor. Secure the shims to the subfloor with construction adhesive or screws.
For larger areas of unevenness that cannot be adequately addressed with leveling compounds or shims, consider installing a layer of plywood or underlayment over the existing chipboard subfloor. This creates a new, level surface for the finished flooring. Ensure the plywood or underlayment is securely fastened to the joists below and that all seams are properly taped and sanded.
After applying either leveling compound or shims, re-check the floor for levelness. Use the straight edge and level to verify that the surface is smooth and even. Make any necessary adjustments before proceeding with the installation of the finished flooring. Rushing this step can result in a subpar finished product.

How To Level A Floor Ideas Advice B Q

How To Level The Particle Board Subfloor With Concrete Leveling Tripods

Osb Or Plywood Which Is Best For Self Leveling Compound

How To Level A Plywood Subfloor With And Self Leveling Compound

How To Level A Subfloor Bunnings New Zealand

Plywood Subfloor Leveling With Big Hump Mryoucandoityourself

Fitting Hardwood Flooring To Chipboard Wood And Beyond Blog

How To Lay Chipboard Flooring Bunnings New Zealand

How To Level A Floor The Home

Chipboard For Floors Blending Durability And Practicality
See Also