How to Level a Plywood Subfloor
A level subfloor is a fundamental requirement for any successful flooring installation. Whether preparing for tile, hardwood, laminate, or vinyl, unevenness in the subfloor can lead to a host of problems, including cracked tiles, warped flooring, squeaks, and an overall unprofessional finish. Plywood is a common material for subfloors, valued for its strength and affordability. However, even when properly installed initially, plywood can develop imperfections over time due to moisture exposure, settling foundations, or structural movement. Therefore, leveling a plywood subfloor is often a necessary step before installing new flooring.
This article provides a detailed explanation of how to level a plywood subfloor, outlining the necessary tools, materials, and techniques to achieve a smooth and even surface. It will cover identifying problem areas, choosing the appropriate leveling method, and implementing the chosen method with precision and care.
Identifying Uneven Areas
The first step in leveling a plywood subfloor is to accurately identify all areas that require attention. This process involves a thorough inspection of the entire subfloor surface and marking any inconsistencies. Multiple tools and techniques can be employed to ensure a comprehensive assessment.
A long, straight edge, such as a six-foot level or a long piece of lumber, is essential. Place the straight edge on the subfloor in various locations and directions. Look for gaps between the straight edge and the subfloor surface. These gaps indicate low spots that need to be filled.
A four-foot level can also be used effectively. While shorter than a straight edge, it provides more maneuverability in confined spaces. Use the level not only to identify low spots but also to check for high spots. Rocking of the level indicates a high spot that needs to be addressed.
A chalk line is particularly useful for marking large areas of unevenness. Snap a chalk line across the subfloor, and then compare the resulting line to the actual surface. Any discrepancies will be clearly visible. The chalk line can assist in visualizing the extent of the unevenness and determining the areas that require the most attention.
A moisture meter is also a vital tool. Plywood is susceptible to moisture damage, which can cause warping and swelling. Measure the moisture content of the plywood in several locations. High moisture readings may indicate a problem that needs to be resolved before proceeding with leveling. The ideal moisture content for plywood subfloors is typically between 6% and 12%, but it's advisable to consult with the flooring manufacturer's recommendations for specific requirements.
Once you have identified all the uneven areas, mark them clearly with a pencil or marker. Indicate the depth of the low spots and the height of the high spots, if possible. This will help you determine the amount of material needed to level the subfloor.
Choosing the Appropriate Leveling Method
Several methods can be used to level a plywood subfloor, each with its advantages and disadvantages. The best method will depend on the severity of the unevenness, the type of flooring being installed, the size of the area, and the installer's skill level. Two common methods are patching with floor leveling compound and sanding down high spots.
Self-leveling compound is a cement-based mixture that is poured onto the subfloor and allowed to flow into low spots. This method is ideal for correcting gradual slopes or large areas of unevenness. It provides a smooth, level surface that is suitable for most types of flooring. However, self-leveling compound can be expensive, and it requires careful preparation and application to avoid problems such as cracking or curing issues.
Floor patching compound is a similar product, but it is thicker and is applied with a trowel. It is better suited for smaller areas and individual low spots. Floor patching compound is typically less expensive than self-leveling compound, and it is easier to apply. However, it may not provide as smooth of a finish, and it can be more difficult to feather the edges of the patch seamlessly into the existing subfloor.
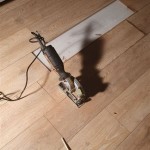
Sanding is a suitable method for addressing high spots, particularly those caused by protruding nails or edges of plywood sheets. A belt sander or orbital sander can be used to remove the excess material and create a level surface. However, sanding can be dusty and time-consuming, and it is not effective for correcting significant dips or slopes.
Shimming involves inserting thin pieces of material, such as plywood or plastic shims, under the low spots in the subfloor. This method is often used to correct minor unevenness or to support areas where the subfloor is sagging. Shimming is a relatively inexpensive and easy option, but it may not be suitable for all types of flooring.
For particularly extensive damage or unevenness, replacing the affected section of the subfloor may be the most effective option. This involves cutting out the damaged plywood and installing a new piece in its place. While more labor-intensive, replacing the subfloor ensures a solid and level foundation for the new flooring.
Applying Leveling Compound or Patching Compound
If using self-leveling compound or patching compound, thorough preparation is crucial for a successful outcome. Ensure the subfloor is clean, dry, and free of any loose debris. Vacuum the entire area thoroughly to remove dust, dirt, and other particles that could interfere with the adhesion of the compound.
Apply a primer to the subfloor according to the manufacturer's instructions. Primer helps the leveling compound adhere properly and prevents it from drying out too quickly. Choose a primer that is specifically designed for use with self-leveling compounds or patching compounds.
Mix the leveling compound or patching compound according to the manufacturer's instructions. Use a mixing drill with a paddle attachment to ensure a smooth, consistent mixture. Add the correct amount of water or liquid polymer to the dry powder, and mix until there are no lumps or dry spots.
For self-leveling compound, pour the mixture onto the subfloor, starting at the deepest low spots. Use a gauge rake or other spreading tool to distribute the compound evenly and to control the thickness of the application. Allow the compound to flow into all the low spots and to level itself out.
For patching compound, use a trowel to apply the mixture to the low spots. Feather the edges of the patch into the surrounding subfloor to create a smooth transition. Work in small sections to ensure that the compound does not dry out before you have a chance to smooth it.
Allow the leveling compound or patching compound to dry completely according to the manufacturer's instructions. This may take several hours or even days, depending on the product and the ambient temperature. Do not walk on the leveled area until it is fully dry.
Sanding and Shimming Techniques
If sanding is the chosen method, use a belt sander for large areas and an orbital sander for smaller areas or edges. Start with a coarse-grit sandpaper to remove the bulk of the material, and then gradually switch to finer grits to achieve a smooth finish. Be careful not to sand too deeply, as this could damage the subfloor.
Wear a dust mask and eye protection when sanding to avoid inhaling dust particles. Vacuum the area frequently to remove dust and debris. Check the level of the subfloor periodically as you sand to ensure that you are not removing too much material.
For shimming, cut the shims to the appropriate size and shape using a utility knife or scissors. Place the shims under the low spots in the subfloor, and secure them with construction adhesive or screws. Check the level of the subfloor to ensure that the shims are providing adequate support.
Trim any excess shim material that protrudes above the subfloor surface. This will prevent the shims from interfering with the installation of the new flooring. Sand the shimmed areas to create a smooth transition between the shims and the surrounding subfloor.
Final Inspection and Preparation
After applying the leveling compound, sanding, or shimming, perform a final inspection of the subfloor. Use a straight edge or level to check for any remaining unevenness. Address any problem areas before proceeding with the flooring installation.
Ensure the subfloor is clean and dry before installing the flooring. Vacuum thoroughly to remove dust, dirt, and debris. If necessary, apply a moisture barrier to protect the subfloor from moisture damage.
Consult the flooring manufacturer's instructions for specific recommendations on subfloor preparation. Different types of flooring may have different requirements for flatness, smoothness, and moisture content.
By following these steps, you can effectively level a plywood subfloor and create a solid, even foundation for your new flooring. A properly leveled subfloor will ensure a professional-looking installation and prevent problems such as cracked tiles, warped flooring, and squeaks.

Plywood Subfloor Leveling With Big Hump Mryoucandoityourself

How To Level A Plywood Subfloor With And Self Leveling Compound

How To Level A Plywood Or Osb Subfloor Using Asphalt Shingles Construction Felt

How To Plywood Floor Leveling For Laminate Flooring Nail Down Installation Diy Mryoucandoityourself

How To Level A Plywood Or Osb Subfloor Using Asphalt Shingles Construction Felt

How To Prep Wood Subfloor For Luxury Vinyl Plank Flooring Beginners Fix High And Low Spots

Plywood Subfloor Leveling With Sheets How To Raised The Level Of Floor

How To Level A Plywood Or Osb Subfloor Using Asphalt Shingles Construction Felt

5 Wooden Subflooring Installation Mistakes You Must Avoid Kaltimber Timber Merchant Flooring

Condo Blues Ten Things You Need To Know Level And Repair An Uneven Floor
See Also