How to Level Plywood Subfloor for Laminate Flooring
Installing laminate flooring over an uneven plywood subfloor can lead to a myriad of problems, including squeaking, buckling, and premature wear. A level and stable subfloor is crucial for a successful and long-lasting laminate installation. This article provides a comprehensive guide on how to level a plywood subfloor specifically in preparation for laminate flooring, outlining the necessary tools, materials, and techniques.
Before embarking on any leveling project, a thorough assessment of the subfloor's condition is essential. This involves identifying areas of unevenness, checking for loose or damaged plywood, and addressing any existing moisture issues. Failure to adequately prepare the subfloor will compromise the integrity of the finished floor, regardless of the leveling efforts.
The primary goal of leveling is to create a flat and consistent surface that meets the manufacturer's specifications for laminate flooring installation. This typically involves filling low spots, sanding down high spots, and reinforcing any weak or unstable areas. The acceptable tolerance for flatness varies depending on the laminate flooring product, but generally, a deviation of no more than 3/16 inch within a 10-foot radius is considered acceptable. Exceeding this tolerance can invalidate the warranty of the laminate flooring and lead to performance issues.
Key Point 1: Assessing and Preparing the Plywood Subfloor
The initial stage involves a detailed inspection to identify all imperfections. This systematic approach allows for the development of a targeted leveling strategy. The appropriate tools for this stage include a long straightedge (at least 6 feet), a level, a moisture meter, and a marking pencil.
Begin by visually inspecting the plywood subfloor for signs of damage, such as delamination, warping, or rot. Pay particular attention to areas near walls, doorways, and plumbing fixtures, as these are often more susceptible to moisture damage. Using the moisture meter, check the moisture content of the plywood. The ideal moisture content for plywood subfloors intended for laminate flooring is typically between 6% and 12%. Elevated moisture levels can indicate a leak or humidity problem that needs to be addressed before proceeding with the leveling process.
Next, use the straightedge and level to identify high and low spots. Place the straightedge on the subfloor and use the level to determine if there are any gaps between the straightedge and the plywood. Mark the areas where there are noticeable gaps or deviations with the marking pencil. It is important to test the subfloor in multiple directions to capture the full extent of the unevenness.
Any loose or damaged plywood sheets must be repaired or replaced before leveling. Loose plywood can be secured with construction adhesive and screws driven into the joists below. Damaged plywood should be cut out and replaced with new plywood of the same thickness. Ensure that the replacement plywood is properly supported and securely fastened to the joists.
Finally, clean the subfloor thoroughly. Remove any debris, such as dust, dirt, nails, or staples. A vacuum cleaner with a brush attachment is ideal for removing loose particles. For stubborn stains or residue, use a mild detergent and water, ensuring that the subfloor is completely dry before proceeding.
Key Point 2: Leveling Techniques and Materials
Several methods can be employed to level a plywood subfloor, depending on the severity and extent of the unevenness. Common techniques include using self-leveling underlayment, patching compound, or sanding down high spots. The choice of method will depend on the size and depth of the areas that need to be leveled, as well as the desired precision.
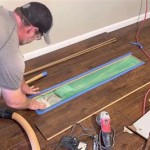
Self-leveling underlayment is a cement-based product that is poured onto the subfloor and allowed to flow and self-level. It is particularly effective for leveling large areas with significant variations in height. Before applying self-leveling underlayment, ensure that the subfloor is properly prepared and primed according to the manufacturer's instructions. This typically involves cleaning the subfloor and applying a bonding agent to promote adhesion. Dams or barriers may be required to contain the self-leveling compound within the designated areas.
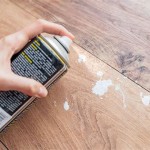
Patching compound is a more localized solution for filling smaller depressions and imperfections. It is typically a cement-based or acrylic-based product that is applied with a trowel. When using patching compound, apply thin layers and allow each layer to dry completely before applying the next. This helps to prevent cracking and ensures proper adhesion. Sanding the patched areas smooth after they are dry is essential for achieving a seamless transition.
Sanding is an effective method for leveling high spots or removing minor imperfections. A belt sander or orbital sander can be used, depending on the size and severity of the area. When sanding, use a coarse grit sandpaper to remove the bulk of the material, followed by progressively finer grits to achieve a smooth finish. Wear a dust mask and eye protection when sanding, and ensure adequate ventilation.
In some cases, a combination of these techniques may be necessary to achieve the desired level of flatness. For example, self-leveling underlayment could be used to level a large area, followed by patching compound to fill any remaining imperfections. Sanding can then be used to blend the patched areas seamlessly with the surrounding subfloor.
Key Point 3: Ensuring Proper Adhesion and Stability
Regardless of the leveling method used, proper adhesion is critical for the long-term performance of the laminate flooring. This involves ensuring that the leveling compound or patching material is properly bonded to the plywood subfloor. A bonding agent or primer is often recommended to promote adhesion, especially when using self-leveling underlayment or patching compound over existing finishes.
Stability is another crucial factor. The subfloor must be strong and stable enough to support the weight of the laminate flooring and the anticipated traffic. If the subfloor is weak or unstable, it may need to be reinforced before proceeding with leveling. This can involve adding additional joists, shimming existing joists, or applying a layer of plywood over the existing subfloor.
Furthermore, it is essential to avoid creating a situation where the leveling material significantly raises the floor height, potentially interfering with doorways or transitions to other rooms. Careful planning and measurement are necessary to ensure that the finished floor height is within acceptable limits. Tapering the leveling material at the edges can help to minimize height differences and create a smooth transition.
After leveling, allow sufficient drying time for the leveling compound or patching material to fully cure. The drying time will vary depending on the product and the ambient conditions, but it is generally recommended to follow the manufacturer's instructions. Premature installation of the laminate flooring can lead to adhesion problems and ultimately compromise the integrity of the floor.
In addition to leveling, addressing any squeaks in the subfloor is important. Squeaks are often caused by loose fasteners or movement between the subfloor and the joists. Tightening loose screws or adding shims to eliminate movement can resolve most squeaking issues.
Ultimately, a properly leveled and stable plywood subfloor is an investment in the longevity and performance of the laminate flooring. By following these guidelines and taking the necessary precautions, it is possible to create a solid foundation for a beautiful and durable floor.
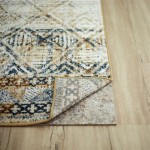
Before installing the laminate flooring, consider installing an underlayment. While some laminate flooring comes with pre-attached underlayment, adding an additional layer can provide extra cushioning, sound insulation, and moisture protection. Carefully select an underlayment that is compatible with the laminate flooring and the subfloor conditions.

How To Plywood Floor Leveling For Laminate Flooring Nail Down Installation Diy Mryoucandoityourself

How To Level A Plywood Subfloor With And Self Leveling Compound

Plywood Subfloor Leveling With Big Hump Mryoucandoityourself

How To Level A Plywood Or Osb Subfloor Using Asphalt Shingles Construction Felt

How To Level A Plywood Or Osb Subfloor Using Asphalt Shingles Construction Felt

How To Prep A Subfloor Lowe S

Plywood Subfloor Leveling With Sheets How To Raised The Level Of Floor

How To Prep Wood Subfloor For Luxury Vinyl Plank Flooring Beginners Fix High And Low Spots

How To Level A Plywood Or Osb Subfloor Using Asphalt Shingles Construction Felt

How To Level A Wood Floor For New Laminate Flooring Parc Monceau Westport
See Also