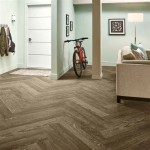
Installing Lifeproof Flooring On Concrete Slabs
Lifeproof flooring, renowned for its durability and waterproof qualities, is a popular choice for homeowners looking to install resilient and attractive flooring solutions. Concrete slabs, common in basements and ground-level installations, provide a solid foundation for Lifeproof flooring. However, proper preparation and installation techniques are crucial to ensure the longevity and performance of the flooring system. This article details the necessary steps to successfully install Lifeproof flooring on concrete slabs.
Preparing the Concrete Slab
The most critical aspect of installing any flooring over concrete is the preparation of the slab. A poorly prepared surface can lead to issues such as uneven flooring, moisture problems, and even premature failure of the Lifeproof planks. The preparation phase encompasses several key steps, beginning with a thorough inspection and cleaning.
Initially, a visual inspection of the concrete slab is necessary to identify any existing damage. Cracks, holes, and uneven surfaces need to be addressed before proceeding. Small cracks (less than 1/8 inch) can usually be filled with a concrete crack filler. Larger cracks may indicate a more significant structural issue and should be evaluated by a professional before any flooring is installed. Holes and significant depressions in the concrete should be filled with a self-leveling concrete compound to create a smooth and even surface.
Cleaning the concrete slab is essential to remove any debris, dust, or contaminants that could interfere with the adhesion of the flooring underlayment or the interlocking of the Lifeproof planks. Use a broom and vacuum to remove loose debris. For stubborn stains or contaminants, a degreasing cleaner specifically designed for concrete may be necessary. Ensure the cleaner is thoroughly rinsed and the concrete is allowed to dry completely before moving on to the next step.
Moisture testing is a crucial, and often overlooked, step. Concrete is porous and can absorb moisture from the ground. Excessive moisture can lead to mold growth and cause the Lifeproof flooring to warp or buckle. There are several methods for testing moisture levels in concrete, including the plastic sheet test and the calcium chloride test. The plastic sheet test involves taping a piece of clear plastic sheeting (approximately 18x18 inches) to the concrete floor and sealing the edges with duct tape. After 24-72 hours, check for condensation under the plastic. The presence of condensation indicates a moisture problem. The calcium chloride test, which involves placing a small container of calcium chloride on the concrete under a sealed dome for a specific period, provides a more quantitative measurement of moisture emission. Follow the manufacturer's instructions for both tests. If moisture levels exceed the manufacturer's recommendations for the Lifeproof flooring, a moisture barrier must be installed before proceeding. Several types of moisture barriers are available, including liquid-applied epoxy coatings and polyethylene films. Choose a moisture barrier that is compatible with both the concrete and the Lifeproof flooring.
Finally, ensure the concrete slab is level. Uneven surfaces can cause the Lifeproof planks to flex and potentially damage the interlocking system. Use a long level to identify any high or low spots. Minor imperfections can often be addressed with a self-leveling concrete compound. For more significant unevenness, grinding down high spots or applying multiple layers of self-leveling compound may be required.
Installing Underlayment (If Required)
While many Lifeproof flooring products come with an attached underlayment, there are instances where an additional underlayment may be necessary or beneficial. The need for additional underlayment depends on factors such as the condition of the concrete slab, the desired level of sound insulation, and whether a moisture barrier is required. Consult the Lifeproof flooring manufacturer's recommendations for guidance on underlayment requirements.
If an additional underlayment is required, choose a product specifically designed for use with luxury vinyl plank flooring. Avoid using thick, cushioned underlayments that can create excessive give and potentially damage the interlocking system of the Lifeproof planks. Options include thin foam underlayments, cork underlayments, and specialized underlayments with integrated moisture barriers. When installing an underlayment, follow the manufacturer's instructions for proper installation techniques. Typically, the underlayment is rolled out and secured to the concrete slab with tape or adhesive. Overlap seams as recommended by the manufacturer to prevent moisture penetration.
It is crucial to consider local building codes and manufacturer’s recommendation before foregoing any underlayment to determine if this is suitable for the situation. In some instances, even if the flooring has attached underlayment, additional layers may be required to achieve minimum performance requirements.
Installing the Lifeproof Flooring
Once the concrete slab is properly prepared and the underlayment (if required) is installed, the next step is to install the Lifeproof flooring planks. This process involves careful planning, precise cutting, and secure interlocking of the planks. It’s important to review the floor plan and layout to minimize waste and ensure a visually appealing final product.
Before beginning the installation, allow the Lifeproof flooring planks to acclimate to the room temperature for at least 48 hours. This allows the planks to expand or contract, minimizing the risk of gaps or buckling after installation. Store the boxes of planks in the room where they will be installed, away from direct sunlight or heat sources.
Start the installation along a straight wall, leaving a ¼-inch expansion gap between the flooring and the wall. This gap allows for expansion and contraction of the flooring due to temperature and humidity changes. Use spacers to maintain the proper expansion gap. The first row of planks should be installed with the tongue facing the wall. The interlocking system of Lifeproof flooring is designed for easy installation, typically involving angling the plank and snapping it into place. Follow the manufacturer's instructions for the specific interlocking system used in your Lifeproof flooring.
When cutting planks to fit around obstacles or at the end of a row, use a utility knife with a sharp blade or a flooring cutter. Score the plank several times along the desired cut line and then snap it along the score. For more complex cuts, such as around pipes or door frames, use a jigsaw. Be precise when cutting planks to ensure a tight fit and prevent gaps. It is always advisable to measure twice and cut once to avoid costly mistakes.
Stagger the end joints of the planks in each row to create a more visually appealing and structurally sound floor. A common practice is to start each row with a plank that is at least 6 inches shorter than the plank used in the previous row. Avoid creating patterns that are too repetitive or uniform, as this can detract from the natural look of the flooring.
As you install each row of planks, use a tapping block and a hammer to ensure a tight and secure connection. The tapping block helps to distribute the force of the hammer evenly, preventing damage to the interlocking system. Be careful not to over-hammer the planks, as this can also damage the interlocking system. Periodically check the floor for any unevenness or gaps. If any issues are detected, correct them immediately before proceeding with the installation.
Once the entire floor is installed, remove the spacers and install baseboards or quarter-round molding to cover the expansion gap along the walls. These moldings not only conceal the gap but also provide a finished look to the flooring. Secure the moldings to the wall, not to the floor, to allow the flooring to expand and contract freely.
Finally, clean the floor with a damp cloth or mop to remove any dirt or debris. Avoid using harsh chemicals or abrasive cleaners, as these can damage the surface of the Lifeproof flooring. Follow the manufacturer's recommendations for proper cleaning and maintenance to ensure the longevity and beauty of your new floor.
Addressing Common Installation Challenges
While installing Lifeproof flooring on concrete slabs is a manageable project for many homeowners, certain challenges may arise. It is important to recognize these potential issues and have solutions in place to ensure a successful installation. One common challenge is dealing with uneven concrete slabs. As previously mentioned, self-leveling concrete can be used to address minor imperfections. However, for more significant unevenness, grinding down high spots or applying multiple layers of self-leveling compound may be necessary. Consulting with a flooring professional may be beneficial in assessing the extent of the problem and recommending the appropriate solution.
Another challenge is dealing with moisture issues. If the concrete slab has high moisture levels, installing a moisture barrier is essential. Choose a moisture barrier that is compatible with both the concrete and the Lifeproof flooring. Follow the manufacturer's instructions for proper installation techniques. In some cases, it may be necessary to install a dehumidifier in the room to help control moisture levels.
Cutting planks accurately can also be a challenge, especially when dealing with complex shapes or angles. Use a utility knife with a sharp blade or a flooring cutter for straight cuts. For more complex cuts, use a jigsaw. Take your time and measure carefully before cutting. Practice on scrap pieces of flooring to get a feel for the cutting process. If you are unsure about making a particular cut, it is always best to consult with a flooring professional.
Ensuring a tight and secure connection between the planks is crucial for the longevity of the flooring. Use a tapping block and a hammer to ensure the planks are properly interlocked. Avoid over-hammering the planks, as this can damage the interlocking system. If you are having difficulty interlocking the planks, check for any debris or obstructions in the interlocking system. In some cases, it may be necessary to use a pull bar to pull the planks together.

How To Install Vinyl Plank Flooring Lifeproof Over Concrete

Lvp Flooring Installation Over Concrete Subfloor Full Instructional Builds By Maz Flooret

How To Install Lifeproof Flooring The Home

How To Install Lifeproof Flooring The Home

Tips For Installing Vinyl Plank Over Concrete Floors Lemon Thistle

How To Install Lifeproof Flooring The Home

Lvp Flooring Installation How To Install Luxury Vinyl Plank In A Basement Diy

Why We Chose Lifeproof Vinyl Flooring And How To Install It

How To Install Lifeproof Flooring The Home

Why We Chose Lifeproof Vinyl Flooring And How To Install It
See Also