How To Level a Wood Subfloor for Tile Installation
The successful installation of tile flooring hinges significantly on the integrity and flatness of the subfloor beneath. A wood subfloor, while offering a resilient base, can often exhibit unevenness, whether from settling, warping, or previous damage. Installing tile directly onto an uneven subfloor is a recipe for disaster, leading to cracked tiles, loose grout, and an overall aesthetically displeasing result. Therefore, properly leveling a wood subfloor is a critical preparatory step before any tile work commences. This article details the process of assessing, planning, and executing the steps necessary to create a flat, stable surface suitable for tile installation.
The importance of a level subfloor cannot be overstated. Tile, especially large format tile, requires a perfectly flat surface to ensure proper adhesion and prevent stress points that can lead to cracking under normal use. Even minor imperfections in the subfloor can translate into visible and structural problems in the finished tile installation. Furthermore, an uneven subfloor can make the tile installation process itself significantly more challenging, requiring excessive amounts of thin-set mortar in certain areas, which can weaken the bond and increase the risk of future failures.
Assessing the Subfloor's Condition
The first step in leveling a wood subfloor is a thorough assessment of its current condition. This involves visually inspecting the floor for any signs of damage, such as water stains, rot, or insect infestation. Any compromised sections of the subfloor must be addressed before proceeding with leveling. This often involves replacing damaged boards or reinforcing weak areas with additional support.
Beyond visual inspection, the assessment requires identifying the extent of the unevenness. This is best accomplished using a long, straight edge (at least 6 feet in length) and a level. Place the straight edge across the subfloor in various directions, both lengthwise and diagonally, and check for any gaps between the straight edge and the floor surface. Use a level to determine the degree of slope in any areas where gaps are present. Mark these areas clearly with a pencil or marker, noting the depth of the depressions and the direction of any slopes.
The type of wood subfloor also influences the leveling method. Common types include plywood, oriented strand board (OSB), and plank subfloors. Plywood and OSB offer a more consistent and stable surface compared to plank subfloors, which can be more prone to movement and unevenness due to the individual planks shifting over time. Identifying the subfloor type allows for choosing the most appropriate leveling compounds and techniques.
Furthermore, check the subfloor’s deflection, or how much it bends under load. This is crucial for ensuring structural integrity before tiling. Bouncing or excessive movement indicates insufficient support joists and can necessitate reinforcement. A simple test involves walking across different sections of the floor and observing any noticeable flexing. If deflection is significant, consult with a structural engineer to determine the appropriate reinforcing measures.
Choosing the Right Leveling Method
Several methods exist for leveling a wood subfloor, each suited to different degrees of unevenness and subfloor conditions. The choice of method depends heavily on the results of the initial assessment. Minor imperfections can often be addressed with self-leveling underlayment, while more significant variations may require patching compounds or even shimming.
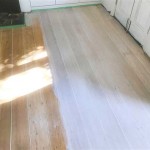
Self-Leveling Underlayment (SLU): This is a pourable cement-based compound that spreads and levels itself, creating a smooth, even surface. SLU is ideal for correcting minor undulations and imperfections across a large area. However, it is essential to properly prepare the subfloor before applying SLU. This typically involves cleaning the surface thoroughly, priming it with a compatible primer to promote adhesion, and sealing any gaps or cracks to prevent the SLU from leaking through. SLU also requires a certain minimum thickness to be effective, so it's important to calculate the volume needed based on the depth of the deepest depressions.
Patching Compounds: These are trowel-applied materials used to fill in localized depressions, cracks, and imperfections. Patching compounds are suitable for smaller areas where the unevenness is more concentrated. Like SLU, proper surface preparation is crucial. The area to be patched should be cleaned, primed, and any loose or crumbling material removed. Patching compounds are available in various formulations, including cement-based and latex-modified options. Latex-modified compounds offer improved flexibility and adhesion, making them a good choice for areas subject to movement.
Shimming: This method involves using shims, small pieces of wood or plastic, to raise low spots in the subfloor. Shimming is typically used in conjunction with other leveling methods to address more significant variations in height. The shims are placed beneath the subfloor near the joists to provide additional support and level the surface. This method is more labor-intensive but can be effective for correcting localized dips or slopes.
Plywood Overlay: Installing a new layer of plywood over the existing subfloor is another option for leveling, especially if the existing subfloor is severely damaged or uneven. This method involves screwing down a new sheet of plywood (typically a minimum of ½ inch thickness) over the existing subfloor, ensuring that the new layer is level and securely fastened to the joists. It is important to use exterior-grade plywood to prevent moisture damage. If using this method, stagger the seams of the new plywood layer relative to the seams of the existing subfloor to increase strength and stability.
Executing the Leveling Process
Once the appropriate leveling method has been chosen, the next step is to execute the leveling process carefully and methodically. Regardless of the chosen method, proper preparation and attention to detail are essential for achieving a successful outcome.
Surface Preparation: Before applying any leveling compounds, the subfloor must be thoroughly cleaned. This involves sweeping, vacuuming, and potentially scrubbing the surface to remove any dust, debris, or loose particles that could interfere with adhesion. For particularly dirty subfloors, a mild detergent solution can be used, followed by a thorough rinse with clean water. Allow the subfloor to dry completely before proceeding.
Priming: Priming is a crucial step in preparing the subfloor for leveling compounds. A compatible primer will improve adhesion, prevent the compound from drying out too quickly, and reduce the risk of cracking. Choose a primer specifically designed for use with the chosen leveling compound and apply it according to the manufacturer's instructions. Typically, this involves applying a thin, even coat of primer with a brush, roller, or sprayer.
Applying Self-Leveling Underlayment: Follow the manufacturer's instructions carefully when mixing and applying SLU. Ensure that the mixing ratio is precise to achieve the correct consistency. Pour the SLU onto the prepared subfloor and use a gauge rake or trowel to spread it evenly. Work quickly, as SLU typically has a limited working time. Use a spiked roller to remove any air bubbles trapped within the compound. Allow the SLU to dry completely according to the manufacturer's instructions before proceeding with tile installation.
Applying Patching Compounds: Apply patching compounds with a trowel, filling in the depressions and imperfections. Feather the edges of the patch to blend it smoothly with the surrounding subfloor. Allow the patching compound to dry completely before sanding it smooth. Use a sanding block or orbital sander with a fine-grit sandpaper to create a seamless transition between the patched area and the surrounding subfloor.
Installing Shims: Place shims beneath the subfloor near the joists to raise low spots. Secure the shims with construction adhesive and screws to prevent them from shifting over time. Use a level to ensure that the shims are creating a flat and level surface. After the adhesive has dried, trim any excess shim material that protrudes beyond the subfloor surface.
Ensuring Proper Adhesion: After the leveling process is complete, it's crucial to ensure that the subfloor is ready to receive the tile and thin-set mortar. This may involve applying a final coat of primer or using a bonding agent to further enhance adhesion. Always consult the tile manufacturer's recommendations for specific requirements regarding subfloor preparation.
By carefully assessing the subfloor, choosing the appropriate leveling method, and executing the process methodically, it is possible to create a perfectly flat and stable surface for tile installation, ensuring a long-lasting and aesthetically pleasing result. The effort invested in proper subfloor preparation pays dividends in the longevity and appearance of the finished tile floor.

How To Prepare A Subfloor For Tile Installation The Home

How To Level A Floor For Tile Expert Tips And Advice

How To Level A Subfloor Before Laying Tile

How To Prepare A Subfloor For Tile Installation The Home

How To Prepare A Wooden Subfloor For Tile Installation And Self Leveler

How To Prepare A Subfloor For Tile Installation The Home

How To Prepare Subfloor For Tile The Home
%20(2).png?strip=all "How To Level A Subfloor Lay Flooring")
How To Level A Subfloor Lay Flooring

Wood Floor Shims How To Use Them Remove Squeaky Floors Easiklip

How To Prep Wood Subfloor For Luxury Vinyl Plank Flooring Beginners Fix High And Low Spots
See Also