How Flat Does Subfloor Need To Be For Tile?
Installing tile flooring can significantly enhance the aesthetic appeal and durability of a space. However, a successful tile installation hinges significantly on the condition of the subfloor. The flatness of the subfloor directly impacts the long-term performance and appearance of the tile. Deviations from acceptable flatness tolerances can lead to a host of problems, including cracked tiles, uneven surfaces, and compromised grout lines. Therefore, understanding the required flatness standards for subfloors before beginning a tile project is paramount.
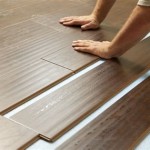
The term "subfloor" refers to the structural layer directly beneath the finished flooring. It provides a stable and level base for the tile. Commonly, subfloors are made of plywood, oriented strand board (OSB), or concrete. Regardless of the material, the subfloor must be structurally sound, clean, and, most importantly, flat to ensure a successful tile installation. Without proper preparation and verification of flatness, the entire tile project is at risk of failure.
Industry standards and manufacturer recommendations dictate the acceptable flatness tolerances for tile subfloors. These standards are in place to prevent common issues that arise from uneven surfaces. Adhering to these guidelines is not merely a suggestion; it is a fundamental requirement for ensuring a durable and aesthetically pleasing tile floor.
Understanding the Significance of Subfloor Flatness
The flatness of the subfloor plays a crucial role in distributing weight evenly across the tile surface. When tiles are installed on an uneven subfloor, certain areas will bear more weight than others. This uneven distribution of stress can lead to tile cracking, particularly under heavy loads or in high-traffic areas. The concentrated pressure imposed on these high points weakens the tile's integrity, making it susceptible to fractures.
Grout lines are also significantly affected by subfloor flatness. An uneven subfloor can result in inconsistent grout line widths, which detracts from the overall appearance of the tile installation. Wider grout lines in some areas and narrower ones in others create a visually unappealing and unprofessional look. Furthermore, inconsistent grout lines can be more prone to cracking and moisture intrusion, compromising the longevity of the installation.
Another critical aspect is the bonding of the tile to the subfloor. Tile mortar, or thin-set, is designed to create a strong and uniform bond between the tile and the subfloor. However, if the subfloor is uneven, the mortar layer will also be uneven, leading to voids and weak spots in the bond. These voids reduce the contact area between the tile and the subfloor, making the tile more susceptible to becoming loose or detached over time. The compromised bond can also lead to a hollow sound when walking on the tiles, indicating a lack of proper adhesion.
Finally, an uneven subfloor can compromise the functionality of the tiled surface. For example, in bathrooms, uneven floors can lead to water pooling in certain areas, increasing the risk of slips and falls. In kitchens, uneven surfaces can cause appliances to wobble or be unstable. The overall usability and safety of the tiled area are directly impacted by the flatness of the subfloor.
Industry Standards for Subfloor Flatness
The applicable standard for subfloor flatness varies depending on the tile type, size, and installation method. However, generally accepted industry standards provide a guideline for acceptable tolerances. The American National Standards Institute (ANSI) and the Tile Council of North America (TCNA) offer detailed specifications for tile installation, including subfloor preparation and flatness requirements.
According to ANSI A108.02, section 4.3.7, the typical requirement for subfloor flatness is that the surface should not deviate more than 1/4 inch in 10 feet or 1/8 inch in 2 feet. This means that when measuring the subfloor using a straightedge or level, the maximum allowable gap between the straightedge and the subfloor surface should not exceed these tolerances. It's crucial to note that these are general guidelines, and specific tile types or installation methods may require even tighter tolerances.
For large-format tiles, which are becoming increasingly popular, the flatness requirements are often more stringent. Larger tiles are less flexible than smaller tiles, making them more susceptible to cracking if installed on an uneven surface. Manufacturers of large-format tiles often specify a maximum deviation tolerance of 1/8 inch in 10 feet or even less. It is essential to consult the tile manufacturer's recommendations to determine the precise flatness requirements for the specific tile being used.
When dealing with concrete subfloors, the flatness is often measured using a "flatness number" (F-number) system. This system, defined by ASTM E1155, provides a more precise method for quantifying the flatness of concrete surfaces. The F-number system uses two values, FF and FL, to represent the flatness and levelness of the concrete, respectively. While not directly related to the 1/4 inch in 10 feet measurement, a higher F-number indicates a flatter surface. For tile installations, achieving a suitable F-number is crucial for ensuring a successful outcome. Consulting with a concrete specialist can help determine the appropriate F-number for the specific tile installation.
These standards are important because they provide a measurable target for subfloor preparation. Installers can use these standards to assess the existing subfloor and determine the necessary steps to achieve the required flatness. Without adhering to these standards, the tile installation is at greater risk of failure, leading to costly repairs and replacements.
Methods for Achieving a Flat Subfloor
Several methods can be employed to achieve the required flatness for a tile subfloor. The specific method chosen will depend on the type of subfloor, the extent of the unevenness, and the budget for the project. Regardless of the method used, proper preparation and thorough inspection are essential for ensuring a successful outcome.
For plywood or OSB subfloors, one common method is to use self-leveling underlayment. Self-leveling underlayment is a cement-based mixture that is poured onto the subfloor and allowed to spread and level itself. This product effectively fills in low spots and creates a smooth, flat surface for tile installation. Before applying self-leveling underlayment, it is crucial to ensure that the subfloor is structurally sound and properly secured to the joists. Any loose or damaged areas should be repaired or replaced before proceeding. Additionally, the subfloor should be primed to improve the adhesion of the self-leveling underlayment.
Another method for leveling plywood or OSB subfloors is to use shims and furring strips. This involves identifying low spots in the subfloor and adding shims or furring strips to bring those areas up to the desired level. This method requires careful measuring and accurate cutting of the shims or furring strips to ensure a smooth and even surface. This approach is often more labor-intensive than using self-leveling underlayment, but it can be a cost-effective option for smaller areas or when only minor leveling is required.
For concrete subfloors, grinding is a common method for addressing unevenness. Concrete grinders use abrasive disks to remove high spots and smooth out the surface. This method is effective for correcting minor imperfections and achieving a more uniform flatness. However, grinding can generate a significant amount of dust, so it is essential to use proper dust control measures, such as a vacuum system, to minimize the spread of dust.
Another approach for concrete subfloors is to apply a concrete patching compound or self-leveling concrete. Patching compounds are used to fill in cracks, holes, and other imperfections in the concrete surface. Self-leveling concrete is similar to self-leveling underlayment but is specifically formulated for use on concrete subfloors. This product can effectively level large areas of uneven concrete and create a smooth, flat surface for tile installation. As with self-leveling underlayment, proper preparation of the concrete surface, including cleaning and priming, is crucial for ensuring proper adhesion.
Regardless of the method used, it is essential to verify the flatness of the subfloor after completing the leveling process. This can be done using a straightedge, level, or laser level to measure the surface and ensure that it meets the required flatness tolerances. Any remaining imperfections should be addressed before proceeding with the tile installation. Taking the time to properly prepare and flatten the subfloor will significantly improve the quality and longevity of the tile installation.

How To Prepare A Subfloor For Tile Installation The Home

How To Prepare A Subfloor For Tile Installation The Home

How To Prepare A Subfloor For Tile Installation The Home

Tile Floor Underlayment Options Hometips

How To Level A Floor For Tile Expert Tips And Advice

Tile Underlayment The Complete Guide For Beginners Diytileguy

How Flat Does Subfloor Need To Be For Vinyl Plank

How To Prepare A Subfloor For Tile Installation The Home

Working With Self Leveling Floor Underlayments Jlc

Subfloor For Tile Installation Everything You Need To Know
See Also