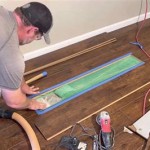
How Level Does a Subfloor Need to Be for Tile Installation?
Proper subfloor preparation is paramount for a successful and long-lasting tile installation. A subfloor that is not sufficiently level can lead to a multitude of problems, including cracked tiles, uneven grout lines, and compromised structural integrity of the tiled surface. Understanding the required levelness and the methods to achieve it is crucial for both professional installers and DIY enthusiasts embarking on tiling projects.
The term "level" is often used interchangeably with "flat" in the context of subfloor preparation, but it's vital to differentiate between the two. Level refers to being parallel to the plane of gravity, while flat refers to the absence of deviations or undulations on the surface. While a level subfloor is desirable, the more critical requirement for tile installation is flatness. Small variations in level can be compensated for during the installation process, but significant deviations in flatness will inevitably cause problems.
The acceptable tolerance for subfloor flatness for tile installation is generally specified by industry standards and tile manufacturers. These standards provide guidelines to ensure that the installed tile surface meets aesthetic and performance expectations. Failure to adhere to these guidelines can void warranties and result in costly repairs.
Acceptable Tolerance Levels for Subfloor Flatness
The generally accepted standard for subfloor flatness for most tile installations is a maximum deviation of 1/4 inch over a 10-foot span, or 1/8 inch over a 2-foot span. These tolerances are outlined by organizations such as the Tile Council of North America (TCNA) in their handbook. The tighter tolerance over the shorter span is particularly important to address localized high and low spots that can cause individual tiles to rock or shift.
For large format tiles (typically defined as tiles with at least one side exceeding 15 inches), even stricter tolerances are often recommended. These larger tiles are less forgiving of substrate imperfections, and any undulation in the subfloor will be more readily apparent in the finished installation. In these cases, a maximum deviation of 1/8 inch over a 10-foot span, or 1/16 inch over a 2-foot span, may be required.
It's important to consult the specific tile manufacturer's recommendations for flatness tolerances, as they may vary depending on the type of tile, its size, and the intended application. Some types of natural stone tile, for instance, may have stricter requirements than ceramic or porcelain tiles due to their inherent variations in thickness and density.
Moreover, the type of mortar used can influence the permissible variations in subfloor flatness. Thicker mortar beds can compensate for slight imperfections, but they are generally not recommended for modern tile installations due to their increased drying time and potential for shrinkage. Thin-set mortars, which are the industry standard for most applications, require a flatter substrate to achieve proper adhesion and prevent tile cracking.
Methods for Assessing Subfloor Flatness
Several methods can be employed to assess the flatness of a subfloor before tile installation. The simplest and most common method is to use a long straightedge, such as a 10-foot level or a straight piece of lumber, and a measuring tape or feeler gauges.
The straightedge is placed on the subfloor in various directions, and the distance between the straightedge and the surface of the subfloor is measured at multiple points. Any deviations exceeding the specified tolerances should be marked for correction. It's crucial to assess the flatness in a grid pattern, covering the entire area to be tiled, to identify all high and low spots.
For smaller areas or when dealing with localized imperfections, a shorter straightedge, such as a 2-foot level, can be used. This allows for more precise identification of problem areas. A laser level can also be a useful tool for identifying high and low spots over larger areas. The laser beam provides a reference plane, and any deviations from this plane can be easily detected.
Another method involves using a self-leveling compound, which is poured onto the subfloor and allowed to spread and harden. This compound will naturally seek its own level, filling in low spots and creating a flat surface. However, it's essential to ensure that the self-leveling compound is compatible with the subfloor material and the tile adhesive to be used.
Before applying any leveling compounds or making any corrections, it's vital to thoroughly clean the subfloor to remove any dirt, dust, or debris. This will ensure proper adhesion of the leveling materials and prevent any future problems.
Techniques for Correcting Subfloor Imperfections
Once the subfloor has been assessed and any deviations exceeding the acceptable tolerances have been identified, appropriate corrective measures must be taken before proceeding with tile installation. The specific techniques used will depend on the nature and extent of the imperfections.
For minor imperfections, such as small bumps or dips, the subfloor can be corrected using patching compounds or thin-set mortar. These materials are applied to the affected areas to fill in low spots or smooth out high spots. It's crucial to allow the patching compound or mortar to fully dry and cure before proceeding with tile installation. Multiple thin coats may be necessary to achieve the desired flatness.
For larger imperfections or significant deviations in flatness, self-leveling compounds are often the most effective solution. These compounds are designed to flow freely and create a level and flat surface. They are typically applied in a single layer, but multiple layers may be required for particularly uneven subfloors. It's important to follow the manufacturer's instructions carefully when applying self-leveling compounds, as improper application can lead to problems such as cracking or uneven curing.
In some cases, it may be necessary to mechanically alter the subfloor to achieve the required flatness. This may involve sanding down high spots or adding shims to low spots. When sanding, it's crucial to use appropriate safety measures, such as wearing a dust mask and eye protection. When adding shims, they should be securely fastened to the subfloor to prevent them from shifting or becoming dislodged.
For wooden subfloors, it's essential to ensure that the subfloor is adequately supported and that there is no excessive deflection or movement. If the subfloor is flexing or bouncing, it may be necessary to reinforce it with additional joists or plywood. Excessive deflection can lead to tile cracking and grout failure.
When working with concrete subfloors, it's important to ensure that the concrete is fully cured and free of any contaminants, such as oil or grease. Any cracks or imperfections in the concrete should be repaired before proceeding with tile installation. Acid etching or grinding may be necessary to prepare the surface of the concrete for proper adhesion of the tile adhesive.
In summary, achieving the required level of flatness for a subfloor before tile installation is a critical step that directly impacts the longevity and appearance of the finished tile surface. By understanding the acceptable tolerances, employing appropriate assessment methods, and utilizing effective corrective techniques, both professional installers and DIY enthusiasts can ensure a successful and satisfactory tile installation.

How To Prepare A Subfloor For Tile Installation The Home

How To Prepare A Subfloor For Tile Installation The Home

How To Prepare A Subfloor For Tile Installation The Home

How To Level A Subfloor Before Laying Tile

How To Prepare A Subfloor For Tile Installation The Home
%20(2).png?strip=all)
How To Level A Subfloor Lay Flooring
Marrying Old And New Floors For Tile Jlc

How To Prepare Subfloor For Tile The Home

Tile Underlayment The Complete Guide For Beginners Diytileguy

Learn How To Level A Floor For Tile Rubi Blog Usa
See Also
