Fitting Vinyl Flooring in a Bathroom: A Comprehensive Guide
Vinyl flooring has become a popular choice for bathrooms, offering a cost-effective, durable, and water-resistant alternative to tiles and other traditional flooring materials. Its ease of installation, wide range of designs, and resistance to moisture make it an attractive option for both DIY enthusiasts and professional contractors. This article provides a detailed guide to fitting vinyl flooring in a bathroom, covering essential preparations, installation techniques, and troubleshooting tips.
Key Considerations Before Installation
Before commencing the installation process, meticulous planning is crucial for ensuring a successful outcome. Several factors need careful consideration to avoid complications and ensure the longevity and aesthetic appeal of the vinyl flooring.
Measuring and Ordering: Accurate measurements of the bathroom floor are paramount. Measure the length and width of the room at its widest points. Add an extra 10% to these measurements to account for waste, cuts, and any potential installation errors. This buffer is particularly important for bathrooms with irregular shapes or numerous fixtures. When ordering the vinyl flooring, ensure it is specifically designed for bathroom use, featuring enhanced water resistance and slip-resistant properties.
Subfloor Preparation: The subfloor forms the foundation upon which the vinyl flooring will be installed. Its condition directly affects the final appearance and durability of the flooring. The subfloor must be clean, level, and dry. Any existing flooring materials, such as old tiles or linoleum, should be removed. Thoroughly clean the subfloor using a vacuum cleaner and a damp mop to remove dust, debris, and any residual adhesive. Check for any imperfections, such as cracks, holes, or uneven surfaces. Fill any holes or cracks with a suitable patching compound and allow it to dry completely according to the manufacturer’s instructions. Level any uneven surfaces using a self-leveling compound. This ensures a smooth and consistent surface for the vinyl flooring to adhere to.
Acclimation: Vinyl flooring needs to acclimate to the bathroom's environment before installation. This process allows the material to adjust to the temperature and humidity levels, minimizing the risk of expansion or contraction after installation. Unroll the vinyl flooring in the bathroom and allow it to sit for at least 24 to 48 hours. This allows the vinyl to relax and conform to the room's dimensions, making the installation process easier and preventing potential issues later on.
Gathering Tools and Materials: Having all the necessary tools and materials readily available will streamline the installation process and prevent unnecessary delays. Essential tools include a measuring tape, utility knife with sharp blades, straight edge or T-square, pencil, notched trowel (if using adhesive), seam roller (if installing sheet vinyl), and safety glasses. Materials needed include the vinyl flooring itself, adhesive (if required), seam sealant (if installing sheet vinyl), and transition strips. Ensure the adhesive is compatible with the vinyl flooring and the subfloor material. Read and understand the manufacturer’s instructions for both the vinyl flooring and the adhesive before commencing the installation.
Step-by-Step Installation Guide
The installation process varies slightly depending on the type of vinyl flooring being used – sheet vinyl, vinyl tiles, or vinyl planks. This section provides a general guide applicable to most types of vinyl flooring, with specific notes for each type where necessary.
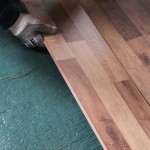
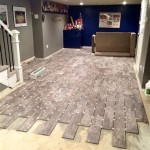
Dry Fitting: Before applying any adhesive, it is crucial to perform a dry fit. This involves laying the vinyl flooring in place without any adhesive to ensure a proper fit and identify any areas that require trimming or adjustment. For sheet vinyl, unroll the sheet and position it in the room, allowing for excess material around the edges. For vinyl tiles or planks, lay them out in the desired pattern, ensuring proper alignment and spacing. Use a straight edge and utility knife to trim the vinyl flooring to fit around pipes, toilets, and other fixtures. Leave a small gap (approximately 1/4 inch) around the perimeter of the room to allow for expansion and contraction. This gap will be covered by the baseboards or trim.
Applying Adhesive (if Required): While some vinyl flooring products feature a peel-and-stick backing, others require the application of adhesive. If adhesive is necessary, carefully follow the manufacturer's instructions. Apply the adhesive to the subfloor using a notched trowel, ensuring even coverage. Work in small sections to prevent the adhesive from drying out. The specific type of notched trowel required will depend on the type of vinyl flooring and the adhesive being used. Consult the manufacturer's recommendations for the appropriate trowel size.
Laying the Vinyl Flooring: Once the adhesive is applied, carefully position the vinyl flooring in place. For sheet vinyl, start at one edge of the room and gradually unroll the sheet, pressing it firmly into the adhesive. Use a seam roller to flatten the vinyl and remove any air bubbles. For vinyl tiles or planks, start in one corner of the room and work outwards, ensuring each piece is aligned and firmly pressed into the adhesive. Use a rubber mallet to gently tap the tiles or planks into place, ensuring a secure bond with the adhesive.
Sealing Seams (for Sheet Vinyl): When installing sheet vinyl, seams may be necessary, particularly in larger bathrooms. Properly sealing these seams is crucial to prevent water from seeping underneath the flooring. Use a seam sealant specifically designed for vinyl flooring. Apply the sealant along the seam line, following the manufacturer's instructions. Use a clean cloth to wipe away any excess sealant. Allow the sealant to dry completely before proceeding with the next step.
Trimming Excess Material: After the vinyl flooring is securely in place, trim any excess material around the perimeter of the room. Use a straight edge and utility knife to make clean, precise cuts. Ensure the gap around the perimeter remains consistent and is covered by the baseboards or trim.
Installing Baseboards and Trim: Install baseboards or trim around the perimeter of the room to cover the expansion gap and provide a finished look. Use nails or adhesive to secure the baseboards or trim in place. Caulk any gaps between the baseboards or trim and the wall using a paintable caulk.
Troubleshooting Common Issues
Even with careful planning and execution, certain issues may arise during the installation process. Understanding how to address these issues is crucial for achieving a satisfactory outcome.
Air Bubbles: Air bubbles can appear beneath the vinyl flooring during or after installation. To remove air bubbles, use a utility knife to make a small incision in the bubble. Gently press down on the surrounding area to release the trapped air. Apply a small amount of adhesive under the incision and press the vinyl back into place. Use a seam roller to flatten the area and ensure a secure bond.
Uneven Seams: Uneven seams can occur when installing sheet vinyl. To address this issue, use a straight edge and utility knife to trim the overlapping edges of the vinyl flooring. Ensure the edges are perfectly aligned before applying seam sealant. Use a seam roller to flatten the seam and ensure a smooth, even surface.
Adhesive Issues: Problems with the adhesive can range from insufficient bonding to excessive adhesive squeeze-out. If the adhesive is not bonding properly, ensure the subfloor is clean, dry, and properly prepared. Use the correct type of adhesive and apply it according to the manufacturer's instructions. If there is excessive adhesive squeeze-out, use a damp cloth to wipe away the excess adhesive before it dries. Avoid using harsh chemicals or solvents, as these can damage the vinyl flooring.
Loose Tiles or Planks: If vinyl tiles or planks become loose after installation, carefully remove the loose piece. Clean the subfloor and the back of the tile or plank. Apply a fresh coat of adhesive to the subfloor and the back of the tile or plank. Press the tile or plank firmly into place and use a rubber mallet to gently tap it into place.
Properly fitting vinyl flooring in a bathroom involves thorough preparation, careful installation, and diligent troubleshooting. By following the steps outlined in this guide, both DIY enthusiasts and professional contractors alike can achieve a durable, aesthetically pleasing, and water-resistant flooring solution.

How To Install Vinyl Plank Flooring In A Bathroom Fixthisbuildthat

How To Install Vinyl Plank Flooring In A Bathroom As Beginner Home Renovation

How To Install Vinyl Plank Flooring In A Bathroom As Beginner Home Renovation

How To Install Vinyl Plank Floors In A Bathroom Over Tile

How To Install Vinyl Plank Flooring In A Bathroom

How To Install Vinyl Plank Flooring In A Bathroom Fixthisbuildthat

How To Install Vinyl Plank Floors In A Bathroom Over Tile

How To Install Vinyl Plank Flooring In A Bathroom

Dos And Don Ts For Installing Vinyl Plank Floors In The Bathroom Advice Homeowners

Can I Install Vinyl Planks In Bathrooms Signature Flooring Floor Tiles
See Also