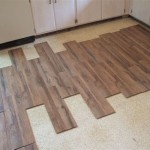
How Flat Should a Floor Be for Tile?
Achieving a properly installed tiled floor hinges significantly on the flatness of the subfloor. The substrate, whether concrete, plywood, or another material, serves as the foundation upon which the tile is laid. Any deviations from flatness, such as dips, humps, or undulations, can translate into an uneven tiled surface, leading to aesthetic imperfections, compromised structural integrity, and potential tile failure. Understanding the required level of flatness and the methods to achieve it is therefore paramount for successful tile installation.
The exact requirements for floor flatness vary depending on the type and size of tile being used. Larger format tiles, for instance, demand a flatter surface than smaller tiles. The thinner the tile, the more important subfloor flatness becomes. These variations stem from the tile's ability, or lack thereof, to conform to minor imperfections in the subfloor. Failure to meet the flatness requirements can result in lippage (uneven tile edges), cracking, or even bond failure between the tile and the underlying substrate. Industry standards and manufacturer recommendations should always be consulted before commencing any tile installation project to ensure adherence to appropriate specifications.
Industry Standards and Tolerances
The American National Standards Institute (ANSI) provides guidelines for floor flatness in its ANSI A108.02 standard, which addresses requirements for installing ceramic tile, glass tile, and stone tile. This standard defines acceptable tolerances for variations in floor flatness, typically expressed as deviations over a specific distance. The standard defines flatness tolerance in terms of "Variation from Plane" or "Maximum Deviation." This specification indicates the maximum allowable deviation from a perfectly flat plane over a particular distance, commonly measured in feet.
Generally, a flatness tolerance of 1/4 inch in 10 feet is considered acceptable for many standard-sized tile installations. This means that over a 10-foot span, the floor should not deviate more than 1/4 inch from a perfectly flat plane. However, for larger format tiles (typically defined as tiles larger than 15 inches on at least one side) and rectified tiles (tiles that have been precisely cut to ensure uniform size and edges), a more stringent flatness tolerance of 1/8 inch in 10 feet is often required. These tighter tolerances are necessary to minimize lippage and ensure a visually appealing and structurally sound installation.
It is crucial to note that these are general guidelines, and specific tile manufacturers may have more restrictive flatness requirements. Consulting the tile manufacturer's specifications is essential before beginning the installation process. Their documentation often details the precise flatness tolerances necessary for their specific product to ensure a successful and warrantied installation. Ignoring these specifications can lead to problems with the tile installation that invalidate any manufacturer warranty.
Methods for Assessing Floor Flatness
Accurately assessing the flatness of a floor is essential before tile installation can begin. Several methods can be employed to determine the level of flatness and identify any areas requiring correction. These methods range from simple visual inspections to more precise measurements using specialized tools.
A simple visual inspection can often reveal obvious irregularities, such as dips, humps, or cracks. However, visual inspection alone is rarely sufficient for determining if a floor meets the required flatness tolerances. Areas where water pools, or where existing flooring shows signs of unevenness, are key indicators of potential issues.
A straightedge, typically 6 to 10 feet long, is a common tool used for measuring floor flatness. The straightedge is placed on the floor in various directions, and a feeler gauge or ruler is used to measure the gap between the straightedge and the floor surface. This method allows for a relatively quick assessment of flatness variations over a given distance. The measurements gathered should then be compared to the required tolerances as specified by the ANSI standards or the tile manufacturer.
Laser levels provide a more precise method for assessing floor flatness. These tools project a laser beam onto the floor surface, allowing for the identification of high and low spots with greater accuracy. Laser levels are particularly useful for larger areas where it may be difficult to maneuver a long straightedge. The deviation from the laser line can be accurately measured and documented to guide corrective actions.
In some cases, particularly for critical or complex installations, a digital level or a flatness gauge can be used. These devices provide highly accurate measurements of floor flatness and can generate a detailed profile of the floor surface. These tools are typically employed by professionals for demanding applications where precision is paramount.
Techniques for Correcting Floor Flatness
Once the floor flatness has been assessed, and any deviations exceeding the acceptable tolerances have been identified, corrective measures must be taken to bring the floor within the specified limits. Several techniques can be employed to correct floor flatness issues, depending on the type and severity of the problem. These techniques range from applying self-leveling compounds to grinding down high spots.
Self-leveling underlayments (SLUs) are cement-based or gypsum-based products that are designed to flow freely and create a smooth, level surface. These compounds are poured onto the existing floor and allowed to spread and level themselves before hardening. SLUs are effective for correcting minor variations in flatness, filling in dips and low spots, and creating a uniform surface for tile installation. Proper preparation of the existing floor is crucial for successful SLU application, including cleaning, priming, and sealing any cracks or joints. The SLU manufacturer's instructions should be followed carefully to ensure proper mixing, application, and curing.
For concrete floors with high spots or humps, grinding may be necessary. Concrete grinders use abrasive wheels or discs to remove material from the floor surface, effectively leveling down high spots. This method is more labor-intensive than using an SLU but is necessary for correcting significant deviations in flatness. Dust control is essential when grinding concrete to minimize airborne particles. Proper safety precautions, including wearing respiratory protection and eye protection, should always be taken when using concrete grinding equipment.
In some situations, a combination of techniques may be required to achieve the desired floor flatness. For example, grinding down high spots may be followed by applying an SLU to fill in low spots and create a perfectly level surface. The specific corrective measures required will depend on the unique characteristics of the floor and the tile being installed.
For plywood subfloors, shimming or adding additional layers of plywood may be required to correct flatness issues. Shimming involves inserting thin pieces of material, such as wood shims, under the plywood to level out low spots. Adding a second layer of plywood can also help to improve flatness and stiffness, providing a more stable base for tile installation. It is crucial to ensure that the plywood is properly fastened to the underlying joists to prevent movement or deflection. All screws should be counter sunk to ensure the flatness of the top surface.
Prior to applying any corrective measures, it is essential to address any structural issues with the floor. Weak or damaged joists should be repaired or replaced to ensure a stable and level foundation. Addressing structural problems before tiling can prevent future issues, such as cracking or sagging, that could compromise the integrity of the tile installation. A structural engineer should be consulted if there are concerns regarding the structural integrity of the floor.
.jpg?strip=all)
Is Your Floor Or Wall Flat Enough For Large Format Tile

Is Your Floor Or Wall Flat Enough For Large Format Tiles

Technical Focus Achieving A Flat Floor For Tile And Stone S 2024 06 14 Trends Installation

If The Floor Is Not Flat Fix It Trends Installation

Is Your Floor Or Wall Flat Enough For Large Format Tiles

The Tile Journal Of Hamilton In Woodstock Ga

Critical Points Of Ceramic Tile Design And Installation Mortar Bed Mud Floors Walls Floor Trends

Complete Guide On How To Install Ceramic Floor Tiles Rubi Blog Usa

Wood Look Tile Flooring How To Lay That Looks Like

How To Prepare A Subfloor For Tile Installation The Home
See Also

