How To Apply Vinyl Flooring Over Tile Floor In Bathroom
Applying vinyl flooring over existing tile in a bathroom offers a practical and cost-effective alternative to complete tile removal. This approach can refresh the bathroom's aesthetic while avoiding the extensive demolition, dust, and potential structural complications associated with tearing out the old tiles. Careful preparation and proper installation techniques are crucial for ensuring a long-lasting and visually appealing result. The method presents a way to update the bathroom’s look without a major renovation project.
Before commencing the project, a thorough assessment of the existing tile floor is necessary. This evaluation will determine the suitability of the tile as a subfloor for the vinyl flooring. Potential issues, such as loose tiles, uneven surfaces, and moisture problems, must be addressed before proceeding. Addressing these issues will affect the project outcome.
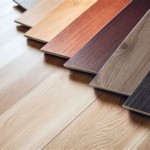
Vinyl flooring comes in various forms, including sheet vinyl, vinyl planks, and vinyl tiles. The choice depends on personal preference, budget, and the complexity of the bathroom layout. Sheet vinyl often provides a seamless, waterproof surface, ideal for bathrooms prone to moisture. Vinyl planks and tiles offer more design flexibility and can be replaced individually if damaged. Regardless of the type selected, ensure the vinyl flooring is specifically designed for bathroom use, offering water resistance and slip resistance.
Assessing the Existing Tile Floor
The first and perhaps most important step is to rigorously inspect the existing tile floor. A sound tile floor is essential. Examine each tile for signs of looseness, cracks, or damage. Loose tiles need to be re-adhered or replaced before any further work is done. Tap each tile gently with a rubber mallet or the handle of a screwdriver. A hollow sound indicates that the tile is not properly bonded to the subfloor and needs attention. Remove any loose tiles carefully, ensuring not to damage the surrounding tiles. Clean the area where the loose tile was using a scraper to remove old mortar. Reapply new thin-set mortar and replace the tile, ensuring it is level with the adjacent tiles. Allow it to cure for the recommended time before proceeding.
Next, check for any unevenness in the tile floor. Significant variations in height between tiles can telegraph through the vinyl flooring, creating an unsightly and potentially unstable surface. Use a long level or straightedge to identify high and low spots. For minor dips or imperfections, a self-leveling compound can be used to create a smooth, even surface. Follow the manufacturer's instructions for mixing and applying the self-leveling compound, ensuring it flows into the low spots and levels out properly. For larger discrepancies, consider using a patching compound specifically designed for filling in tile grout lines and creating a uniform surface. These compounds are typically easier to work with and can be feathered out to blend seamlessly with the surrounding tiles. Allow the patching compound to dry completely before moving on to the next step. If the tile floor is severely uneven, it might be necessary to grind down high spots or apply multiple layers of leveling compound.
Furthermore, assess the grout lines between the tiles. Grout lines, particularly if they are wide or uneven, can also show through the vinyl flooring. Filling the grout lines with a patching compound is crucial for creating a smooth, uniform surface. Apply the patching compound generously, ensuring it fills the grout lines completely. Use a wide putty knife to smooth the compound flush with the surface of the tiles. Multiple applications may be necessary to achieve a perfectly smooth surface. Allow the patching compound to dry thoroughly before sanding it smooth with fine-grit sandpaper.
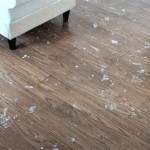
Finally, check for any signs of moisture damage. Bathrooms are inherently damp environments, and moisture can seep through the tile and damage the subfloor. Look for discoloration, staining, or a musty odor. If moisture is present, identify and address the source of the leak before installing the vinyl flooring. This might involve repairing leaky pipes, resealing the shower or tub, or improving ventilation in the bathroom. Installing vinyl flooring over a damp subfloor can lead to mold growth, adhesive failure, and premature deterioration of the flooring. Consider using a moisture meter to accurately assess the moisture content of the subfloor. If the moisture content is above the recommended level for the vinyl flooring, take steps to dry out the subfloor before proceeding.
Preparing the Tile Surface
Once the existing tile floor has been thoroughly assessed and any necessary repairs have been made, the next step is to prepare the surface for the vinyl flooring. This involves cleaning, sanding, and applying a primer. Effective preparation is the basis for success.
Start by thoroughly cleaning the tile floor to remove any dirt, grime, or residue. Use a degreasing cleaner specifically designed for tile floors. Scrub the floor thoroughly with a stiff-bristled brush or a scrubbing pad. Pay particular attention to the grout lines, where dirt and grime tend to accumulate. Rinse the floor thoroughly with clean water to remove any remaining cleaner. Allow the floor to dry completely before proceeding to the next step. Avoid using harsh chemicals or abrasive cleaners, as they can damage the tile surface or leave behind a residue that interferes with the adhesion of the vinyl flooring.
After cleaning, sand the tile floor to create a slightly roughened surface that will promote adhesion of the vinyl flooring adhesive. Use a medium-grit sandpaper (around 100-120 grit) and a sanding block or a floor sander to lightly sand the entire surface of the tile floor. The goal is not to remove the tile's finish completely, but rather to create a slightly textured surface that will provide a better grip for the adhesive. Vacuum up any sanding dust and wipe the floor with a damp cloth to remove any remaining residue. Ensure that all sanding dust is removed, as it can interfere with the adhesion of the vinyl flooring.
Finally, apply a primer specifically designed for use with vinyl flooring. This primer will improve the adhesion of the vinyl flooring to the tile floor and help prevent moisture from seeping through the tile. Choose a primer that is compatible with the type of vinyl flooring and the adhesive you will be using. Follow the manufacturer's instructions for applying the primer. Typically, this involves applying a thin, even coat of primer to the entire surface of the tile floor using a paint roller or a brush. Allow the primer to dry completely before proceeding to the next step. The drying time will vary depending on the type of primer and the ambient temperature and humidity.
Some installers recommend applying a self-leveling compound after sanding and before priming for a smoother surface. This is particularly recommended if the original tile floor has uneven grout lines, is significantly uneven or has tiles that aren't perfectly flat. This compound creates a uniformly flat and even surface for the vinyl layer.
Installing the Vinyl Flooring
With the tile floor properly prepared, the final step is to install the vinyl flooring. This involves measuring, cutting, and adhering the vinyl flooring to the prepared surface. Accuracy and attention to detail are essential for achieving a professional-looking result.
Begin by measuring the bathroom floor carefully. Use a tape measure to determine the length and width of the room. Add a few extra inches to these measurements to account for any irregularities or miscalculations. Transfer these measurements to the vinyl flooring, using a utility knife or a straightedge to cut the vinyl flooring to the desired size. For sheet vinyl, it's best to create a paper template of the bathroom floor to ensure a precise fit. Lay the template on the vinyl and cut along the lines. For vinyl planks or tiles, you may need to cut individual pieces to fit around obstacles such as toilets, sinks, and door frames.
Once the vinyl flooring is cut to size, apply the adhesive. Choose an adhesive that is specifically designed for use with vinyl flooring and that is compatible with the existing tile floor. Follow the manufacturer's instructions for applying the adhesive. Typically, this involves applying a thin, even coat of adhesive to the entire surface of the prepared tile floor using a notched trowel. Be sure to spread the adhesive evenly and avoid leaving any gaps or puddles. Allow the adhesive to become tacky before laying the vinyl flooring. The tack time will vary depending on the type of adhesive and the ambient temperature and humidity.
Carefully lay the vinyl flooring onto the adhesive. Start in one corner of the room and gradually work your way across the floor, pressing the vinyl flooring firmly into the adhesive. Use a roller or a hand roller to ensure that the vinyl flooring is fully bonded to the adhesive. Pay particular attention to the edges and corners, ensuring that they are properly adhered. For sheet vinyl, use a seam roller to seal the seams between adjacent sheets. For vinyl planks or tiles, ensure that the edges are aligned properly and that there are no gaps between the pieces.
Once the vinyl flooring is installed, allow the adhesive to cure completely before walking on the floor. The curing time will vary depending on the type of adhesive and the ambient temperature and humidity. Typically, it is recommended to wait at least 24-48 hours before walking on the floor. After the adhesive has cured, install any baseboards or trim to cover the edges of the vinyl flooring and to provide a finished look.
Proper selection and application of the adhesive is crucial. Consider water-resistant adhesives specifically designed for bathroom environments to prevent moisture-related issues. Read the adhesive manufacturer's instructions carefully and adhere to the recommended open time and curing time.
With careful planning, adequate preparation, and attention to detail, applying vinyl flooring over existing tile in a bathroom can be a successful and aesthetically pleasing project. This approach offers a convenient and affordable way to update the bathroom's look without the extensive work of removing the old tile.

How To Install Vinyl Plank Tiles In A Bathroom

How To Install Vinyl Plank Floors In A Bathroom Over Tile

How To Install Vinyl Plank Flooring In A Bathroom As Beginner Home Renovation

How To Install Vinyl Plank Flooring Into A Bathroom

How To Install Sheet Vinyl Floor Decor Adventures

How To Install Vinyl Plank Floors In A Bathroom Over Tile

How To Lay Vinyl Floor In A Bathroom Dove Cottage

How To Install Vinyl Plank Flooring In A Bathroom Fixthisbuildthat

How To Lay Vinyl Flooring Sheet Over Tiles

Vinyl Flooring Lvp On Top Of Bathroom Tile Home Improvement Stack Exchange
See Also