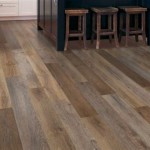
A Comprehensive Guide to Installing Cork Flooring in Your Kitchen
Cork flooring, an eco-friendly and aesthetically pleasing option, can transform your kitchen into a warm and inviting space. Here's a comprehensive guide to lead you through the installation process:
Materials You'll Need
- Cork flooring tiles or planks
- Cork underlayment
- Floor adhesive
- Notched trowel
- Spreader
- Utility knife
- Tape measure
- Pencil
Step 1: Prepare the Subfloor
Ensure the subfloor is clean, level, and dry. Remove any existing flooring and baseboards. Repair any damaged areas with appropriate subfloor repair materials.
Step 2: Install Underlayment
Lay down the cork underlayment over the entire subfloor, staggering the joints. Use tape or adhesive to secure the underlayment and ensure it remains flat.
Step 3: Plan the Layout
Determine the center point of the kitchen and plan the layout from there. Dry-fit the cork tiles or planks to ensure a visually pleasing arrangement.
Step 4: Apply Adhesive
Using the notched trowel, spread a thin, even layer of floor adhesive onto a small section of the subfloor. Follow the manufacturer's instructions for the adhesive used.
Step 5: Install the First Row
Place the first row of cork flooring along one of the walls, aligning the edge with a chalk line or tape. Press the tiles or planks firmly into the adhesive.
Step 6: Continue Laying Rows
Continue laying the rows of cork flooring, working your way across the kitchen. Use the spreader to push the tiles or planks together tightly. If necessary, use a utility knife to cut tiles or planks to fit around obstacles.
Step 7: Seal the Perimeter
Once the flooring is installed, seal the perimeter with quarter-round or T-molding. This will hide any gaps at the edges and provide a clean, finished look.
Step 8: Apply Finishing Treatment
To protect and enhance the appearance of the cork flooring, you can apply a polyurethane finish. Follow the manufacturer's instructions for the specific finish you choose.
Tips for Success
- Rent a moisture meter to check the moisture content of the subfloor before installing cork flooring.
- Allow the adhesive to dry completely before walking on the floor.
- Use a tapping block to ensure the tiles or planks are securely pressed into place.
- Carefully cut around obstacles using a utility knife, ensuring precise fits.
- Protect the cork flooring from heavy foot traffic or moisture until the finish is applied and fully dry.

Cork Floating Floor Installation In Kitchen Icork

Cork Floating Floor Installation In Kitchen Icork

Cork Floating Floor Installation In Kitchen Icork

Cork Flooring Guide Specifics Pros Cons Fantastic Handyman Au

A Buyers Guide And Deep Dive For Cork Flooring Icork Floor

Cork Kitchen Flooring Installation Instruction Cancork

Is Cork Flooring Right For Your Kitchen

Cork Floating Floor Installation In Kitchen Icork

Cork Flooring Pros And Cons Is It The Right Choice For You

A Buyers Guide And Deep Dive For Cork Flooring Icork Floor
See Also


