Installing Vinyl Plank Flooring for a Stylish Bathroom
Vinyl plank flooring has emerged as a popular choice for bathrooms due to its durability, waterproof nature, and ease of maintenance. If you're considering upgrading your bathroom with vinyl plank flooring, here's a comprehensive guide to help you achieve a stylish and functional space.
1. Surface Preparation
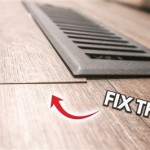
Before installing vinyl plank flooring, it's crucial to ensure that the subfloor is clean, level, and dry. Remove any existing flooring, baseboards, and quarter rounds. Repair any unevenness or damage to the subfloor using a self-leveling compound or patching material.
2. Waterproofing
Bathrooms are prone to moisture, so waterproofing the subfloor is essential. Apply a moisture barrier, such as a plastic sheeting or a self-adhering membrane, over the subfloor. This barrier will prevent moisture from seeping through and damaging the flooring or subfloor.
3. Acclimation
Vinyl plank flooring needs to acclimate to the temperature and humidity of the room before installation. Store the planks in the room for at least 48 hours before starting the installation. This will allow the planks to adjust to the environment and minimize the risk of buckling or shrinking.
4. Layout and Installation
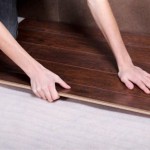
Start by planning the layout of the flooring. Consider the direction of the planks and the location of fixtures. Use a chalk line or a laser level to ensure that the first row is perfectly straight. Apply adhesive or a floating system to the subfloor and start installing the planks from the center outwards.
When installing the first row, use spacers to ensure an even gap between the planks and the wall. Continue installing subsequent rows, tapping the planks together firmly to create a secure joint. Use a pull bar or a rubber mallet to gently tap in the edges of the planks.
5. Cutting and Trimming
For areas around fixtures or obstacles, you'll need to cut the planks to fit. Use a sharp utility knife or a circular saw to make precise cuts. To cut around pipes or other obstructions, drill a pilot hole and use a jigsaw to cut a notch.
Once the flooring is installed, remove the spacers and trim the excess flooring around the walls and fixtures. Use a sharp utility knife to score the planks and then snap them off. Install baseboards or quarter rounds to cover the exposed edges and enhance the finished look.
6. Maintenance and Care
Vinyl plank flooring is relatively easy to maintain. For regular cleaning, use a damp mop or microfiber cloth. Avoid harsh chemicals or abrasive cleaners. For spills or stains, clean them up immediately using a mild detergent and water.
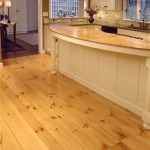
With proper care and maintenance, vinyl plank flooring can last for many years, providing you with a stylish and durable bathroom floor.

Vinyl Planks In Bathrooms Residential Inspiration Flooring

How To Install Vinyl Plank Flooring In A Bathroom Fixthisbuildthat

Luxury Vinyl Tile Floors For A Bathroom The Ultimate Guide

Installing Vinyl Plank Flooring Lifeproof Waterproof Rigid Core Sustain My Craft Habit

Dos And Don Ts For Installing Vinyl Plank Floors In The Bathroom Advice Homeowners

Installing Vinyl Plank Flooring Lifeproof Waterproof Rigid Core Sustain My Craft Habit

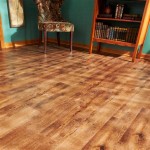
Achieve High End Hardwood Looks For Your Dream Bath In Lvt

Achieve High End Hardwood Looks For Your Dream Bath In Lvt

Dos And Don Ts For Installing Vinyl Plank Floors In The Bathroom Advice Homeowners

How To Install Vinyl Plank Flooring In A Bathroom Fixthisbuildthat
See Also