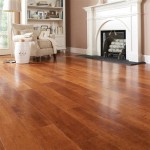
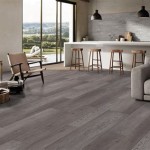
Diy Plywood Flooring: An Efficient And Cost-Effective Solution
Plywood flooring is a versatile and budget-friendly option that can transform the look of your home. Whether you're a seasoned DIYer or a complete novice, installing plywood flooring is a manageable project that can be completed with the right tools and techniques.
Choosing the Right Plywood:
The key to a successful plywood flooring installation lies in selecting the right type of plywood. Opt for plywood graded AC or higher, as these grades feature a smooth surface and minimal imperfections. Additionally, consider the thickness of the plywood, as it will determine the durability and stability of the flooring.
Preparing the Subfloor:
Before installing the plywood flooring, ensure that the subfloor is level, dry, and free of debris. Any unevenness or moisture issues can compromise the stability of the flooring. If necessary, level the subfloor using a self-leveling compound or by adding shims.
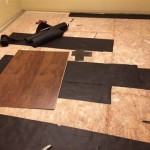
Laying the Plywood:
Begin by laying the plywood sheets along the longest wall of the room, leaving a small gap around the perimeter for expansion. Use a circular saw or a jigsaw to cut the sheets to fit, ensuring that the edges are straight and clean. Stagger the joints between the plywood sheets to enhance strength.
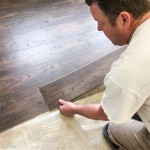
Securing the Plywood:
Secure the plywood sheets to the subfloor using screws or nails. Start by driving fasteners around the perimeter, then work your way towards the center. Countersink the fasteners slightly below the surface of the plywood to create a smooth finish.
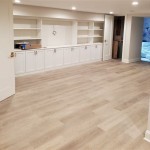
Smoothing the Surface:
Once the plywood flooring is installed, you may notice some minor gaps or unevenness. To achieve a smooth and professional-looking finish, use a wood filler to fill any gaps and sand the surface until it is level. A random orbit sander works well for this purpose.
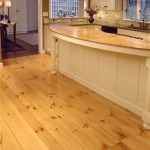
Finishing the Floor:
The final step is to finish the plywood flooring to protect it from wear and tear. You can choose from a variety of options, including polyurethane, stains, or paint. Apply the finish according to the manufacturer's instructions, ensuring even coverage and proper drying time.
Maintenance and Care:
To maintain the beauty and longevity of your plywood flooring, it's crucial to clean and maintain it regularly. Use a damp mop or microfiber cloth to clean the floor, and avoid using harsh chemicals or abrasive cleaners. Periodically reapply the finish to protect the surface and enhance its appearance.
Conclusion:
Installing plywood flooring is a cost-effective and rewarding DIY project that can add value and style to your home. By following these essential tips and techniques, you can create a durable and beautiful plywood floor that will last for years to come.

Diy Plywood Flooring Ideas For 100 In 7 Easy Steps

Inexpensive Flooring Options Ideas Instead Of Hardwood Family Handyman

Inexpensive Flooring Options Ideas Instead Of Hardwood Family Handyman

Inexpensive Flooring Options Ideas Instead Of Hardwood Family Handyman

Easy Diy Flooring Ideas And Projects Ohmeohmy Blog

Inexpensive Flooring Options Ideas Instead Of Hardwood Family Handyman

Easiest 5 Diy Flooring Solutions Learn To Install On Your Own Inc

15 Diy Plywood Flooring Ideas To Save Your Money

20 Gorgeous Flooring Ideas That Are Diy Friendly

Inexpensive Flooring Options Ideas Instead Of Hardwood Family Handyman
See Also