Installing Laminate Flooring Step Edging: A Comprehensive Guide
Installing laminate flooring step edging is a crucial step in completing the installation process and creating a professional-looking finish. Step edging, also known as transition strips, provides a smooth and seamless transition between the laminate flooring and other surfaces, such as carpet, tile, or hardwood. Here's a comprehensive guide to help you install laminate flooring step edging perfectly:
1. Plan and Measure the Transition Area
Determine the length and shape of the transition area by measuring the width of the step and the thickness of the flooring. Mark the outline of the transition area on the subfloor using a pencil or chalk.
2. Choose the Right Transition Strip
Select a transition strip that complements the color and style of your laminate flooring. Measure the height difference between the laminate flooring and the adjacent surface to determine the appropriate transition strip profile. Common profiles include T-molding, end caps, and reducers.
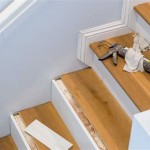
3. Prepare the Subfloor
Clean and level the subfloor surface where the transition strip will be installed. Remove any debris, bumps, or imperfections that could interfere with the installation.
4. Cut the Transition Strip to Length
Use a miter saw or a handsaw to cut the transition strip to the desired length. Make precise cuts to ensure a snug fit against the flooring and the adjacent surface.
5. Apply Adhesive to the Subfloor
Apply a thin layer of construction adhesive to the area of the subfloor where the transition strip will be placed. Follow the manufacturer's instructions for the type of adhesive used.
6. Position the Transition Strip
Carefully place the transition strip into the pre-marked area on the subfloor. Align the edges of the strip flush with the flooring and the adjacent surface.
7. Secure the Transition Strip
Press the transition strip firmly into the subfloor to ensure a secure bond. Use a rubber mallet or tapping block to gently tap along the edges of the strip, ensuring it is securely in place.
8. Finish the Installation
Allow the adhesive to dry completely according to the manufacturer's instructions. Once the adhesive is cured, you can caulk any gaps between the transition strip and the flooring or adjacent surface for a professional finish.
Tips for Success
* Use a spacer block to create a consistent gap between the transition strip and the laminate flooring. * Start by installing the transition strip at one end and work your way toward the other end. * Check for levelness throughout the installation process. * If you are installing a T-molding transition strip, ensure that the center prong fits securely into the expansion gap between the laminate planks. * Avoid overtightening any screws or nails that secure the transition strip. * Clean the transition strip regularly with a damp cloth to maintain its appearance.
How To Install Laminate Flooring On Staircase Step By Guide

How To Install Laminate On Stairs Follow Our Essential Guide Laying And Costing For

How To Install Laminate Flooring On Stairs Direct Wood

Installing Laminate On Stairs Stair Tread And Nosing Installation

How To Install Laminate Flooring On Stairs Direct Wood

Installing Laminate On Angled Stairs

Installing Laminate On Top Stair To Carpet

Do You Want To Install Laminate Flooring On Your Stairs Diy Floors Wonderhowto

How To Install Laminate Flooring On Stairs Direct Wood

How To Install Laminate Flooring On Stairs Construction Repair Wonderhowto
See Also