How To Install Tongue And Groove Flooring
Tongue and groove flooring is a type of hardwood flooring that has a tongue on one edge and a groove on the other. The tongue and groove fit together to create a strong and durable floor. Tongue and groove flooring is a popular choice for do-it-yourselfers because it is relatively easy to install.
Here are the steps on how to install tongue and groove flooring:
1. Prepare the Subfloor
The first step is to prepare the subfloor. The subfloor should be level and smooth. If the subfloor is not level, you will need to level it using a self-leveling compound. If the subfloor is not smooth, you will need to sand it down.
2. Install the Underlayment
Once the subfloor is prepared, you need to install the underlayment. The underlayment will help to reduce noise and vibration. There are several different types of underlayment available, so be sure to choose one that is appropriate for your needs.
3. Install the Starter Row
The next step is to install the starter row. The starter row is the first row of flooring that you will install. To install the starter row, you will need to cut the tongue off of one edge of the first plank. Then, you will need to place the plank against the wall and secure it with a brad nailer.
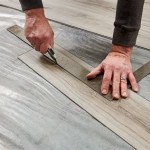
4. Install the Remaining Rows
Once the starter row is installed, you can begin installing the remaining rows of flooring. To install a row of flooring, you will need to insert the tongue of the plank into the groove of the previous plank. Then, you will need to tap the plank into place using a tapping block and a hammer.
5. Trim the Flooring
Once all of the flooring is installed, you will need to trim the flooring around the edges of the room. To trim the flooring, you will need to use a circular saw or a jigsaw.
6. Install the Baseboards
The final step is to install the baseboards. The baseboards will help to hide the gap between the flooring and the wall. To install the baseboards, you will need to nail them into place.
Tips for Installing Tongue and Groove Flooring
Here are a few tips for installing tongue and groove flooring:

What You Need To Know About Tongue And Groove Flooring Installation Reallyfloors America S Est Hardwood

5 Essential Tips For Tongue And Groove Flooring District Floor

What To Know Before You Install Tongue And Groove Flooring Bob Vila

Tongue Or Groove Which To Install First Www Swisskrono Com

Diy Installing Tongue And Groove Wood Flooring

How To Install Engineered Tongue Groove Flooring

Install Tongue And Groove Wood Veneer Flooring

How To Install Lock Engineered Hardwood Flooring

How To Install Tongue And Groove Flooring Cope Stick Blog

How To Install A Hardwood Floor Build This Weekend
See Also