Installing Allure Flooring: A Comprehensive Guide for an Easy and Speedy Project
Allure flooring has gained immense popularity due to its ease of installation and stunning appearance. By following these comprehensive steps, you can effortlessly install your Allure flooring, giving your home a beautiful and durable upgrade.
Preparation: The Foundation for Success
Before embarking on the installation process, take these crucial steps:
- Acclimate the flooring: Allow the Allure flooring to adjust to the temperature and humidity of your home for at least 48 hours before installation.
- Prepare the subfloor: Ensure the subfloor is level, smooth, and dry. Remove any existing flooring, nails, or debris.
- Gather tools: Stock up on necessary tools such as a measuring tape, utility knife, straight edge, spacers, and a tapping block.
Installation: Step-by-Step Guide
Follow these steps for a flawless installation:
- Starting Point: Determine the starting point for your installation, typically a corner or wall perpendicular to the longest wall of the room.
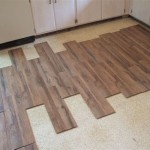
- Lay the First Row: Install the first row of planks along the starting point, using spacers to maintain equal gaps between the planks.
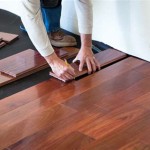
- Lock and Tap: Engage the next row of planks by lifting the end and sliding it under the previous row. Use a tapping block to firmly tap the planks together.
- Stagger the Joints: Ensure the joints between rows are staggered to enhance the strength and stability of the flooring.
- Cut and Trim: For the last row, measure and mark the planks to be cut. Use a utility knife and straight edge to make precise cuts.
- Install Transitions: If necessary, install transition strips between different flooring types or in areas where the flooring meets stairs or doorways.
- Use a tapping block: This tool ensures the planks are securely interlocked without damaging the edges.
- Check for level: Regularly check the level of the flooring as you install to prevent unevenness.
- Trim around obstacles: Use a multi-tool or utility knife to carefully trim the planks around pipes, door frames, and other obstacles.
- Clean as you go: Remove any debris or dust from the planks during installation to prevent scratching or imperfections.
- Protect the flooring: Use floor protectors or cardboard to cover the installed flooring during furniture placement or heavy traffic.
- Regular Cleaning: Use a microfiber mop or broom to remove dirt and debris. Avoid using harsh chemicals or abrasive cleaners.
- Spills and Stains: Blot up spills immediately with a damp cloth. For tougher stains, use a mild cleaning solution and a soft brush.
- Heavy Traffic: Protect high-traffic areas with rugs or mats to minimize wear and tear.
- Sun Protection: Minimize exposure to direct sunlight to prevent fading or discoloration.
Tricks and Tips for a Seamless Finish
Maintenance: Preserving the Beauty of Your Flooring
To maintain your Allure flooring at its best, follow these care tips:
Conclusion
Installing Allure flooring can be a manageable and rewarding project. By following these steps and incorporating the provided tips, you can achieve a stunning and durable flooring solution. Remember, preparation is key, and taking your time to complete the installation meticulously will ensure a beautiful and long-lasting result.

How To Install Allure Flooring Askmediy

How To Install Luxury Vinyl Plank Flooring Quick And Simple Casa Watkins Living

How To Install Luxury Vinyl Plank Flooring Quick And Simple Casa Watkins Living

Installing Vinyl Floors A Do It Yourself Guide The Honeycomb Home

How To Install Vinyl Plank Flooring In A Bathroom Fixthisbuildthat

Installing Vinyl Plank Flooring For Beginners Anika S Diy Life

A Beginner S Guide To Installing Vinyl Plank Flooring Dumpsters Com

Installing Vinyl Floors A Do It Yourself Guide The Honeycomb Home

10 Beginner Mistakes Installing Vinyl Plank Flooring Fixthisbuildthat

How To Install Luxury Vinyl Plank Flooring Quick And Simple Casa Watkins Living
See Also


