Installing Particle Board Flooring: A Comprehensive Guide
Particle board flooring offers a budget-friendly and versatile flooring option for various spaces. Its installation process is relatively straightforward, but it requires careful attention to details to ensure a durable and aesthetically pleasing result. This comprehensive guide will provide you with all the essential steps involved in installing particle board flooring, empowering you to tackle this project with confidence.
Materials and Tools
Before embarking on the installation, gather the necessary materials and tools. These include:- Particle board planks
- Underlayment
- Glue
- Trim
- Tape measure
- Pencil
- Hammer
- Nail gun
- Saw
- Spacer blocks
Preparing the Subfloor
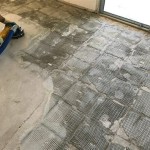
Proper preparation of the subfloor is crucial for ensuring a stable base for the particle board flooring. Begin by removing any existing flooring and leveling the subfloor. If the subfloor is uneven, use a self-leveling compound to create a smooth surface. Once the subfloor is level, install an underlayment to provide a moisture barrier and additional cushioning.
Installing the Underlayment
Roll out the underlayment over the prepared subfloor, aligning the edges carefully. Secure the underlayment using tape or staples to prevent it from shifting during the installation process. Overlap the seams by 2 inches and tape them together for maximum moisture protection.
Applying the Glue
Spread the glue evenly over the underlayment using a notched trowel. Follow the manufacturer's instructions for application thickness and coverage. Ensure that the glue is applied to the entire surface, paying particular attention to the edges and corners.
Laying the Particle Board Planks
Place the first particle board plank in one corner of the room, aligning it with the wall and using spacer blocks to maintain a consistent gap. Apply additional glue to the tongue and groove joints of the planks as you install them, pressing them together tightly. Continue laying the planks row by row, staggering the joints for increased strength.
Cutting and Fitting
As you approach walls and obstacles, you will need to cut the planks to size. Measure and mark the necessary cuts using a tape measure and pencil. Use a saw to make clean cuts, ensuring that the edges are straight and free of splinters. Fit the cut planks into place and secure them as before.
Installing Trim
Once the particle board flooring is installed, finish the edges with trim. Trim the baseboards, moldings, or quarter rounds to size and secure them to the wall and flooring using glue and nails. Trim will not only enhance the aesthetics of the room but also hide any expansion gaps.
Maintaining Particle Board Flooring
To keep your particle board flooring looking its best, regular maintenance is essential. Sweep or vacuum the floor regularly to remove dirt and debris. Avoid using harsh chemicals or excessive moisture during cleaning, as this can damage the flooring. If necessary, spot clean stains using a mild detergent solution. Use mats or rugs at high-traffic areas to protect the flooring from scratches and wear.

Particle Board As A Flooring Solution

Parquetry Engineered Flooring Installation Method Over Particleboard

Solid Hardwood Flooring Installation Method Over Particleboard

Particle Board Flooring Durable Building Material

Engineered Flooring Installation Method Over Particleboard

Parquetry Solid Hardwood Flooring Installation Method Over Particleboard

How To Prevent Flooring Problems Prior Installation

Installing Wood Subfloors Over Concrete Hardwood Floors

Particle Board Underlayment Pros Cons And Cautions Home Efficiency Guide

Installing Hardwood Flooring Over Particleboard Magnus Anderson
See Also

