Installing Lifeproof Vinyl Plank Flooring on Concrete Floor: A Comprehensive Guide
Installing Lifeproof vinyl plank flooring on a concrete floor is a straightforward DIY project that can transform the look and feel of your space. With careful planning and proper execution, you can achieve a professional-looking floor that is both durable and stylish.
1. Preparing the Concrete Floor
Before installing the flooring, it's essential to prepare the concrete floor to ensure a smooth and level surface. Start by removing any existing flooring, such as carpet or tile. Then, clean the floor thoroughly to remove any dirt, debris, or old adhesive. Use a concrete cleaner or degreaser, and rinse the floor well with water.
2. Leveling the Floor
If the concrete floor has uneven areas, you may need to level it using a self-leveling concrete compound. This is especially important if you are installing planks that are longer than 12 feet.
3. Installing an Underlayment
An underlayment provides a moisture barrier and adds additional cushioning to the floor. Choose an underlayment specifically designed for vinyl plank flooring, and follow the manufacturer's instructions for installation.
4. Installing the First Row of Planks
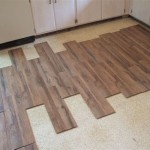
Start by measuring the room and determining the center point. Begin installing the planks from the center point and work your way out towards the edges. Use spacers to maintain a consistent gap between the planks and the wall.
5. Joining the Planks
Lifeproof vinyl planks feature a patented locking system that allows them to be easily joined together. Position the short end of one plank at a 45-degree angle to the long end of the adjacent plank. Gently press down on the joint to lock the planks together.
6. Cutting and Fitting the Planks
Use a utility knife to cut the planks to fit around obstacles or to create the desired shape. Measure the space and transfer the measurements to the plank. Score the plank using the utility knife, then snap it along the score line.
7. Installing Subsequent Rows
Continue installing the planks row by row, staggering the joints to create a more durable floor. Use a tapping block and a rubber mallet to gently tap the planks into place.
8. Finishing the Edges
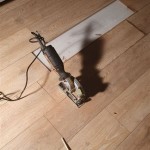
Once the flooring is installed, trim any excess around the perimeter of the room. Use a sharp utility knife or a power saw for this task.
9. Cleaning and Maintaining the Floor
Sweep or vacuum the floor regularly to remove dirt and debris. Use a damp mop and a mild cleaning solution for deeper cleaning. Avoid using harsh chemicals or abrasive cleaners, as they may damage the floor.
Conclusion
By following these steps, you can successfully install Lifeproof vinyl plank flooring on a concrete floor. This versatile and durable flooring option will enhance the aesthetics of your space and provide years of enjoyment.

How To Install Lifeproof Flooring The Home

How To Install Lifeproof Vinyl Flooring

How To Install Vinyl Plank Flooring Lifeproof Lvp

Why We Chose Lifeproof Vinyl Flooring And How To Install It

Lifeproof Flooring Installation

Tips For Installing Vinyl Plank Over Concrete Floors Lemon Thistle

How To Install Lifeproof Flooring The Home

Tips For Installing Vinyl Plank Over Concrete Floors Lemon Thistle

Why We Chose Lifeproof Vinyl Flooring And How To Install It

How To Install Lifeproof Flooring The Home
See Also


