Installing Lifeproof Vinyl Plank Flooring on Concrete Floors: A Comprehensive Guide
Transforming your concrete floors with Lifeproof vinyl plank flooring is a rewarding project that can significantly enhance the aesthetics and functionality of your space. Here's a comprehensive guide to help you achieve a professional-looking installation:
1. Preparation:
Before starting the installation, ensure your concrete floor is clean, dry, and free of any debris or imperfections. Level any uneven areas using a self-leveling compound or floor patch. Additionally, install a vapor barrier or underlayment to protect against moisture and provide a smooth surface for the flooring planks.
2. Acclimation:
Allow the Lifeproof vinyl planks to acclimate to the room temperature for at least 48 hours before installation. This helps prevent expansion or contraction after installation due to temperature changes.
3. Laying the First Row:
Measure and mark a straight line along the longest wall as your starting point. Begin laying the first row of planks parallel to the starting line, leaving a 1/4-inch gap around the perimeter for expansion. Use spacers to ensure even spacing between the planks.
4. Staggering the Seams:
To enhance the strength and stability of the floor, offset the end seams of the planks by at least 6 inches. This staggered pattern prevents weak points and ensures even weight distribution.
5. Cutting the Planks:
Use a sharp utility knife or flooring cutter to trim the planks to fit around walls, corners, or obstacles. Measure and mark the cutting line accurately to ensure a clean cut.
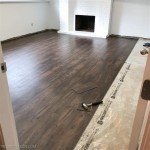
6. Installing the Remaining Rows:
Continue laying the planks row by row, staggering the seams and using spacers to maintain even spacing. Tap the planks together firmly using a rubber mallet or tapping block.
7. Cutting Around Obstacles:
When encountering obstacles such as pipes or doorways, carefully measure and cut the planks to fit around them. Use templates or scribe the planks to achieve a precise fit.
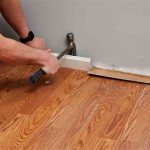
8. Trim Around the Perimeter:
Once all the planks are installed, use a quarter-round molding or baseboard to cover the expansion gap around the perimeter. This conceals the gap and adds a finished look to the flooring.
9. Cleaning and Maintenance:
After the installation is complete, vacuum or sweep the floor to remove any debris. Lifeproof vinyl planks are easy to clean and maintain. Use a damp mop with a mild cleaning solution for regular cleaning.
Additional Tips:
- Use a chalk line or laser level to ensure the starting line is straight.
- Check the planks for any defects or damaged edges before installation.
- Handle the planks carefully to avoid scratches or dents.
- Allow the adhesive to fully cure for 24 hours before walking or placing furniture on the floor.
- Consider using a transition strip or threshold to connect the vinyl plank flooring to other types of flooring, such as carpet or tile.

Tips For Installing Vinyl Plank Over Concrete Floors Lemon Thistle

How To Install Vinyl Plank Flooring Lifeproof Lvp

Why We Chose Lifeproof Vinyl Flooring And How To Install It

How To Install Lifeproof Flooring The Home

How To Install Vinyl Plank Flooring Lifeproof Lvp

Why We Chose Lifeproof Vinyl Flooring And How To Install It

Installing Vinyl Plank Flooring For Beginners Anika S Diy Life

Lvp Flooring Installation How To Install Luxury Vinyl Plank In A Basement Diy

How To Prepare A Concrete Floor For Vinyl Flooring Parrys

Why We Chose Lifeproof Vinyl Flooring And How To Install It
See Also