Installing Pergo Laminate Flooring: A Step-by-Step Guided Instruction
Pergo laminate flooring is a popular choice for homeowners and businesses alike due to its durability, ease of installation, and affordable price. If you're looking to install Pergo laminate flooring in your home, this step-by-step guide will provide you with the information you need to get the job done right.
Tools and Materials You'll Need:
- Pergo laminate flooring
- Underlayment (if not included with flooring)
- Laminate flooring cutter
- Spacer blocks
- Tapping block
- Tape measure
- Pencil
- Utility knife
- Vacuum cleaner
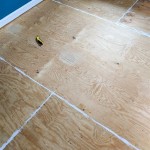
Step 1: Prepare the Subfloor
The first step is to prepare the subfloor. The subfloor should be level, smooth, and free of any debris. If the subfloor is not level, you may need to use a self-leveling compound to smooth it out. If the subfloor is not smooth, you may need to sand it down or use a floor leveler.
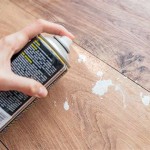
Step 2: Install the Underlayment
Once the subfloor is prepared, you can install the underlayment. The underlayment will help to protect the laminate flooring from moisture and will also help to reduce noise. Roll out the underlayment over the subfloor and tape the seams together.
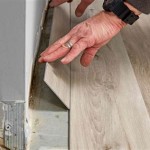
Step 3: Start Laying the Laminate Flooring
Now you can start laying the laminate flooring. Start by laying a row of flooring along one wall. Use spacer blocks to create a gap between the flooring and the wall. This gap will allow the flooring to expand and contract without buckling.
Step 4: Continue Laying the Flooring
Continue laying the flooring one row at a time. Stagger the joints in the flooring to create a more natural look. Use a laminate flooring cutter to cut the flooring to fit around obstacles such as walls and doorways.
Step 5: Tap the Flooring Together
Once the flooring is laid, you will need to tap it together. Use a tapping block and a hammer to tap the flooring together tightly. Make sure that the flooring is flush with the wall and that there are no gaps between the planks.
Step 6: Trim the Flooring
Once the flooring is tapped together, you will need to trim the flooring around the edges of the room. Use a utility knife to score the flooring and then snap it off. Be careful not to damage the flooring when you are trimming it.
Step 7: Install Moldings
The final step is to install moldings around the edges of the room. Moldings will help to hide the expansion gap and will also give the room a finished look. Use a nail gun to attach the moldings to the wall.
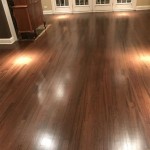
Congratulations! You have now successfully installed Pergo laminate flooring.

How To Install Pergo Flooring Easy Diy From Start Finish

How To Install Pergo Flooring Easy Diy From Start Finish

Pergo Installation Essentials Guide For Laminate Flooring

How To Install Pergo Flooring Easy Diy From Start Finish

How To Install Hardwood Flooring Pergo

Installing Laminate Flooring For The First Time Crafted Work

How To Install Pergo Flooring Easy Diy From Start Finish

How To Install Laminate Flooring For Beginners Diy

How To Install Laminate Flooring For Beginners

How To Install Pergo Flooring Easy Diy From Start Finish
See Also