How To Install Adhesive Vinyl Plank Flooring On Concrete Floor
Installing adhesive vinyl plank flooring on concrete can be a rewarding and cost-effective home improvement project. However, it requires proper preparation and precision to ensure a durable and attractive floor.
Here's a step-by-step guide to help you through the process:
1. Preparation
Before beginning the installation, it's crucial to prepare the concrete floor. Make sure it is level, smooth, clean, and dry. Remove any existing flooring or покрытия, sweep away debris, and fill any cracks or holes with a patching compound.
Additionally, check for moisture using a moisture meter. If the concrete floor has a moisture level higher than 12%, you may need to install a vapor barrier or subfloor to prevent moisture damage to the flooring.
2. Acclimation
Before installing the vinyl planks, allow them to acclimate to the temperature and humidity of the room for at least 24 hours. This will prevent expansion or contraction after installation.
3. Layout
Determine the starting point and layout of the planks. Measure the room and plan the installation to minimize waste. Use a chalk line to mark the placement of the first row.
4. Apply Adhesive
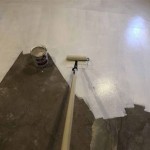
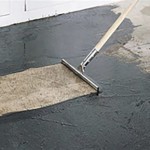
Using a notched trowel, apply a thin layer of vinyl flooring adhesive to the concrete floor. Follow the manufacturer's instructions for the type of adhesive and the size of the trowel notch. Avoid applying too much adhesive, as this can lead to buckling or movement of the planks.
5. Install the First Row
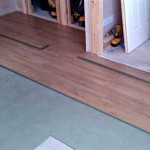
Place the first vinyl plank at the starting point, aligning it with the chalk line. Press the plank firmly into the adhesive and tap it with a rubber mallet to secure it. Continue installing planks in the first row, interlocking them together and ensuring they are level and straight.
6. Continue Installation
Once the first row is complete, continue installing the planks row by row. Interlock the planks by sliding the tongue of one plank into the groove of the adjacent plank. Use a rubber mallet to tap the planks together and ensure a tight fit.
For the last row, you may need to cut the planks to fit. Measure and mark the planks, then use a sharp utility knife to cut them. Be careful to cut straight and clean, as the last row will be visible.
7. Trim and Finish
Once all the planks are installed, trim around the edges of the room using a utility knife or a multi-tool. Install baseboards or molding to cover the expansion gap and give the floor a finished look.
8. Allow Curing Time
Allow the adhesive to cure for the recommended time specified by the manufacturer. This can range from 24 hours to several days. Avoid walking on the floor or moving furniture until the adhesive has fully cured.
Tips for Success
Here are some tips to ensure a successful installation:
- Use high-quality vinyl flooring and adhesive.
- Prepare the concrete floor properly.
- Acclimate the vinyl planks before installation.
- Apply adhesive evenly and avoid using too much.
- Install the planks tightly and level.
- Allow ample curing time.
- Use a sharp utility knife for trimming.
- Install baseboards or molding to complete the finish.

How To Prepare A Concrete Floor For Vinyl Flooring Parrys

20 Tips For A Great Vinyl Plank Flooring Installation

How To Install Glue Down Vinyl Plank Flooring Bathroom Concrete Floor

Lvp Flooring Installation How To Install Luxury Vinyl Plank In A Basement Diy

How To Install Glue Down Vinyl Plank

10 Beginner Mistakes Installing Vinyl Plank Flooring

Easy Ways To Install Vinyl Plank Flooring On Concrete

How To Install A Glue Down Floor Diy Flooring

How To Install L And Stick Vinyl Tiles Houseful Of Handmade

Laying Vinyl Planks The Right Way Expert Guide By Fantastic Handyman
See Also


