Essential Aspects of Rigid Core Luxury Vinyl Flooring Installation Instructions
Rigid core luxury vinyl flooring (LVF) has gained immense popularity due to its durability, water resistance, and ease of installation. Whether you're a seasoned DIY enthusiast or entrusting the task to professionals, understanding the essential aspects of rigid core LVF installation is crucial for ensuring a flawless outcome.
Materials Required
Before embarking on the installation, gather the necessary materials:
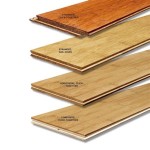
- Rigid core LVF planks
- Underlayment (if needed)
- Vapor barrier (if required)
- Tapping block or mallet
- Spacer wedges
- Utility knife
- Pencil or chalk line
Surface Preparation
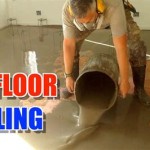
A smooth, level subfloor is essential for a successful installation.
- Remove existing flooring, including any adhesives.
- Inspect the subfloor for any unevenness or imperfections.
- Fill in any gaps or level any bumps using self-leveling compound or patching materials.
Underlayment Installation (Optional)
An underlayment can provide added moisture resistance, sound absorption, and support.
- Roll out the underlayment perpendicular to the direction you plan to install the planks.
- Overlap the seams by at least 2 inches and tape them together.
Vapor Barrier Installation (Required for Concrete Subfloors)
For concrete subfloors, a vapor barrier is necessary to prevent moisture from damaging the flooring.
- Overlapping the seams by 6 inches, roll out a plastic vapor barrier.
- Secure it to the subfloor using 2-inch wide tape.
Plank Installation
Now, it's time to install the rigid core planks:
- Determine the starting point and snap in the first plank.
- Insert the long edge of the next plank into the groove of the first one and press down to snap it into place.
- Continue adding planks in a similar manner, staggering the joints for stability.
Trim and Finishing
Once all the planks are installed, it's time for trimming and finishing touches:
- Make precise cuts around door frames, baseboards, and other obstacles.
- Install transition strips where different flooring materials meet.
- Add quarter round or base moldings to conceal the expansion gap between the flooring and the wall.
Allow for Expansion
Rigid core LVF requires some space for expansion and contraction due to temperature fluctuations.
- Maintain a 1/4-inch expansion gap around the perimeter of the room.
- Use spacer wedges to keep the planks separated during installation.
Care and Maintenance
To preserve the beauty of your rigid core LVF, follow these care tips:
- Sweep or vacuum regularly to remove dirt and debris.
- Use a damp mop with a pH-neutral cleaner for occasional mopping.
- Protect the flooring from heavy furniture or sharp objects.
By following these essential aspects of rigid core LVF installation instructions, you can achieve a professional-looking and durable floor that will enhance the aesthetics and functionality of your home for years to come.

Installation Instructions Of Rigid Core Vinyl Flooring

How To Lay Fit Lvt Flooring Wood And Beyond Blog

Diy How To Install Rigid Core Vinyl Plank Flooring Home Decorators Oak

Luxury Vinyl Flooring Installation Everlife Msi

20 Tips For A Great Vinyl Plank Flooring Installation

Diy How To Install Rigid Core Vinyl Plank Flooring Home Decorators Oak

How Is Lvt Flooring Installed Malmo Luxury Vinyl

Luxury Vinyl Flooring Installation Everlife Msi

Luxury Vinyl Flooring Installation Everlife Msi

Luxury Vinyl Flooring Fitting Instructions Direct Blog
See Also