The Ultimate Guide to Installing Lifeproof Rigid Core Luxury Vinyl Flooring
Transform your home with the elegance and durability of Lifeproof rigid core luxury vinyl flooring. This innovative flooring solution boasts exceptional performance, making it a perfect choice for busy households and commercial settings. Installing Lifeproof flooring is a relatively straightforward process, but it requires careful preparation and attention to detail to achieve a seamless and professional-looking result.
Materials and Tools You'll Need:
- Lifeproof rigid core luxury vinyl flooring
- Underlayment (if required)
- Tape measure
- Chalk line or laser level
- Pry bar
- Tapping block or hammer
- Spacer blocks
- Trim pieces (if needed)
Step 1: Prepare the Subfloor
The subfloor must be clean, flat, and dry before installing the flooring. Remove all existing flooring, baseboards, and quarter rounds. Inspect the subfloor for any imperfections, such as cracks or unevenness. If necessary, level the subfloor using a self-leveling compound or underlayment.
Step 2: Install Underlayment (if required)
Some Lifeproof rigid core flooring products come with an attached underlayment. If yours does not, you may need to install a separate underlayment to ensure sound absorption and moisture resistance. Follow the manufacturer's instructions for installing the underlayment.
Step 3: Plan Your Layout
Measure and determine the center point of the room. Snap a chalk line or use a laser level to create a perpendicular line from the center point. This line will serve as your starting point for installing the flooring.
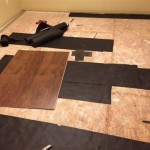
Step 4: Install the First Row
Place spacer blocks along the perimeter of the room to ensure a consistent expansion gap. Start laying the planks from the center point outward, tapping them together with a tapping block or hammer. Ensure that the planks are tightly interlocked and that there are no gaps.
Step 5: Continue Installation
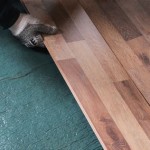
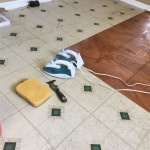
Continue installing the remaining rows in the same manner, staggering the joints for added strength. Use spacer blocks as needed to maintain the expansion gap. If you need to cut a plank to fit, measure twice and cut once. Use a sharp utility knife or a flooring saw for precise cuts.
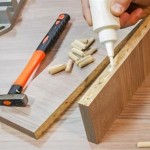
Step 6: Install Trim Pieces
Once the flooring is installed, you will need to trim around baseboards, door frames, and other obstacles. Use a pry bar to lift the edge of the flooring near the obstacle and cut the plank to fit. Install transition strips or molding to cover the expansion gap between the flooring and other surfaces.
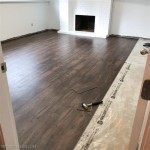
Step 7: Final Touches
Inspect the installed flooring for any loose or damaged planks. Replace any damaged planks as necessary. Vacuum or sweep the floor to remove any debris and install the baseboards, quarter rounds, and any other trim pieces.
Tips for a Successful Installation:
- Allow the flooring to acclimate to the room temperature for 24-48 hours before installation.
- Use a sharp utility knife or flooring saw for precise cuts.
- Tap the planks together firmly but vorsichtig.
- Maintain a consistent expansion gap of 1/4 inch around the perimeter of the room.
- Vacuum or sweep the floor regularly to keep it clean.

How To Install Lifeproof Vinyl Flooring

20 Tips For A Great Vinyl Plank Flooring Installation

Lifeproof Rigid Core Luxury Vinyl Plank Flooring Installation Guide

How To Install Vinyl Plank Flooring Lifeproof Lvp

Installing Vinyl Plank Flooring For Beginners Anika S Diy Life

How To Install Vinyl Flooring Traffic Master Moonstone Rigid Core Plank Diy

How To Install Lifeproof Flooring The Home

Installing Vinyl Plank Flooring Lifeproof Waterproof Rigid Core Sustain My Craft Habit

How To Install Vinyl Plank Flooring Lifeproof Lvp

Lifeproof Rigid Core Luxury Vinyl Plank Flooring Installation Guide
See Also