How to Install Lifeproof Rigid Core Luxury Vinyl Flooring
Installing Lifeproof rigid core luxury vinyl flooring is a relatively easy project that can be completed in a few hours. With a little planning and preparation, you can have a beautiful new floor that will last for years to come.
Tools and Materials
Before you begin, you will need to gather the following tools and materials:
* Lifeproof rigid core luxury vinyl flooring * Utility knife * Measuring tape * Straight edge * Circular saw or miter saw * Hammer or nail gun * Flooring underlayment (optional) * Tape measure * PencilPreparation
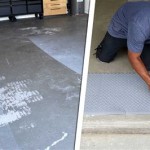
1. Remove all furniture and other objects from the room where you will be installing the flooring. 2. Sweep or vacuum the floor to remove any dust or debris. 3. If you are installing the flooring over an existing floor, make sure that the floor is level and smooth. You may need to use a level to check the floor and a sander to smooth out any uneven areas. 4. If you are installing the flooring over a concrete subfloor, you may need to install a vapor barrier to prevent moisture from seeping up through the floor.
Installation
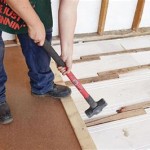
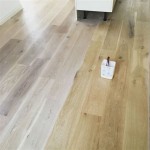
1. Start by measuring the room and cutting the flooring to size. Use a utility knife to score the flooring along the desired cut line, then snap the flooring along the score line. 2. Apply a thin layer of flooring adhesive to the subfloor. 3. Place the first row of flooring planks along the wall, making sure that the planks are flush with the wall. 4. Tap the planks together using a hammer or nail gun. 5. Continue adding rows of planks, tapping them together as you go. 6. Once you have installed all of the flooring, trim any excess flooring around the edges of the room.
Tips
* Use a tapping block to protect the flooring from damage when tapping the planks together. * If you are installing the flooring in a large room, you may want to use a flooring leveler to ensure that the floor is level. * Allow the flooring to acclimate to the room temperature for at least 24 hours before installing it. * Follow the manufacturer's instructions carefully to ensure a successful installation.
Installing Vinyl Plank Flooring Lifeproof Waterproof Rigid Core Sustain My Craft Habit

Diy How To Install Rigid Core Vinyl Plank Flooring Home Decorators Oak

Tools Needed To Install Rigid Core Luxury Vinyl Flooring

20 Tips For A Great Vinyl Plank Flooring Installation

How To Install Lifeproof Vinyl Flooring

Installing Vinyl Plank Flooring Lifeproof Waterproof Rigid Core Sustain My Craft Habit

Installing Lifeproof Vinyl Plank Flooring Our Diy Guide Exquisitely Unremarkable

How To Install Luxury Vinyl Plank Flooring Quick And Simple Casa Watkins Living

Installing Vinyl Plank Flooring Lifeproof Waterproof Rigid Core Sustain My Craft Habit

Diy How To Install Rigid Core Vinyl Plank Flooring Home Decorators Oak
See Also