How to Install Vinyl Plank Flooring in Bathroom Over Tile
Transforming your bathroom floor with vinyl plank flooring is a smart choice for its durability, waterproof nature, and stylish aesthetics. Installing vinyl planks over existing tile adds an extra layer of sophistication and protection to your bathroom. Here's a comprehensive guide to assist you with this DIY project:
Step 1: Preparation
Before you begin, ensure the tile surface is clean, dry, and free of debris and loose grout. Remove any fixtures or obstacles from the bathroom. To ensure a smooth and even installation, level the tile floor using a self-leveling compound if necessary.
Step 2: Underlayment
Install a moisture barrier underlayment over the tiles to protect against moisture and prevent the planks from warping. Use a thin, moisture-proof underlayment that is specifically designed for vinyl flooring.
Step 3: Plan the Layout
Plan the layout of the vinyl planks before installation. Determine the plank orientation (lengthwise or widthwise) and the starting point. Use a chalk line or measuring tape to mark the layout lines on the underlayment.
Step 4: Install the First Plank
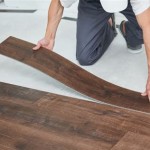
Apply adhesive to the back of the first plank and place it in the designated starting corner. Ensure the plank is aligned with the layout lines. Press it firmly into place using a rolling pin or a tapping block.
Step 5: Continue Laying the Planks
Continue laying the vinyl planks one by one, applying adhesive to each plank before placing it next to the previous one. Use spacers to maintain even gaps between the planks. Stagger the joints between planks to enhance strength.
Step 6: Trim Planks
To fit planks around obstacles like toilets or doorframes, measure and trim them using a utility knife or circular saw. Ensure precise cuts to maintain a professional finish.
Step 7: Install Transition Pieces
Install transition pieces, such as T-mouldings or end caps, to connect the vinyl planks to other flooring materials or to finish the edges. Secure them using nails or adhesive.
Step 8: Seal the Edges
Apply a waterproof sealant around the perimeter of the bathroom, including the baseboards, shower walls, and any other areas where moisture may penetrate. This will prevent water damage and enhance the longevity of your flooring.
Tips for Success
- Use a sharp utility knife for clean cuts.
- Allow the adhesive to dry fully before applying weight on the floor.
- Clean up excess adhesive immediately using a damp cloth.
- Protect the floor from heavy traffic or moisture for the recommended time period after installation.
- Regularly clean and maintain the vinyl plank flooring according to the manufacturer's instructions to ensure its longevity.
Conclusion
Installing vinyl plank flooring over tile in your bathroom is a rewarding DIY project that can transform the space. By following these steps and adhering to the tips provided, you can achieve a durable, waterproof, and stylish floor that will elevate the aesthetics and functionality of your bathroom for years to come.

How To Install Vinyl Plank Floors In A Bathroom Over Tile

How To Install Vinyl Plank Flooring In A Bathroom Fixthisbuildthat

How To Install Vinyl Plank Flooring In A Bathroom Fixthisbuildthat

How To Install Vinyl Plank Flooring In A Bathroom

How To Install Vinyl Plank Flooring In A Bathroom Fixthisbuildthat

How To Install Vinyl Plank Flooring As A Beginner Home Renovation

Installing Vinyl Plank Flooring Lifeproof Waterproof Rigid Core Sustain My Craft Habit

Install L And Stick Vinyl Floor Planks In The Bathroom More To Mrs E

Should You Install Vinyl Floor Over Tile

Installing Vinyl Plank Flooring Lifeproof Waterproof Rigid Core Sustain My Craft Habit
See Also


