Installing Vinyl Flooring Planks: A Step-By-Step Guide
Vinyl flooring planks have surged in popularity as a stylish and durable flooring option. Installing them might seem daunting at first, but with the right tools and know-how, you can achieve professional-looking results. Follow this step-by-step guide to install vinyl flooring planks like a pro.
Tools and Materials You'll Need:
- Vinyl flooring planks
- Underlayment (optional)
- Measuring tape
- Utility knife
- Tapping block
- Rubber mallet
- Spacers
- Circular saw or miter saw (for cutting planks)
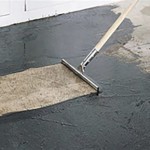
Step 1: Prepare the Subfloor
Ensure that your subfloor is level, smooth, and dry. Remove any existing flooring, carpet, or baseboards. If the subfloor is not level, you may need to level it using a self-leveling compound or plywood sheets.
Step 2: Install the Underlayment (Optional)
An underlayment can provide additional cushioning and sound insulation. If using underlayment, roll it out over the subfloor, overlapping the edges slightly. Secure it with tape or staples.
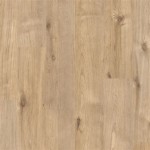
Step 3: Measure and Cut the Planks
Measure the width and length of the room and add a few extra inches for cutting and trimming. Using a utility knife, score and snap the planks to the desired size. For angled cuts, use a circular saw or miter saw.
Step 4: Plan the Layout
Plan the layout of the planks to minimize waste. Start from the center of the wall and work your way towards the edges. For a more staggered look, offset the seams by half a plank.
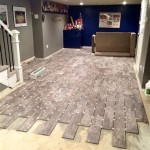
Step 5: Install the First Row
Place a spacer along the wall to maintain a consistent gap. Insert the first plank into the corner and tap it into place with a tapping block and rubber mallet. Continue adding planks, connecting them using their locking system.
Step 6: Continue Laying the Rows
For each subsequent row, stagger the seams and insert the planks into the locking system. Tap them into place using the tapping block and mallet. Use spacers to ensure even gaps around the edges.
Step 7: Cut and Install Around Obstacles
For obstacles such as pipes or door frames, carefully measure and cut the planks using a utility knife. Use a tapping block and mallet to secure the cut pieces around the obstacle.
Step 8: Install Baseboards and Trim
Once all the planks are installed, remove the spacers and install baseboards or trim around the edges of the room. This will conceal the expansion gap and complete the look.
Tips for Success:
- Accurately measure and cut the planks to avoid gaps or overlaps.
- Use a tapping block to distribute force evenly when tapping the planks into place.
- Stagger the seams of the planks for a more cohesive look.
- Allow the flooring to acclimate to the room temperature for 24-48 hours before installation.
- Clean the flooring regularly with a damp mop or vacuum to maintain its appearance.

Installing Vinyl Plank Flooring For Beginners Anika S Diy Life

Step By Guide For Hybrid Flooring Installation The Guys

Your Step By Guide How To Install Luxury Vinyl Plank Wc Supply Whole Cabinet

A Beginner S Guide To Installing Vinyl Plank Flooring Dumpsters Com

Laying Vinyl Planks The Right Way Expert Guide By Fantastic Handyman

Post Nbl Express Eco Flooring

How To Install Vinyl Plank Flooring Few Simple Steps Guide

Installing Vinyl Plank Flooring Step By Guide Homeserve Usa

Simple To Use Step By Guide For Installing Vinyl Plank Everywhere

Installing Vinyl Floors A Do It Yourself Guide The Honeycomb Home
See Also