Essential Aspects of Engineered Wood Flooring Installation Guide
Engineered wood flooring offers an elegant and durable option for homeowners looking to enhance their interior spaces. Installing engineered wood flooring requires precise preparation, careful installation, and proper maintenance. This comprehensive guide will provide you with the essential steps to ensure a successful engineered wood flooring installation.
1. Pre-Installation Preparation
Before beginning the installation process, it is crucial to prepare the subfloor and the engineered wood planks. Ensure that the subfloor is level, dry, and free from any irregularities. If necessary, use a moisture barrier to protect the flooring from moisture damage.
2. Acclimation
Engineered wood flooring requires acclimation to the environment where it will be installed. Remove the flooring planks from their packaging and stack them loosely in the room where they will be installed. Allow the planks to acclimate for at least 48 hours before beginning the installation.
3. Subfloor Preparation
The subfloor must be properly prepared to ensure a stable and durable flooring installation. Remove any existing flooring, nails, or debris. Level the subfloor using a self-leveling compound or a floating underlayment system.
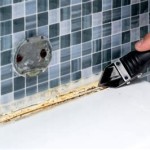
4. Underlayment and Moisture Barrier
Install an underlayment beneath the engineered wood flooring to provide additional cushioning and soundproofing. Choose an underlayment designed for engineered wood flooring to ensure compatibility. In areas prone to moisture, install a moisture barrier to protect the flooring from moisture damage.
5. Plank Installation
Begin the plank installation along a parallel wall. Use a spacer to maintain a consistent gap between the planks and the wall. Tap the planks together using a tapping block and a hammer or flooring nailer. Ensure that the planks are securely interlocked and flush with each other.
6. Cutting and Fitting
Cut the planks to fit around obstacles such as doors, walls, and cabinets. Use a jigsaw or circular saw to make precise cuts. Use a pry bar to gently fit the planks into tight spaces or around obstacles.
7. Edge Trim and Moldings
Install edge trim or moldings around the perimeter of the room to cover the expansion gap between the flooring and the wall. Choose moldings that complement the flooring and create a finished look.
8. Cleaning and Maintenance
After installation, clean the engineered wood flooring with a soft cloth and a cleaning solution specifically designed for engineered wood flooring. Sweep and vacuum regularly to maintain the flooring's appearance. Avoid using harsh chemicals or abrasive cleaners.
Conclusion
Installing engineered wood flooring requires careful planning, precise installation, and proper maintenance. By following the essential steps outlined in this guide, you can achieve a beautiful and durable engineered wood flooring that will enhance your home for years to come.

Installation Guide How To Install Engineered Timber Flooring

The Ultimate Guide To Engineered Hardwood Flooring Precision

Step By Installation Guide For Wood Floor Tiles

How To Install Lock Engineered Hardwood Flooring

How To Install Lock Engineered Hardwood Flooring

Installing V4 Wood Flooring Installation Guides

Guide How To Install A Solid Hardwood Floor

How To Install Hardwood Flooring For Beginners

Engineered Timber Flooring Installation Guide Cq

Engineered Wood Flooring Size Guide Bvg
See Also