How to Install Ceramic Tile on a Basement Floor: A Guide for Flawless Results
Transforming your basement floor with ceramic tile adds both aesthetic appeal and durability. While the process may seem daunting, it's achievable with careful planning and execution. Here's a comprehensive guide to guide you through the essential aspects of installing ceramic tile on a basement floor.
1. Prepare the Basement Floor
Begin by ensuring the basement floor is smooth, flat, and free from debris. Use a level to check for any irregularities and fill in any low spots using a self-leveling compound. If the floor has any cracks or damage, repair them before tiling.
2. Choose the Right Ceramic Tile
Selecting the appropriate ceramic tile is crucial. Opt for high-density, moisture-resistant tiles designed specifically for basement installations. Consider the overall design scheme, the amount of foot traffic, and your budget when making your choice.
3. Gather the Necessary Materials
Before starting, gather all the essential materials, including ceramic tiles, thin-set mortar, grout, a notched trowel, a tile saw or wet cutter, spacers, a level, a measuring tape, and a rubber mallet. Additionally, you may need a backer board if your basement floor is not properly prepared.
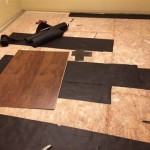
4. Install a Backer Board (Optional)
If your basement floor is made of wood or has any imperfections, installing a backer board provides a stable surface for the tiles. Use screws to secure the backer board onto the floor, leaving about 1/8 inch of space between the panels.
5. Apply Thin-Set Mortar
Using a notched trowel, apply thin-set mortar to the prepared floor. Start from one corner of the room and work your way outward. Spread the mortar evenly, leaving enough coverage for the tiles and spacers.
6. Lay the Ceramic Tiles
Carefully lay the ceramic tiles into the thin-set mortar. Use tile spacers to ensure even spacing between the tiles and maintain a consistent pattern. Use a level to check for any irregularities and adjust the tiles accordingly.
7. Grout the Tiles
Once the tiles are set, allow the thin-set mortar to dry for at least 24 hours. Prepare the grout by mixing it with water according to the manufacturer's instructions. Using a grout float, apply the grout to the tile joints, filling them completely. Wipe away excess grout with a damp sponge.
8. Seal the Tiles
To protect the tiles from moisture and stains, apply a tile sealer to the surface. Use a brush or roller to evenly apply the sealer and allow it to dry completely.
9. Care and Maintenance
To keep your ceramic tile floor looking its best, follow these maintenance tips: - Sweep or vacuum the floor regularly to remove dust and debris. - Mop the floor with a mild detergent solution. - Avoid using abrasive cleaners or scouring pads. - Seal the tiles periodically to maintain their protective coating.
By following these steps carefully, you can successfully install ceramic tile on your basement floor, creating a stylish and durable addition to your home.
How To Install Ceramic Tiles On Concrete Floor Tile Installation

How To Install Ceramic Tiles On Concrete Floor Tile Installation
:max_bytes(150000):strip_icc()/can-you-install-tile-directly-on-concrete-1822600-04-458f7bb6c78348c1835cf8054ef36553.jpg?strip=all "How To Install Tile Over Concrete")
How To Install Tile Over Concrete

How To Install Ceramic Tiles On Concrete Floor Tile Installation

Complete Guide On How To Install Ceramic Floor Tiles Rubi Blog Usa

Complete Guide On How To Install Ceramic Floor Tiles Rubi Blog Usa

How To Tile A Concrete Basement Floor The Grout Medic

Tiling Over A Ed Concrete Slab Fine Homebuilding

How To Install Ceramic Tiles On Concrete Floor Tile Installation

How To Tile Onto Concrete Floors Porcelain Super
See Also