How To Remove Laminate Floor Tiles
Laminate flooring offers an affordable and aesthetically pleasing alternative to hardwood. However, like all flooring materials, it eventually requires replacement due to wear and tear or style preferences. Removing laminate flooring is a manageable DIY project with the right tools and techniques. This guide provides a comprehensive step-by-step process for successful laminate floor tile removal.
Preparation is Key. Before beginning the removal process, gather the necessary tools and prepare the work area. Essential tools include a pry bar, hammer, safety glasses, work gloves, a utility knife, and dust masks. A pull bar, specifically designed for removing flooring, can significantly expedite the process. Clear the room of furniture and any other obstructions. Covering remaining furniture with drop cloths helps prevent dust accumulation.
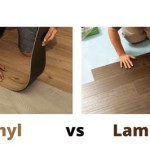
Understanding the Laying Method. Laminate flooring typically utilizes either a glue-down or click-lock installation method. Click-lock systems are significantly easier to remove, as the planks interlock without adhesive. Glue-down installations require more effort and specialized tools, such as a floor scraper, to separate the planks from the subfloor.
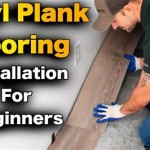
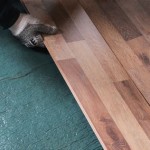
Starting the Removal Process: Click-Lock Systems. Locate a corner or edge of the room. Using a pry bar, gently lift the edge of the first plank. The goal is to disengage the interlocking mechanism connecting it to adjacent planks. Once the initial plank is loose, the remaining planks in the row can usually be lifted and removed by hand. Continue removing rows methodically, working across the room.
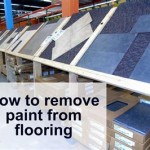
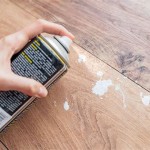
Starting the Removal Process: Glue-Down Installations. Glue-down laminate requires more care during removal to avoid damaging the subfloor. Begin by scoring the surface of the laminate with a utility knife. This helps break the adhesive bond and allows the pry bar to access the underside of the plank. Gently insert the pry bar beneath the plank and apply leverage to lift it. A floor scraper can assist in removing stubborn adhesive residue from the subfloor.
Dealing with Difficult Areas. Around door frames and other tight spaces, a smaller pry bar or a putty knife may be necessary for precise maneuvering. Exercise patience and avoid excessive force, which can damage the surrounding structures. In cases of extremely stubborn adhesive, a heat gun can soften the glue, making removal easier. However, exercise caution when using a heat gun, as excessive heat can damage the subfloor.
Underlayment Removal. Once the laminate flooring is removed, inspect the underlayment. If the underlayment is in good condition, it can often be left in place for future flooring installations. However, if the underlayment is damaged or deteriorated, removal is necessary. Underlayment is typically stapled or glued to the subfloor. Use a pry bar or pliers to remove staples and a floor scraper to remove any adhesive residue.
Subfloor Preparation. After removing the underlayment (if necessary), the subfloor should be clean and level. Scrape away any remaining adhesive, debris, or staples. Fill any gaps or imperfections with a suitable floor patching compound. A smooth and level subfloor is crucial for the successful installation of new flooring.
Waste Disposal. Dispose of the removed laminate flooring and other debris responsibly. Check local regulations for proper disposal methods. Some municipalities may require specific procedures for construction waste disposal. Consider recycling options if available.
Safety Considerations. Throughout the removal process, prioritize safety. Wear appropriate safety gear, including safety glasses and work gloves. Dust masks are essential, especially when dealing with older laminate flooring, which may contain asbestos. If asbestos is suspected, consult a professional for safe removal and disposal.
Addressing Specific Challenges. Different types of laminate flooring may present unique challenges during removal. Thicker planks may require more leverage for removal, while thinner planks may be more prone to breakage. Be aware of these variations and adjust your techniques accordingly. Consulting manufacturer guidelines for specific product recommendations is always advisable.
Tool Maintenance. Maintaining the tools used in the removal process ensures their longevity and effectiveness. Clean any adhesive residue from pry bars and scrapers immediately after use. Sharpen dull utility knife blades for optimal cutting performance. Proper tool maintenance contributes to a smoother and more efficient removal process in the future.

How To Remove Laminate Flooring The Home

How To Remove Laminate Flooring A Step By Guide Mersey

How To Remove L And Stick Floor Tile A Erfly House

How To Remove Laminate Flooring Budget Dumpster

How Do I Remove Laminate Flooring Factory Direct

Diy Guide Step By Tutorial For Removing Vinyl Tile Flooring That S Glued Down Lx Hausys

How To Remove Laminate Flooring 1905 Farmhouse

How To Remove Vinyl Flooring The Home

How To Remove Vinyl Flooring Twenty Oak

How To Remove Self Adhesive Vinyl Floor Planks L And Stick Pvc Tiles
See Also