How To Replace Laminate Floor Panels
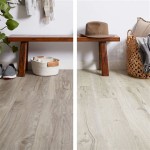
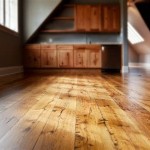
Laminate flooring offers an attractive and durable flooring solution for many homes. However, accidents and wear and tear can necessitate the replacement of individual panels. This guide provides a comprehensive approach to replacing damaged laminate floor panels, minimizing disruption and maintaining the floor's aesthetic appeal.
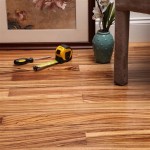
Before beginning the replacement process, gather the necessary tools and materials. These include a utility knife, pry bar, tapping block, pull bar, measuring tape, safety glasses, hammer, replacement laminate planks, and potentially a saw for cutting planks to size if necessary.
The first step involves identifying the damaged plank and the surrounding area. Carefully examine the locking mechanism of the laminate flooring. Different laminate flooring systems employ varying locking mechanisms, understanding which type is installed is crucial for successful removal and replacement.
Begin the removal process by clearing the area of any furniture or obstructions. Then, using the pry bar and tapping block, gently lift the plank adjacent to the damaged one. The goal is to disengage the locking mechanism. Proceed with caution to avoid damaging surrounding planks. Once the adjacent plank is lifted, the damaged plank can be more easily removed. Depending on the locking system, it might be necessary to angle and lift the damaged plank to detach it from the surrounding planks.
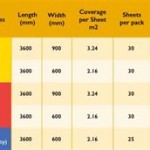
Once the damaged plank is removed, prepare the replacement plank. If a full plank is not required, measure and cut the new plank to the appropriate size using a saw. Ensure the cut is clean and precise to maintain the integrity of the flooring.
Installation of the new plank requires careful maneuvering to engage the locking mechanism. Angle the new plank and slide the tongue edge into the groove of the previously lifted adjacent plank. Gently lower the plank and use the tapping block to ensure a secure fit. The tapping block helps distribute the force evenly, preventing damage to the new plank's edges. Once the new plank is in place, ensure it lies flush with the surrounding floor. Use the pull bar if necessary to tighten the connection between the new plank and its adjacent pieces, ensuring a seamless finish.
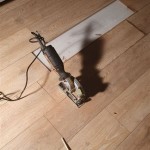
If the damaged plank is located in the middle of the floor, a different approach is necessary. This involves cutting out the damaged section of the plank without removing the entire plank. Using a utility knife, score a rectangle slightly smaller than the damaged area within the plank. Ensure the cuts are deep enough to penetrate the decorative layer and the core material. Then, carefully chisel out the scored section, removing the damaged portion.
Prepare a replacement piece that matches the removed section. Ensure accurate measurements for a proper fit. Apply a strong wood glue to the edges of the cut-out area and carefully insert the replacement piece. Use clamps or weights to secure the piece while the glue dries. Ensure the patch lies flush with the surrounding plank.
After the glue has dried completely, remove the clamps or weights. Inspect the repaired area to ensure a seamless and level finish. Lightly sand any uneven edges and clean the area to remove any excess glue or debris.
Replacing laminate flooring panels requires precision and patience. Addressing damaged planks promptly prevents further damage and maintains the floor's overall appearance. Understanding the specific locking mechanism of the installed flooring is critical for successful removal and replacement. Following these steps will help achieve professional-looking results and extend the lifespan of the laminate flooring.
Different laminate flooring systems may require slightly different techniques. Consulting the manufacturer's instructions for the specific flooring product is always recommended. This ensures the correct procedures are followed and helps avoid potential issues during the replacement process.
Regular maintenance, such as sweeping and occasional mopping with appropriate cleaning solutions, helps prolong the life of laminate flooring and minimizes the risk of damage. Protective measures like using furniture pads and floor mats in high-traffic areas can also prevent scratches and other damage that might necessitate panel replacement.
While replacing individual panels is often a manageable DIY project, extensive damage or complex situations may require professional assistance. Consulting a flooring specialist is advisable if the damage is widespread or if there are concerns about the structural integrity of the subfloor.
Properly maintaining and addressing damage promptly contributes significantly to the longevity and aesthetic appeal of laminate flooring. Following these guidelines ensures a successful repair and minimizes future issues.

How To Install Laminate Flooring For Beginners

How To Repair Laminate Flooring The Home

How To Replace A Vinyl Plank With Tongue And Groove Locking System

How To Replace A Damaged Laminate Board That S In The Middle Of Floor

How To Repair Laminate Flooring The Home

Laminate Floor Installation For Beginners 9 Clever Tips

How To Install The Laminate Floor

How To Repair Laminate Flooring The Home

How To Repair Laminate Flooring The Home

How To Replace Lock Vinyl Flooring
See Also