How To Install Garage Floor Mats
Garage floor mats provide a durable, protective layer against stains, spills, and wear. They also enhance the appearance of the garage and can offer increased comfort underfoot. Proper installation ensures the mats function effectively and remain securely in place. This article provides a comprehensive guide to installing various types of garage floor mats.
Before beginning the installation process, it is essential to prepare the garage floor. This preparation ensures optimal adhesion and prevents issues later. Begin by thoroughly cleaning the garage floor. Remove any loose debris, dust, and dirt using a broom, shop vacuum, or leaf blower. For oil or grease stains, a degreaser specifically designed for concrete is recommended. Apply the degreaser according to the manufacturer’s instructions and allow it to dwell for the appropriate amount of time before rinsing thoroughly.
Once the floor is clean and dry, any cracks or imperfections should be addressed. Minor cracks can be filled with a concrete patching compound. Larger cracks or damaged areas may require professional repair. Allow sufficient drying time for any repairs before proceeding with the mat installation. A level floor is crucial for proper mat placement and to prevent tripping hazards. Significant unevenness in the floor may require professional leveling.
Accurate measurements of the garage floor are essential for selecting the correct size mats. Measure the length and width of the garage, noting any obstructions such as columns or built-in cabinets. These measurements will determine the necessary mat size and configuration. If using interlocking tiles, calculate the number of tiles needed based on the floor dimensions and tile size. For roll-out mats, ensure the chosen roll width adequately covers the garage floor.
Interlocking tiles are a popular choice for garage flooring due to their ease of installation and customization. Begin by laying out the tiles in the desired configuration to ensure proper fit and coverage. Start from the center of the garage and work outward, ensuring the tiles interlock securely. Most interlocking tiles require no adhesive, relying on their weight and interlocking design to stay in place. However, some manufacturers may recommend or offer optional adhesive for added security, particularly in areas with heavy traffic or potential moisture exposure.
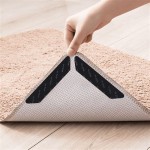
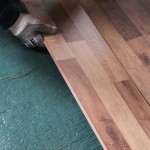
Roll-out mats offer a seamless and quick installation option. Unroll the mat in the center of the garage, allowing it to relax and flatten. Position the mat carefully, ensuring even coverage and proper alignment with the garage walls. Trim any excess material using a sharp utility knife or scissors. Some roll-out mats are designed to lie flat under their own weight, while others may require double-sided tape or adhesive along the edges or in specific areas to prevent shifting or curling. Follow the manufacturer's instructions for specific adhesive recommendations.
Heavy-duty rubber mats are designed for maximum durability and resilience to heavy loads and chemicals. These mats are often thicker and denser than standard roll-out or interlocking tiles. Positioning and alignment are crucial due to their weight. Unroll the mat in the desired location and carefully adjust its position to ensure even coverage. Heavy-duty mats may require adhesive for secure placement. Apply adhesive according to the manufacturer’s instructions, paying particular attention to the edges and corners. Some heavy-duty mats may require weights or anchoring systems for added stability, particularly in areas with frequent vehicular traffic.
Regardless of the mat type installed, allowing adequate time for the mats to settle and any adhesive to cure fully is important. Avoid heavy traffic or placing objects on the mats for the period recommended by the manufacturer. This allows the mats to conform to the floor surface and ensures optimal adhesion. Once the mats are fully settled, they can withstand regular garage activities.
Regular maintenance will prolong the life and effectiveness of the garage floor mats. Sweep or vacuum the mats regularly to remove loose debris and dirt. For spills or stains, promptly clean the affected area using a mild detergent and water. Avoid using harsh chemicals or abrasive cleaners, which can damage the mat surface. For tougher stains, consult the manufacturer's recommendations for specific cleaning solutions. Periodic deep cleaning, following the manufacturer’s guidelines, will maintain the appearance and functionality of the garage floor mats.
By following these detailed steps and paying attention to the specific requirements of the chosen mat type, a successful and long-lasting garage floor mat installation can be achieved. This will provide a clean, organized, and protected garage floor for years to come.

Garage Floor Installation Guide Tiles Rolls And

How To Install Garage Floor Tiles The Ultimate Flooring

How To Install Garage Flooring Rolls

How To Install Plastic Garage Flooring Raised Tile Floor Guide

Here S How You Fit Interlocking Garage Floor Tiles Step By Quick Easy Gftc

Garage Floor Tiles Installation Syn X Synthetic Experts

How To Install Garage Floor Tile Motordeck Example

How To Install Rubber Flooring On Concrete Inc

How To Install Garage Flooring Ecotile Interlocking Floor Tiles In Small

Installation With G Floor Vinyl Flooring
See Also