How To Replace Laminate Floor Boards
Replacing damaged or worn laminate floorboards is a manageable DIY project that can significantly improve a room's aesthetic. This article provides a comprehensive guide to replacing individual planks, offering a cost-effective alternative to replacing the entire floor.
Before beginning the replacement process, gather the necessary tools and materials. These include a tapping block, pull bar, rubber mallet, pry bar, utility knife, measuring tape, safety glasses, and replacement laminate planks. Ensure the replacement planks match the existing flooring in color, texture, and thickness. Purchasing extra planks is recommended to account for potential cutting errors or future repairs.
The first step involves isolating the damaged plank. Begin by removing the baseboard or quarter-round molding closest to the damaged board. This provides access to the edge of the flooring and facilitates plank removal. Use a pry bar to carefully lift the molding, minimizing damage for later reinstallation.
Once the molding is removed, the next step is to disengage the damaged plank. Laminate flooring utilizes a click-lock system. The plank must be angled upwards to release it from the adjacent boards. A pull bar and tapping block are essential tools for this process. The pull bar is inserted into the short end of the damaged plank, close to the wall. Gentle tapping with the rubber mallet on the tapping block, placed against the pull bar, helps lift the plank and disengage the locking mechanism. This process may require patience and careful maneuvering, especially for planks located near walls.
With the damaged plank disengaged at the short end, the next step is to work along the long side of the board. Carefully angle the plank upwards, disengaging it from the adjacent boards. The pull bar can be used along the long edge to assist with this process. Continue to lift and separate the plank until it is completely free from the surrounding flooring.
After removing the damaged plank, prepare the replacement plank for installation. Measure the area where the new plank will be placed to ensure a precise fit. If necessary, cut the replacement plank to size using a utility knife and a straight edge. Scoring the plank multiple times before snapping it along the scored line ensures a clean cut.
Before inserting the new plank, examine the tongue and groove of the surrounding planks. Any remaining fragments of the old plank's tongue or groove must be removed to ensure a smooth and secure fit. Use a utility knife to carefully clean the edges of the adjoining boards.
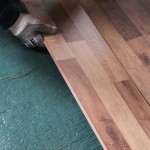
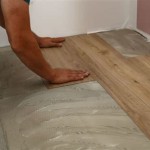
Begin installing the replacement plank by inserting the tongue of the long edge into the groove of the adjacent board at a slight angle. Lower the plank gently until the click-lock mechanism engages. Use the tapping block and rubber mallet to fully secure the long edge. Ensure the plank lies flush with the surrounding flooring.
Next, engage the short end of the replacement plank with the adjacent board. Again, insert the tongue into the groove at an angle and gently lower the plank until the click-lock mechanism engages. The tapping block and rubber mallet can be used to secure the short end. Ensure proper alignment and a tight fit with the surrounding floorboards.
Once the replacement plank is fully installed, reinstall the baseboard or quarter-round molding. Use finishing nails to secure the molding in place. If necessary, fill any nail holes with wood putty and touch up the paint to match the existing trim.
Replacing multiple contiguous planks requires a similar process, beginning with the removal of the outermost plank. Each subsequent plank is then removed, working towards the center of the damaged area. Installation of the new planks begins with the innermost board, working outwards towards the edges of the repaired area. Ensure proper alignment and engagement of the click-lock system throughout the process.
Regular maintenance can prolong the lifespan of laminate flooring and reduce the need for board replacement. Avoid excessive moisture, use protective felt pads under furniture legs, and sweep or vacuum regularly to remove dirt and debris. Promptly addressing spills and avoiding dragging heavy objects across the floor can also prevent damage.

How To Replace Warped Water Damaged Laminate Floor Boards

Replace A Damaged Board In Laminate Floor Rw Supply Design

How To Replace Damaged Flooring Plank Diy

How To Fix A De Laminated Board Without Removing The

How To Replace A Damaged Laminate Board That S In The Middle Of Floor

How To Do A Laminate Board Replacement On Floor Step By

How To Replace Lock Vinyl Flooring

How To Install Laminate Flooring For Beginners

How To Replace A Damaged Hardwood Floor Board Diy Family Handyman

How To Repair Laminate Flooring The Home
See Also