How To Replace A Few Laminate Floor Boards
Laminate flooring offers a durable and aesthetically pleasing surface for homes and businesses. However, accidents and wear can sometimes necessitate the replacement of a few damaged boards. This process, while requiring patience and precision, is achievable for most homeowners with basic DIY skills. This guide offers a comprehensive step-by-step approach to replacing damaged laminate floorboards.
Necessary Tools and Materials: Before beginning the replacement process, gather the necessary tools and materials. This preparation ensures a smoother and more efficient workflow. The essential items include a tapping block, pull bar, safety glasses, measuring tape, utility knife, pry bar, pencil, replacement laminate boards, hammer, and potentially a circular saw or jigsaw depending on the location of the damaged boards.
Locating the Damaged Boards: Identifying the damaged boards is the first step. Carefully inspect the affected area for signs of damage like chips, cracks, deep scratches, or warping. Mark these boards clearly for easy identification during the removal process.
Disassembling the Affected Area: Begin by removing the baseboard or quarter-round molding closest to the damaged boards. A pry bar is useful for this task, gently prying the molding away from the wall to avoid damage. Depending on the installation method (glue-down or click-lock), different approaches are required. For glue-down installations, a solvent designed for laminate flooring adhesive may be necessary to loosen the boards. Click-lock systems require careful separation of the boards, starting from the edge of the room and working towards the damaged area.
Removing the Damaged Boards: Once the surrounding area is disassembled, the damaged boards can be removed. For click-lock systems, carefully angle and lift the boards to disengage the locking mechanism. For glue-down boards, a pry bar may be necessary to lift the damaged boards. Extreme care should be taken to avoid damaging adjacent boards during this process. A tapping block can be used to protect the edges of surrounding boards while applying pressure.
Preparing the Replacement Boards: After removing the damaged boards, measure the area to ensure the replacement boards are the correct size. If the damaged boards are in the middle of a row, the replacement boards may need to be cut to fit. A circular saw or jigsaw fitted with a fine-toothed blade designed for laminate flooring should be used for precise cutting. Remember to always wear safety glasses when operating power tools. The cut edges should be smooth and clean for proper fitting.
Installing the Replacement Boards: With the replacement boards prepared, the installation process can begin. For click-lock systems, angle the replacement board and insert the tongue into the groove of the adjacent board. Gently lower the board until it clicks into place. A tapping block and hammer can be used to ensure a tight and secure connection. For glue-down installations, apply a thin layer of laminate flooring adhesive to the subfloor and carefully position the replacement board. Ensure the board is aligned correctly and apply pressure to secure it in place. Follow the adhesive manufacturer's instructions for drying times.
Reassembling the Floor: Once the replacement boards are securely installed, the surrounding boards can be reassembled. For click-lock systems, carefully engage the locking mechanisms, ensuring a tight fit between all boards. For glue-down installations, ensure proper alignment and apply pressure until the adhesive sets. Replace the baseboard or quarter-round molding using finishing nails.
Clean Up: After the replacement is complete, thoroughly clean the area. Remove any debris, dust, or adhesive residue. This final step ensures a seamless and professional-looking finish.
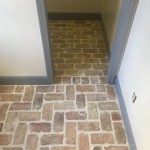
Addressing Complex Scenarios: Replacing boards near walls or doorways may require more intricate cutting and fitting. In these situations, carefully measure and mark the boards to ensure a precise fit. It may be necessary to undercut door jambs to allow the new flooring to slide underneath. A jamb saw is a helpful tool for this task.
Preventing Future Damage: Implementing preventative measures can help extend the lifespan of laminate flooring and minimize the need for future repairs. Using furniture pads under heavy objects helps prevent scratches and dents. Regularly sweeping and cleaning prevents the buildup of dirt and grit which can also contribute to wear and tear. Placing mats at entrances can help trap dirt and moisture, protecting the flooring from damage. Addressing spills promptly prevents moisture from seeping into the seams and causing warping or swelling.
Seeking Professional Assistance: While replacing a few laminate floor boards is often manageable for DIY enthusiasts, complex repairs or extensive damage may require professional assistance. Consulting a qualified flooring installer ensures the job is completed correctly and efficiently.

Laminate Floor Repair Diy Family Handyman

How To Replace A Damaged Laminate Board That S In The Middle Of Floor

How To Repair Laminate Flooring The Home

Laminate Floor Repair Diy Family Handyman

How To Replace Damaged Flooring Plank Diy

How To Do A Laminate Board Replacement On Floor Step By

How To Replace Warped Water Damaged Laminate Floor Boards

Laminate Floor Repair Diy Family Handyman

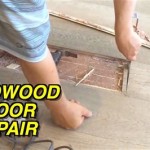
How To Replace A Damaged Hardwood Floor Board Diy Family Handyman

How To Repair Laminate Flooring The Home
See Also