How To Replace a Laminate Floor Board
Laminate flooring offers an attractive and durable alternative to traditional hardwood. Its click-and-lock system simplifies installation and, thankfully, also simplifies repairs. Replacing a single damaged board, rather than the entire floor, is often possible, saving time and money. This process requires careful execution to maintain the floor's integrity and appearance.
Before beginning, gather the necessary tools. These typically include a circular saw, a jigsaw, a pry bar, a tapping block, a pull bar, safety glasses, a hammer, a utility knife, a measuring tape, and a pencil. Having the correct tools readily available streamlines the process and prevents unnecessary interruptions.
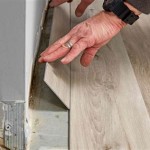
The first step involves isolating the damaged board. Begin by scoring the damaged plank with a utility knife along the edges where it joins adjacent planks. This step is crucial to prevent damage to the surrounding boards during removal. Multiple passes with the utility knife may be necessary to fully cut through the laminate layer.
Next, carefully cut out the majority of the damaged board using a circular saw. Set the saw blade depth slightly deeper than the laminate thickness to avoid scratching the subfloor. Make several parallel cuts along the length of the board, leaving a small border around the edges. This technique minimizes vibration and reduces the risk of chipping the surrounding planks.
The remaining border of the damaged board can be removed using a jigsaw. This allows for greater precision in tight areas near the adjacent planks. Angle the jigsaw blade slightly downward to prevent it from scratching the neighboring boards. Carefully work around the perimeter until the central portion of the damaged plank is free.
Remove the remaining border pieces. A pry bar can be helpful in gently lifting and removing these sections. Insert the pry bar between the cut pieces and the subfloor, applying gentle upward pressure to avoid damaging the surrounding laminate. Exercise caution during this step, as the remaining pieces may be brittle and prone to splintering.
Once the damaged board is removed, clean the area thoroughly. Remove any remaining debris, adhesive residue, or splinters from the subfloor. A clean surface is essential for proper installation of the replacement board.
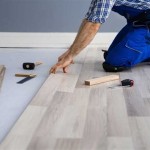
Prepare the replacement board. Using the old board as a template, carefully measure and mark the dimensions of the new plank. It's essential to account for the tongue and groove system of the laminate, ensuring a proper fit within the existing flooring. Cut the replacement board to the correct size using a circular saw or jigsaw, following the previously marked lines.
Remove the bottom lip of the groove on the long side of the replacement board. This is typically done using a utility knife or saw. This modification allows the replacement plank to be angled and inserted into the existing flooring. Precision during this step is vital for a seamless fit.
Angle the replacement board and slide the long edge with the removed lip into the existing flooring. The angled insertion allows the tongue-and-groove system to engage. Use a tapping block and hammer to gently tap the new board into place. The tapping block protects the edge of the plank from damage and ensures even pressure distribution.
Once the long edge is securely engaged, lower the replacement board to the floor. Use a pull bar to ensure a tight fit against the adjacent planks. Position the pull bar against the edge of the new board and carefully tap it with a hammer to close any gaps. This step ensures a seamless transition and prevents future issues.
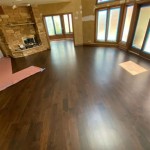
Inspect the replaced board. Check for any gaps or unevenness. The replacement plank should lie flush with the surrounding flooring. Addressing any imperfections at this stage will ensure the longevity and aesthetic appeal of the repair.
Finally, clean the area one last time to remove any dust or debris generated during the replacement process. This final cleaning ensures the repaired area blends seamlessly with the existing flooring.
While replacing a single laminate board can be a DIY project, complex repairs or extensive damage may require professional assistance. Consulting a flooring specialist is recommended if the damage is widespread or if there is uncertainty about any step of the process.

Laminate Floor Repair Diy Family Handyman

How To Replace Damaged Flooring Plank Diy

How To Do A Laminate Board Replacement On Floor Step By

How To Replace Lock Vinyl Flooring

How To Replace Warped Water Damaged Laminate Floor Boards

How To Replace A Damaged Laminate Board That S In The Middle Of Floor

Replace A Damaged Board In Laminate Floor Rw Supply Design

How To Fix A De Laminated Board Without Removing The

How To Repair Laminate Flooring The Home

How To Replace A Floorboard Fine Homebuilding
See Also