How to Repair a Damaged Laminate Floor Plank
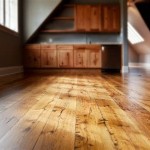
Laminate flooring offers an attractive and affordable alternative to hardwood. However, it is susceptible to damage from scratches, dents, and spills. Fortunately, minor damage often doesn’t necessitate replacing the entire floor. Repairing individual planks can restore the floor’s appearance and prevent further issues. This guide outlines how to repair a damaged laminate floor plank, depending on the type of damage.
Assessing the Damage
Before attempting any repair, assess the type and extent of the damage. This assessment will determine the appropriate repair method.
Minor scratches or scuffs can often be addressed with readily available repair kits. Deeper scratches, chips, or dents might require replacing the affected plank. If the damage is extensive or covers a large area, professional assistance may be necessary.
Repairing Minor Scratches and Scuffs
Minor imperfections on the surface of a laminate plank can often be repaired with a laminate floor repair kit. These kits typically contain a wax crayon or filler that matches the color of the floor.
Clean the damaged area with a damp cloth to remove any dirt or debris. Apply the repair crayon or filler according to the manufacturer's instructions. Blend the repair material carefully to match the surrounding area.
Repairing Deeper Scratches and Chips
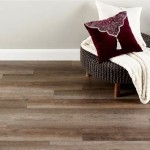
For deeper scratches and chips that penetrate the surface layer, a laminate floor repair paste can be used. This paste comes in various colors and fills the damaged area, providing a more substantial repair.
Clean the area thoroughly, removing any loose pieces. Apply the repair paste to the damaged area, smoothing it with a putty knife. Allow the paste to dry completely according to the manufacturer's instructions. Once dry, the repaired area can be lightly sanded and blended in with the surrounding floor.
Replacing a Damaged Plank
When a plank is severely damaged, replacing it is usually the best solution. This process involves carefully removing the damaged plank and installing a new one. While slightly more involved than cosmetic repairs, plank replacement can be achieved with some patience and the right tools.
Tools Required for Plank Replacement
Before starting the replacement process, gather the necessary tools. This will make the task more efficient and prevent unnecessary delays.
The following items are typically required:
- Pull bar
- Tapping block
- Hammer
- Utility knife
- Safety glasses
- Replacement plank
Steps to Replace a Damaged Plank
Replacing a damaged plank requires a systematic approach to avoid further damage to surrounding planks.
Follow these steps for successful plank replacement:
- Disconnect the Damaged Plank: Start by disconnecting the damaged plank from the surrounding planks. Carefully insert the pull bar into the joint between the damaged plank and the adjacent plank. Gently pry up the damaged plank to disconnect the tongue and groove locking mechanism.
- Remove the Damaged Plank: Once disconnected, carefully lift the damaged plank out of place. If it’s difficult to remove, use a tapping block and hammer to gently tap the plank from the underside. This will help loosen it from the subfloor.
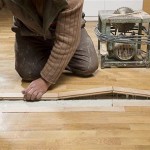
- Prepare the Replacement Plank: Take the replacement plank and cut off the bottom lip of the grooved edge using a utility knife. This will allow the new plank to slide into place under the existing planks.
- Install the Replacement Plank: Angle the replacement plank and slide the tongue edge into the groove of the adjoining plank. Gently lower the plank into position and use the tapping block and hammer to secure the plank, ensuring it is flush with the surrounding floor.
Preventing Future Damage
Once the repair is complete, take steps to prevent future damage to your laminate flooring.
Place protective mats under furniture legs and in high-traffic areas. Clean up spills immediately to prevent moisture damage. Avoid dragging heavy objects across the floor. Regularly sweeping or vacuuming with a soft-bristled attachment will remove dirt and grit that can scratch the flooring surface.
Seeking Professional Help
While many laminate floor repairs can be handled as DIY projects, some situations may require professional assistance. Complex repairs, extensive damage, or if you're uncomfortable attempting the repair yourself are all reasons to contact a flooring professional.
A flooring professional can assess the damage, recommend the best course of action, and carry out the repair effectively, ensuring a lasting solution and preserving the integrity of your flooring.

Laminate Floor Repair Diy Family Handyman

How To Replace Damaged Flooring Plank Diy

How To Repair Laminate Flooring The Home

How To Repair Damaged Laminate Floor Checkatrade

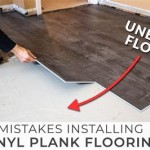
Avoid Costly Mistakes Repairing Vinyl Plank Flooring Made Easy

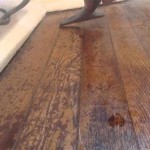
How To Repair Laminate Flooring With Water Damage Dry Force

How To Replace Warped Water Damaged Laminate Floor Boards

How To Fix Scratches On Laminate Flooring Directflooring Direct

How To Repair Laminate Flooring With Water Damage Dry Force

How To Repair Laminate Flooring The Home
See Also