How to Replace Engineered Hardwood Floor Planks
Replacing damaged engineered hardwood floor planks can seem daunting, but with the right tools and approach, it’s a manageable DIY project. This guide provides a step-by-step process to effectively replace individual planks, restoring the beauty and integrity of your floor.
Assessing the Damage and Gathering Supplies
Before starting, carefully examine the damaged plank to determine the extent of the repair needed. This assessment informs the tools and materials required.
Typical supplies include:
* Circular saw with a fine-tooth blade * Oscillating multi-tool * Hammer * Pry bar * Chisel * Wood glue * Replacement plank * Safety glasses and work gloves * Measuring tape * PencilCutting Out the Damaged Plank
Precise cutting is crucial to avoid damaging surrounding planks. The goal is to remove the damaged section while minimizing impact on adjacent areas.
Follow these steps for cutting:
* Mark the cutting lines on the damaged plank using a pencil and measuring tape. Leave a small margin inside the damaged area to avoid cutting into the adjacent planks. * Set the circular saw blade depth slightly deeper than the thickness of the engineered wood flooring. * Carefully score the plank along the marked lines, making multiple passes to prevent splintering. * Use an oscillating multi-tool to cut along the edges of the plank, finishing the cuts started by the circular saw. This tool provides greater control and precision.Removing the Damaged Plank
Once the cuts are complete, the damaged section can be removed. Gentle, controlled actions minimize the risk of collateral damage.
The removal process involves:
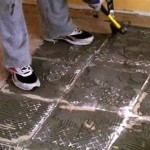
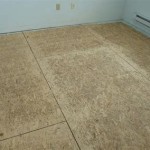
* Use a chisel and hammer to gently break apart the cut section of the damaged plank. * Insert a pry bar under the remaining pieces and carefully lift them out. * Remove any remaining adhesive or underlayment from the subfloor. Ensure the surface is clean and level for the replacement plank.Preparing the Replacement Plank
The replacement plank needs to be precisely cut and fitted into the now-vacant space. Careful measurement and preparation ensure a seamless fit.
Preparation involves:
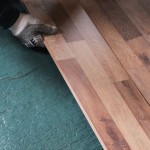
* Measure the dimensions of the removed plank section carefully. * Transfer these measurements to the replacement plank, ensuring accuracy. * Cut the replacement plank to the correct size using a circular saw or miter saw, maintaining clean and straight cuts. * If the flooring has a click-lock system, carefully cut away the bottom lip of the grooved edge of the replacement plank using a utility knife. This allows for the plank to be inserted into the existing floor.Installing the Replacement Plank
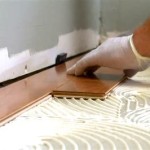
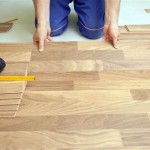
With the replacement plank prepared, the final step is installation. Proper installation ensures a secure and flush fit with the surrounding floor.
Installation steps include:
* Apply a thin layer of wood glue to the subfloor where the replacement plank will be placed. * Carefully insert the replacement plank into the opening, aligning it with the surrounding planks. * Use a tapping block and hammer to gently tap the replacement plank into place, ensuring a tight fit. * If necessary, use a pull bar to secure the plank further, especially with click-lock systems. * Clean any excess glue immediately. * Place weights on top of the newly installed plank for several hours to ensure proper adhesion to the subfloor while the glue dries.Finishing Touches
Once the glue is dry, inspect the replacement plank to ensure it sits flush with the surrounding flooring. Address any minor gaps or imperfections.
Final steps may include:
* Lightly sand any uneven edges to create a smooth transition between the new and existing planks. * Use wood filler to fill any small gaps. Allow the filler to dry completely before sanding smooth. * Apply a touch-up finish to blend the replacement plank with the surrounding floor.Replacing individual engineered hardwood planks requires patience and precision but can be successfully accomplished with the right techniques and tools.

How To Replace Engineered Hardwood Floor Planks Diy Repair

How To Install Hardwood Flooring For Beginners

A Comprehensive Guide On Engineered Wood Flooring Installation Mersey

Removing Replacing A Damaged Hardwood Flooring Board

How To Install Lock Engineered Hardwood Flooring

How To Install An Engineered Hardwood Floor

How I Fit Engineered Oak Wood Flooring

How To Install Lock Engineered Hardwood Flooring

How To Lay Engineered Wood Flooring A Diy Guide For Everyone

Can I Install Engineered Hardwood Flooring Over Existing Floors Lv Toronto
See Also