How Do I Replace A Laminate Floor Board?
Laminate flooring offers an attractive and durable surface for homes and businesses. However, accidents happen, and individual boards can become damaged, requiring replacement. This process, while slightly intricate, is achievable for most homeowners with basic DIY skills. This article details the steps involved in replacing a single laminate floor board.
1. Gathering the Necessary Tools and Materials
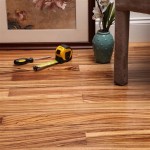
Before beginning the replacement process, ensure all necessary tools and materials are readily available. This includes a replacement board (ideally an exact match from the original installation), a pull bar, a tapping block, a utility knife, a pry bar, safety glasses, a hammer, a pencil, a measuring tape, and wood glue. Having all the necessary tools readily available will streamline the process and prevent unnecessary interruptions.
2. Locating the Damaged Board and Preparing the Area
Identify the damaged board requiring replacement. Clear the area surrounding the damaged board of any furniture or obstructions. Thoroughly clean the area around the damaged board to ensure a proper fit for the replacement.
3. Cutting and Removing the Damaged Board
This step requires precision to avoid damaging surrounding boards. Using a utility knife, score the center of the damaged board several times. This will weaken the board and make it easier to remove. Then, using a hammer and chisel or a pry bar, carefully break apart the scored sections of the damaged board. Work from the center outwards, removing smaller pieces at a time. Exercise caution during this process to minimize the risk of damaging adjacent boards.
After the central portion of the board is removed, use the pry bar to gently lift the remaining edges. The tongue-and-groove locking system of laminate flooring can be stubborn, so patience is key. A pull bar, specifically designed for laminate flooring, can be inserted between the wall and the edge of the damaged board to assist with removal. Apply gentle force to avoid damaging the wall or the surrounding flooring.
4. Preparing the Replacement Board
The replacement board typically needs modification to fit into the now vacant space. Measure the dimensions of the removed board precisely. Transfer these measurements onto the new board using a pencil and a measuring tape. Using a utility knife and a straight edge, carefully cut the replacement board to the correct size. Pay particular attention to the angle of the cuts to ensure a snug fit.
It is important to remove the bottom lip or groove edge of the long side of the replacement board that will be inserted first. This will allow the replacement board to be angled and clicked into the existing flooring. This can be done with a utility knife or a saw. It's also often necessary to remove the tongue edge of the short side of the replacement board to allow it to fit. Test fit the cut board to ensure proper dimensions before applying adhesive.
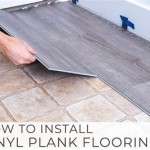
5. Installing the Replacement Board
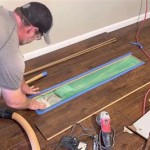
Apply a thin bead of wood glue to the cut edges of the replacement board. This will create a secure bond and prevent future separation. Carefully angle the replacement board and insert the tongue edge into the groove of the adjacent board. Gently lower the board into place, ensuring a flush fit with the surrounding floor. A tapping block and hammer can be used to gently tap the replacement board into place, ensuring a tight and even fit. Avoid striking the board directly with the hammer, as this can damage the laminate surface. The tapping block distributes the force evenly, minimizing the risk of damage.
6. Finishing Touches and Clean Up
Once the replacement board is securely in place, clean the area thoroughly to remove any debris or excess glue. Place a heavy object, such as books or weights, onto the newly installed board. This added weight will maintain pressure while the glue dries, ensuring a strong and lasting bond. Allow sufficient drying time according to the wood glue manufacturer's instructions. Once the glue is dry, remove the weights and inspect the replaced board for any gaps or imperfections.
By following these steps, homeowners can successfully replace a damaged laminate floor board, restoring the aesthetic and functionality of their flooring. If significant damage is present or if discomfort arises during any step of the process, consulting a professional flooring installer is recommended.

Laminate Floor Repair Diy Family Handyman

How To Do A Laminate Board Replacement On Floor Step By

How To Fix A De Laminated Board Without Removing The

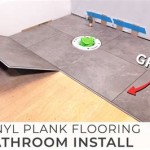
How To Replace Lock Vinyl Flooring

How To Replace A Damaged Laminate Board That S In The Middle Of Floor

How To Replace Damaged Flooring Plank Diy

How To Replace Warped Water Damaged Laminate Floor Boards

Replace A Damaged Board In Laminate Floor Rw Supply Design

How To Repair Laminate Flooring The Home

How To Replace A Damaged Hardwood Floor Board Diy Family Handyman
See Also