How To Put Vinyl Plank Flooring On A Wall
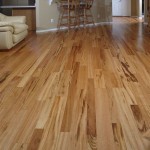
Vinyl plank flooring, renowned for its durability and aesthetic appeal, has traditionally graced floors. However, its versatility extends beyond horizontal surfaces, offering a unique and stylish wall covering option. This article provides a comprehensive guide on installing vinyl plank flooring on a wall, transforming any room with a distinctive textured finish.
Wall Preparation
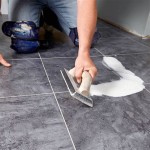
Proper wall preparation is critical for a successful installation. Begin by thoroughly cleaning the wall surface to remove dust, dirt, grease, and any loose debris. A clean wall ensures optimal adhesion of the adhesive or the planks themselves. For walls previously painted with glossy paint, light sanding may be required to create a slightly rough surface for better bonding. Fill any holes or imperfections with spackle and allow it to dry completely before sanding the area smooth. Finally, use a level to identify and mark any uneven sections of the wall. Minor imperfections can often be addressed during installation, but significant irregularities may necessitate pre-installation leveling.
Choosing the Right Installation Method
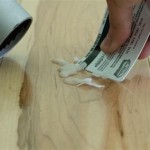
Several methods exist for installing vinyl plank flooring on walls, each with its own advantages and disadvantages. Adhesive application directly to the wall is a common method offering strong bonding. Alternatively, some vinyl plank products come with self-adhesive backing, simplifying the installation process. For a "floating" installation, similar to floor applications, planks can be interlocked without adhesive. However, this method requires meticulous wall preparation and is generally recommended for smaller accent areas rather than entire walls. Finally, using furring strips on the wall provides a framework for nailing or stapling the planks, offering a more robust attachment, particularly for heavier or thicker planks. The best method depends on the specific type of vinyl plank flooring, the wall condition, and the overall project needs.
Material and Tool Assembly
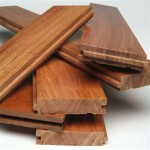
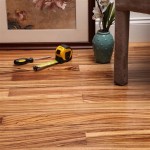
Gathering the necessary tools and materials beforehand streamlines the installation process. Essential tools typically include a measuring tape, level, utility knife, jigsaw or miter saw for cutting planks, safety glasses, and a pencil. Depending on the chosen installation method, additional tools like a notched trowel for adhesive application, a nail gun or staple gun for furring strip installations, or spacers for floating installations may be required. Materials beyond the vinyl planks themselves include adhesive (if necessary), furring strips (if using that method), nails or staples, and finishing trim pieces for a polished look.
Starting the Installation
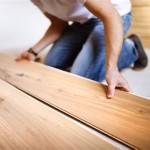
Begin the installation from either the top or bottom of the wall, working horizontally across in rows. Starting from the bottom often mimics the look of traditional wainscoting. If using adhesive, apply it evenly to the wall using a notched trowel, covering an area slightly larger than the plank being installed. Carefully align the first plank with the marked level line and firmly press it against the wall, ensuring full contact with the adhesive. For floating installations, interlock the planks according to the manufacturer's instructions, maintaining a consistent level across the wall. With furring strips, use a nail gun or staple gun to secure the planks to the framework.
Continuing and Completing the Installation
Continue installing the vinyl planks row by row, ensuring tight seams and a staggered pattern for a natural appearance. Use spacers to maintain consistent gaps between planks, particularly with floating installations. Cut planks to fit around corners, outlets, or other obstacles using a utility knife or jigsaw. For a seamless finish around window frames or door frames, carefully measure and cut the planks for a precise fit. Once all planks are installed, attach finishing trim pieces to cover the edges and provide a clean, professional appearance. These trim pieces can be nailed, glued, or adhered depending on the specific type and the wall material.
Addressing Challenges and Considerations
Certain challenges might arise during the installation process. Uneven walls can create difficulties in achieving a level finish. Use shims to address minor imperfections, placing them behind the planks as needed. For areas requiring intricate cuts, create templates from cardboard or paper to ensure accurate measurements. Furthermore, consider the moisture levels in the room where the vinyl planks are being installed. In high-moisture areas like bathrooms, choose waterproof vinyl planks and use a moisture-resistant adhesive to prevent issues with mold or mildew growth. Proper ventilation is also essential in these environments.

How To Install Vinyl Plank Flooring On Walls Europine

How To Install Laminate Planks Horizontally On A Wall

Tips On Installing Vinyl Flooring Walls Ll

Diy Wood Accent Wall Using Vinyl Planks Love Renovations

How To Install Laminate Flooring On Walls 7 Easy Steps Inc

Installing Lvt On A Wall

Diy L And Stick Vinyl Plank Accent Wall Hometalk

How To Install Vinyl Plank Flooring On Wall Step By Tutorial Walls Wood Planks

How To Install Waterproof Vinyl Plank Flooring Four Generations One Roof

Diy Wood Wall Under 40 Low Voc Vinyl Planks
See Also