How to Remove Lino Flooring
Removing lino flooring, also known as linoleum, can be a daunting task, but with the right tools and techniques, it can be done successfully. Lino flooring, a long-lasting and durable material, is often found in kitchens, bathrooms, and other high-traffic areas. While it offers excellent wear resistance, it can become outdated or damaged over time. Whether you're planning a renovation or simply want a change in style, knowing how to remove lino flooring is essential.
Tools and Materials
To remove lino flooring effectively, you'll need the following tools and materials:
- Utility knife or flooring scraper: For cutting through the lino and removing it in sections.
- Pry bar or hammer: To loosen and lift the lino from the subfloor.
- Crowbar or heavy-duty scraper: For removing stubborn areas of lino.
- Gloves: To protect your hands from sharp edges and debris.
- Safety glasses: To protect your eyes from flying debris.
- Dust mask: To prevent inhaling dust and debris.
- Trash bags: For collecting the removed lino and debris.
- Screwdriver: For removing any existing baseboards or trim.
Steps for Removing Lino Flooring
Follow these step-by-step instructions to remove lino flooring safely and efficiently:
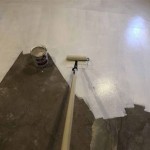
1. Prepare the Work Area
Begin by clearing the room of furniture and any other obstructions. Remove any baseboards or trim that may interfere with the removal process. Disconnect power and water sources to the area. Ensure proper ventilation and wear appropriate personal protective gear, including gloves, safety glasses, and a dust mask.
2. Cut and Loosen the Lino
Start by cutting the lino into manageable sections. Use a utility knife or flooring scraper to score the lino along the seam lines or in a grid pattern. This will help you break it up into smaller pieces for easier removal. Gently pry up the edges of one section with a pry bar or hammer. Tap the pry bar gently to loosen the lino from the subfloor. Be careful not to damage the subfloor.
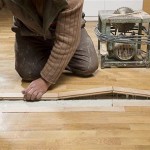
3. Remove the Lino
Once the lino is loose, carefully lift it from the subfloor. Continue cutting and lifting the lino in sections until the entire floor is removed. If you encounter any stubborn areas, use a crowbar or heavy-duty scraper to pry the lino away. Be careful not to damage the subfloor.
4. Clean Up
After removing all the lino, sweep or vacuum the subfloor to remove any debris. Dispose of the removed lino and debris properly. If you're planning to install new flooring, ensure the subfloor is smooth, clean, and free of any remaining adhesive or debris.
Tips for Removing Lino Flooring
Consider these additional tips to make the removal process smoother:
- Work in sections: Removing the lino in manageable sections makes the task less overwhelming and easier to handle.
- Be patient: Removing lino can be time-consuming, especially if it's glued down. Be patient and avoid rushing the process to prevent damaging the subfloor.
- Use appropriate tools: Employ the correct tools for the job to ensure efficiency and prevent injury.
- Proper ventilation: Ensure adequate ventilation to avoid inhaling dust and fumes.
- Safety first: Prioritize safety throughout the entire process. Wear protective gear and exercise caution when handling sharp tools.
Following these steps and tips, you can remove lino flooring effectively and prepare for a new flooring installation. Remember to approach the process with patience and safety in mind.

How To Remove Old Vinyl Or Linoleum Flooring Kitchens And Bathrooms

What You Should Know About Removing Old Linoleum Or Vinyl Flooring Hq Longwood Fl

How To Remove Vinyl Flooring The Home

How To Remove Vinyl Flooring Prep For An Lvp Installation

How To Remove Vinyl Flooring The Home

How To Remove Linoleum 13 Steps With S Wikihow

How To Remove Vinyl Or Linoleum Flooring Jonny Diy

Diy Vinyl Or Linoleum Flooring Removal Dumpsters Com

How To Easily Remove Linoleum Houseful Of Handmade

How To Quickly Remove Replace Linoleum Flooring In The Bathroom For An Ada Unit Step By Diy
See Also