A Comprehensive Guide To Chelsea Plank Flooring Installation
Chelsea plank flooring, known for its elegant look and durability, is a popular choice for homeowners seeking a timeless and versatile flooring option. Installing Chelsea plank flooring requires meticulous planning and execution to ensure a seamless and visually appealing result. This comprehensive guide provides a step-by-step approach to professional installation, covering key considerations, essential tools, and detailed instructions for successful completion.
Preparation: The Foundation of a Successful Installation
Proper preparation is paramount for a successful Chelsea plank flooring installation. It lays the groundwork for a smooth, long-lasting floor. The following steps are essential:
- Clear the Installation Area: Remove all furniture, fixtures, and belongings from the area where the flooring will be installed. This ensures unobstructed access for the installation process.
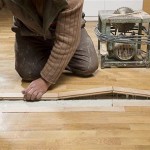
- Subfloor Evaluation: Assess the condition of the existing subfloor. It should be level, free of cracks, and structurally sound. Any repairs or leveling are crucial for a stable foundation.
- Moisture Barrier: If the subfloor is concrete, apply a moisture barrier to prevent moisture damage to the flooring. This helps ensure a dry and stable environment for the planks.
- Underlayment: Install an appropriate underlayment to provide cushioning, soundproofing, and a smooth surface for the planks.
Installation: Step-By-Step Guide to Achieving a Professional Finish
Once the preparation is complete, the installation process can begin. The following steps provide a detailed guide for achieving a seamless and professional finish:
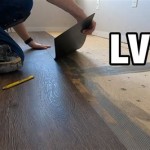
- Start at the Center: Begin by laying the first row of planks in the center of the room, ensuring they are parallel to the longest wall. This creates a symmetrical layout and minimizes potential cutting at the edges.
- Stagger the Joints: Each subsequent row should be offset by at least half the length of a plank. This technique, known as "staggered joints," prevents weak points in the floor and enhances its visual appeal.
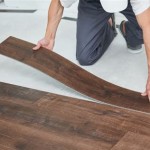
- Secure the Planks: Secure each plank to the subfloor using appropriate fasteners, such as nails or staples. Ensure the fasteners are driven straight and flush with the surface to avoid damaging the planks.
- Measure and Cut: For the last rows, measure carefully and cut the planks to fit precisely against the walls. This ensures a snug fit and a clean finish.
- Install Transition Strips: If transitioning between different flooring types, use transition strips to ensure a smooth and aesthetically pleasing transition.
Finishing Touches: Enhancing the Appearance and Durability
After the installation is complete, there are a few finishing touches to enhance the appearance and durability of your Chelsea plank flooring:
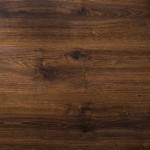
- Sanding and Sealing: Sand the floor to remove any rough edges and create a smooth surface. Apply a sealant to protect the flooring from scratches, stains, and moisture.
- Clean Up: Dust and vacuum the floor to remove any debris and prepare it for furniture placement.
- Enjoy Your New Floor: Take pride in your new Chelsea plank flooring and enjoy its beauty, durability, and elegance for years to come.

Technical Information Chelsea Plank Flooring

A Comprehensive Guide On Engineered Wood Flooring Installation Mersey

Technical Information Chelsea Plank Flooring

Technical Information Chelsea Plank Flooring

Engineered Hardwood Flooring Installation Cost 1 Best Guide

Affordable Laminate Flooring Installation In 2024 The Top 10 Cost Saving Tips

Chelsea Chevron Natural Oak Brushed Lacquered Engineered Wood Flooring Direct

Laying Wood Flooring Over Tile A Comprehensive Guide 2025 Today S Homeowner
Chelsea Chevron Natural Oak Brushed Lacquered Engineered Wood Flooring Direct

Your Complete Guide To Flooring Transition Strips Builddirect
See Also