A Comprehensive Guide to Installing Metal Tile Flooring
Metal tile flooring, known for its durability, sleek aesthetics, and ease of maintenance, has become an increasingly popular choice for both residential and commercial spaces. Installing metal tile flooring may seem like a daunting task, but with proper planning and execution, it can be a rewarding DIY project.
Materials and Tools Required
- Metal tiles
- Underlayment (optional)
- Adhesive
- Notched trowel
- Level
- Tape measure
- Pencil
- Grout (if desired)
Preparing the Subfloor
Ensure the subfloor is level, dry, and free of debris. If necessary, use a self-leveling compound to level the subfloor. For added stability and sound insulation, install an underlayment made of foam or cork.
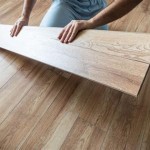
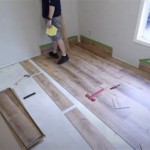
Layout and Dry-Fitting
Measure the room and determine the layout of the metal tiles. Start by dry-fitting the tiles to ensure they fit properly. Adjust the layout as needed to minimize cuts and create a visually pleasing pattern.
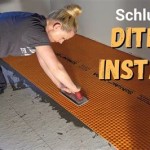
Applying Adhesive
Using a notched trowel, spread a thin layer of adhesive evenly over the subfloor, following the manufacturer's instructions. Work in small sections to prevent the adhesive from drying out.
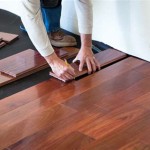
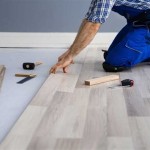
Installing the Tiles
Starting from the center of the room, place the tiles onto the adhesive, pressing firmly to ensure proper bonding. Use a level to check for levelness and adjust the tiles accordingly. Allow ample time for the tiles to set, refer to the adhesive manufacturer's guidelines.
Grouting (Optional)
If desired, grout the joints between the tiles to achieve a seamless look. Apply the grout using a grout float, pressing it into the joints and removing excess with a damp sponge. Allow the grout to cure as per the manufacturer's instructions.
Cutting Tiles (Optional)
If necessary, cut tiles to fit edges or around obstacles. Use a tile cutter or a wet saw for precise cuts. Smooth any sharp edges with a file or sandpaper.
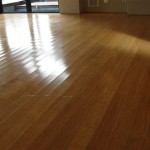
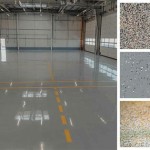
Finishing Touches
Once the tiles are installed and grouted (if applicable), clean the floor using a damp mop. Apply a sealant to protect the tiles and enhance their shine. Allow the sealant to dry completely before walking on the floor.
Maintenance
Metal tile flooring is generally low-maintenance. Clean the floor regularly with a damp mop or vacuum cleaner. Avoid using abrasive cleaners or harsh chemicals. If necessary, apply a metal floor polish or wax to restore its shine.
Conclusion
Installing metal tile flooring requires careful planning and precise execution, but the end result is a durable, stylish, and easy-to-maintain floor. By following these steps and using the appropriate materials and tools, you can create a beautiful and functional metal tile floor that will enhance the ambiance of your space for years to come.

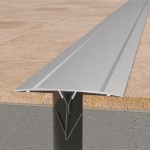
Installing Tile Edging Howtospecialist How To Build Step By Diy Plans

Installing Tile Edging Howtospecialist How To Build Step By Diy Plans

Installing Tile Edging Howtospecialist How To Build Step By Diy Plans

Installing Tile Edging Howtospecialist How To Build Step By Diy Plans

How To Finish Tile Edges And Corners Mountain

Installing Tile Edging Howtospecialist How To Build Step By Diy Plans

How To Tile A Floor Or Wall Beginner S Guide The Created Home

Installing Tile Edging Howtospecialist How To Build Step By Diy Plans

How To Measure A Room For Flooring And Install Tiles Correctly Rubi Blog Usa

Tile Edge Trim How To Choose It And Install 2024 Update
See Also