A Comprehensive Guide to Snap-Together Flooring
Snap-together flooring, also known as floating flooring, has gained immense popularity due to its ease of installation, affordability, and versatility. Whether you're a seasoned DIY enthusiast or a novice homeowner seeking to upgrade your floors, this guide will equip you with the essential knowledge and steps to ensure a seamless installation process.
Choosing the Right Type of Snap-Together Flooring
The first step in installing snap-together flooring is selecting the appropriate type. There are two main types available:
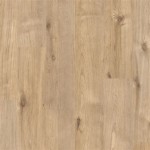
- Laminate: Consists of an engineered wood or plastic core with a decorative top layer that mimics the appearance of natural hardwood or stone.
- Vinyl: Made from durable and waterproof materials, available in various colors, patterns, and textures, including realistic wood and tile looks.
Preparing Your Floor
Proper preparation is crucial for a successful installation. Remove all existing flooring, baseboards, and quarter-round moldings. Clean the subfloor thoroughly to remove any debris or unevenness. If necessary, level the floor using self-leveling compound.
Installing the Underlayment
An underlayment is a thin layer placed beneath the flooring to provide sound absorption, insulation, and a moisture barrier. It is essential to choose the right underlayment for your specific flooring type and subfloor.
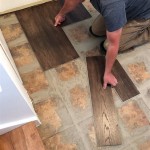
Beginning the Installation
Start installing the flooring in a corner of the room, snapping the first plank into place. Ensure the plank is securely locked together and level with the adjacent plank. Continue adding planks row by row, alternating the starting side to create a staggered pattern.
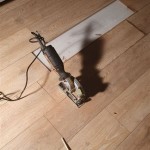
Cutting Planks and Edging
To fit planks around obstacles or the perimeter of the room, you'll need to cut them. Use a sharp knife or flooring saw and measure carefully to ensure accurate cuts. Install transition strips, moldings, or baseboards to conceal any exposed edges and create a finished look.
Finishing Touches
Once the flooring is installed, allow 24-48 hours for the adhesive to cure completely. Inspect the floor for any loose planks and ensure that all transitions are secure. Reinstall baseboards or quarter-round moldings and any other trim elements.
Maintenance and Care
To maintain the beauty and longevity of your snap-together flooring, follow these simple tips:
- Sweep or vacuum regularly to remove loose dirt and debris.
- Mop with a damp cloth and floor cleaner designed for the specific flooring type.
- Avoid using harsh chemicals or abrasive cleaners that could damage the surface.
- Protect high-traffic areas with mats or rugs to prevent excessive wear and tear.
Conclusion
Installing snap-together flooring is a straightforward and rewarding project that can enhance the aesthetics and functionality of your home. By following the steps outlined in this guide and choosing the right materials for your needs, you can create a beautiful, durable, and long-lasting floor that will elevate your living space for years to come.

Guide To Installing Laminate Flooring Diy

Lock Vinyl Plank Flooring A Comprehensive Guide Floorings

Step By Guide For Hybrid Flooring Installation The Guys

The Ultimate Guide To Installing Laminate Flooring Parrys

Laminate Flooring Installation A Step By Guide

Guide To Installing Laminate Flooring Diy Family Handyman

Información Sobre Os Swiss Krono

How To Lay Engineered Timber Floor Guide Fantastic Handyman Au

How To Lay Laminate Flooring Installation Guide Factory Direct

How To Install Laminate Flooring Step By Guide
See Also