A Step-By-Step Guide to Installing Hardwood Flooring on Concrete Floors
Installing hardwood flooring on a concrete subfloor can be a challenging but rewarding task. By following a step-by-step guide and using the appropriate materials, you can achieve a professional-looking and durable floor that will last for years to come.
Materials You'll Need:
- Hardwood flooring
- Concrete moisture barrier
- Underlayment (optional)
- Moisture-resistant adhesive
- Spacer blocks
- Tapping block and hammer
- Pry bar
- Nail gun and nails (for nailing down the flooring)
- Circular saw or miter saw
- Jointer
Step 1: Prepare the Concrete Subfloor
The first step is to ensure that the concrete subfloor is level, dry, and free of any debris or imperfections. Check the moisture level of the concrete using a moisture meter; it should be below 12%.
Step 2: Install the Concrete Moisture Barrier
To prevent moisture from seeping up from the concrete into the flooring, it's crucial to install a concrete moisture barrier. This barrier should overlap the seams by at least 6 inches and extend up the walls by several inches.
Step 3: Install the Underlayment (Optional)
Underlayment provides additional moisture protection and reduces noise. If desired, install an underlayment over the moisture barrier, ensuring any seams are properly taped.
Step 4: Lay Out the First Row of Hardwood Flooring
Start by measuring and cutting the first row of flooring to fit the length of the room, allowing for a 1/4-inch expansion gap around the perimeter. Apply a generous amount of moisture-resistant adhesive to the subfloor and place the first row of planks.
Step 5: Install the Remaining Rows
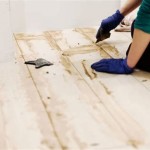
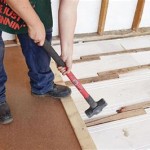
Continue installing the remaining rows of hardwood flooring, staggering the joints and using spacer blocks to maintain the expansion gap. Tap the planks together using a tapping block and hammer, ensuring they are securely joined.
Step 6: Cut and Install Transition Pieces
Where the hardwood flooring meets other flooring types, you'll need to cut and install transition pieces. These pieces will help create a smooth transition and prevent tripping hazards.
Step 7: Nail Down the Flooring (Optional)
For additional stability, you can nail down the hardwood flooring. Use a nail gun and nails specifically designed for hardwood flooring. Countersink the nails slightly below the surface.
Step 8: Sand and Finish the Flooring
Once the flooring is installed, it's time to sand and finish it. Sand the floor to smooth out any imperfections and remove any excess adhesive. Then, apply a sealant or finish of your choice to protect the floor and enhance its appearance.
Installing hardwood flooring on concrete floors requires careful preparation and precision. By following the steps outlined above, you can achieve a beautiful and long-lasting floor that will add value to your home.

How To Install Hardwood Flooring The Home

The Ultimate Guide To Diy Hardwood Flooring Installation

Diy A Complete Guide To Installing Wooden Flooring On Concrete

How To Lay Solid Wood Flooring A Step By Guide For Everyone
:strip_icc()/101206833-2e499ef612434b6b8ab6e5b62422a78f.jpg?strip=all)
How To Install Hardwood Floors

Is Installing Hardwood Flooring Over Concrete A Feasible Task Canadian Home Style

Installing Engineered Hardwood On Concrete Villagio Guide

How To Install Solid Wood Flooring On Concrete And Oak Specialists Suppliers Nexus
:strip_icc()/101206836-29035ec5a7c34a12a4c00cd5101818d4.jpg?strip=all)
How To Install Hardwood Floors

Wooden Flooring Installation Step By Guide
See Also
