Allure Ultra Flooring Installation Guide: Step-by-Step Essential Aspects
Transforming your floors with Allure Ultra flooring is a rewarding endeavor, but it requires careful preparation and precise installation. To help you achieve a flawless finish, here is a comprehensive guide to essential aspects of the Allure Ultra Flooring Installation process:
1. Subfloor Preparation
A stable and level subfloor is crucial for a successful installation. Ensure that your subfloor meets the following criteria:
- Flatness: No more than 3/16 inch variation over 10 feet.
- Level: No more than 1/4 inch variation over 10 feet.
- Moisture: Must be dry and free from moisture.
- Clean: Remove all debris, paint, and oil spills.
2. Acclimation
Before installation, allow the Allure Ultra planks to acclimate to your room's temperature and humidity for at least 24 hours. This prevents expansion and contraction issues later on.
3. Layout and Dry Fit
Plan the layout to minimize cuts and waste. Dry fit the planks together without adhesive to ensure proper alignment and correct any discrepancies.
4. Adhesive Application
Apply the Allure Ultra adhesive liberally to the subfloor using a 1/16-inch notched trowel. Work in small sections to prevent the adhesive from drying before the planks are placed.
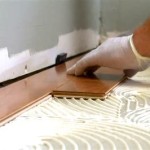
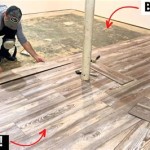
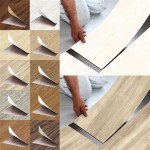
5. Plank Placement
Carefully place the planks into the adhesive and firmly press them down. Use a tapping block and hammer to ensure a secure bond. Stagger the joints and avoid placing them directly over each other.
6. Expansion Gaps
Leave a 1/4-inch expansion gap around the perimeter of the room and around any obstacles. Use spacers to maintain these gaps during installation.
7. Trimming and Cutting
Trim the planks to fit around walls, obstacles, and door frames using a utility knife or jigsaw. Measure carefully to ensure a precise fit.
8. Transitions
If transitioning to other flooring materials, use appropriate transition strips or moldings to create a smooth and seamless connection.
9. Finishing Touches
Once the installation is complete, remove any spacers and clean the floor gently with a damp mop. Avoid using abrasive cleaners or harsh chemicals.
10. Maintenance and Care
To maintain the beauty of your Allure Ultra flooring, follow these care tips:
- Sweep or vacuum regularly to remove loose dirt and debris.
- Mop with a damp cloth and mild cleaning solution as needed.
- Avoid using abrasive cleaners or excessive moisture.
- Protect the floor from scratches and heavy objects.
Conclusion
By following these essential aspects, you can achieve a professional-looking Allure Ultra flooring installation that will enhance the beauty and functionality of your home. Remember to prepare thoroughly, plan carefully, and execute precisely to ensure a durable and visually stunning floor.

How To Install Allure Flooring

How To Install Allure Ultra Simplefit Flooring Official

How To Install Allure Ultra Installation Quick Start Guide

How To Install Allure Ultra Simplefit Flooring Official

Trafficmaster Vinyl Plank Allure Flooring Home Pros

Diy Wood Look Allure Vinyl Plank Flooring Rebecca Propes Design

Trafficmaster Vinyl Plank Allure Flooring Home Pros

Trafficmaster Vinyl Plank Allure Flooring Home Pros

Trafficmaster Vinyl Plank Allure Flooring Home Pros

Trafficmaster Allure Vinyl Plank Flooring Installation
See Also