Can Vinyl Plank Flooring Be Installed Over Plywood Subfloor In Bathroom?
The question of whether vinyl plank flooring can be installed over a plywood subfloor in a bathroom is a common one for homeowners and contractors alike. The answer, while generally affirmative, comes with several caveats and considerations. Understanding these nuances is crucial to ensuring a successful and long-lasting flooring installation that avoids potential problems like moisture damage, mold growth, and premature wear.
Vinyl plank flooring has gained considerable popularity as a bathroom flooring option due to its water resistance, durability, and aesthetic appeal. Unlike traditional hardwood or laminate flooring, vinyl plank is designed to withstand a certain level of moisture exposure, making it a suitable choice for bathrooms, where spills and humidity are common. However, the performance of vinyl plank flooring in a bathroom setting is heavily reliant on the condition of the subfloor beneath it, particularly when that subfloor is made of plywood.
Plywood is a common subfloor material used in residential construction. It is a cost-effective and relatively stable option, providing a solid base for various types of flooring. However, plywood is susceptible to moisture damage if not properly protected. When used as a subfloor in a bathroom, plywood must be adequately prepared and protected to prevent water intrusion that can lead to warping, rot, and mold growth. These problems can compromise the integrity of the subfloor and, consequently, the vinyl plank flooring installed above it.
Therefore, while vinyl plank flooring can indeed be installed over a plywood subfloor in a bathroom, a successful installation depends heavily on proper preparation, addressing potential moisture concerns, and selecting the right type of vinyl plank flooring for a bathroom environment. Ignoring these factors can lead to costly repairs and replacements down the line. The suitability of the existing plywood subfloor and the installation process itself play a critical role in the overall success of the flooring project.
Assessing the Condition of the Plywood Subfloor
Before installing vinyl plank flooring over a plywood subfloor in a bathroom, a thorough assessment of the subfloor's condition is paramount. This assessment should identify any existing damage, potential weaknesses, and areas requiring repair or replacement. A careful inspection can prevent future problems and ensure a stable foundation for the new flooring.
The first step in the assessment is a visual inspection. Look for signs of water damage, such as staining, discoloration, or warping. These are clear indicators that the plywood has been exposed to moisture and may have compromised structural integrity. Pay particular attention to areas around the toilet, shower, and bathtub, as these are the most common locations for leaks and water intrusion.
Next, physically inspect the plywood for softness or crumbling. Press on the plywood in various locations, especially in areas where water damage is suspected. If the plywood feels soft or spongy, it indicates that the wood fibers have begun to break down due to moisture exposure. In severe cases, the plywood may even crumble under pressure. Any areas of significant softness or crumbling should be marked for repair or replacement.
Check for loose or damaged fasteners. Over time, nails or screws holding the plywood subfloor in place can loosen, creating instability. Ensure that all fasteners are securely in place and that the plywood is firmly attached to the floor joists. Replace any missing or damaged fasteners with appropriate screws designed for subfloor applications.
Evaluate the levelness of the subfloor. Vinyl plank flooring requires a relatively smooth and level surface for proper installation. Use a long level or straight edge to check for unevenness, dips, or high spots. Minor imperfections can often be addressed with patching compounds or self-leveling underlayments. However, significant unevenness may require more extensive repairs to the subfloor.
Finally, consider the presence of mold or mildew. If there are visible signs of mold or mildew, or if there is a musty odor, it indicates a moisture problem that needs to be addressed before installing the vinyl plank flooring. Mold and mildew can pose health risks and can also contribute to the deterioration of the subfloor. Remediation may involve cleaning the affected areas with a mold-killing solution or, in severe cases, replacing the damaged plywood entirely.
Addressing any issues identified during the assessment is crucial. Repairing or replacing damaged sections of the plywood subfloor will ensure a solid and stable foundation for the vinyl plank flooring, preventing future problems and extending the life of the flooring installation.
Preparing the Plywood Subfloor for Vinyl Plank Installation
Once the condition of the plywood subfloor has been assessed and any necessary repairs have been made, the next step is to properly prepare the surface for vinyl plank installation. This preparation process involves cleaning, leveling, and priming the subfloor to ensure a smooth, clean, and stable surface for the adhesive or interlocking mechanism of the vinyl planks to adhere to.
Thoroughly clean the plywood subfloor. Remove any dirt, dust, debris, or adhesive residue. Use a broom, vacuum cleaner, and damp mop to clean the entire surface. For stubborn adhesive residue, use a scraper or adhesive remover specifically designed for flooring applications. Ensure the subfloor is completely dry before proceeding to the next step.
Level the subfloor as needed. As mentioned earlier, vinyl plank flooring requires a relatively level surface for proper installation. Use a self-leveling underlayment or patching compound to fill in any dips, cracks, or imperfections. Follow the manufacturer's instructions for mixing and applying the leveling compound. Allow the compound to dry completely before proceeding.
Consider adding an underlayment. While not always required, an underlayment can provide several benefits, including added cushioning, sound insulation, and moisture protection. Choose an underlayment that is specifically designed for use with vinyl plank flooring and that is compatible with bathroom environments. Install the underlayment according to the manufacturer's instructions, ensuring that it is securely attached to the plywood subfloor.
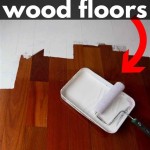
Prime the plywood subfloor. Apply a suitable primer to the plywood subfloor to promote adhesion and seal the surface. Choose a primer that is specifically designed for use with vinyl plank flooring and that is compatible with plywood. Apply the primer according to the manufacturer's instructions, ensuring that it is evenly distributed across the entire surface. Allow the primer to dry completely before installing the vinyl plank flooring.
Ensure proper ventilation and moisture control. Before, during, and after the installation, ensure proper ventilation in the bathroom to minimize moisture levels. Use exhaust fans during showers and baths, and consider using a dehumidifier to control humidity. Proper ventilation will help prevent moisture damage to the plywood subfloor and extend the life of the vinyl plank flooring.
By taking these steps to properly prepare the plywood subfloor, one can create a solid and stable foundation for the vinyl plank flooring, ensuring a successful and long-lasting installation. This preparation is essential for preventing future problems like cupping, buckling, and adhesive failure, which can occur if the subfloor is not adequately prepared.
Choosing the Right Vinyl Plank Flooring for a Bathroom
Selecting the appropriate type of vinyl plank flooring is just as crucial as preparing the subfloor. Not all vinyl plank flooring is created equal, and certain types are better suited for the high-moisture environment of a bathroom. Considering factors such as water resistance, wear layer thickness, and installation method will contribute to the longevity and performance of the flooring.
Opt for waterproof vinyl plank flooring. While all vinyl plank flooring offers some level of water resistance, waterproof vinyl plank flooring provides the highest level of protection against moisture penetration. This type of flooring is designed to prevent water from seeping through the seams and damaging the subfloor. Look for products that are explicitly labeled as "waterproof" rather than just "water-resistant."
Consider the wear layer thickness. The wear layer is the top layer of the vinyl plank that protects the flooring from scratches, dents, and wear. A thicker wear layer provides greater protection and is more durable. For bathrooms, which are subject to frequent use and potential spills, a wear layer of at least 20 mils is recommended. A thicker wear layer will also help to maintain the appearance of the flooring over time.
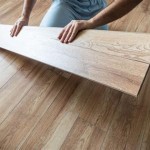
Evaluate the installation method. Vinyl plank flooring is available in different installation methods, including glue-down, click-lock, and loose-lay. Glue-down vinyl plank flooring provides the most secure and waterproof installation, as the planks are adhered directly to the subfloor. Click-lock vinyl plank flooring is easier to install but may be more susceptible to moisture penetration if not properly sealed. Loose-lay vinyl plank flooring is the easiest to install but offers the least amount of water resistance. For bathrooms, glue-down vinyl plank flooring is generally the preferred option, as it provides the best protection against moisture damage.
Look for textured or embossed vinyl plank flooring. Textured or embossed vinyl plank flooring provides a more slip-resistant surface, which is especially important in bathrooms, where spills and wet surfaces are common. This type of flooring also offers a more realistic wood or stone appearance, enhancing the aesthetic appeal of the bathroom.
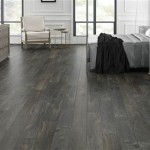
Consider the overall style and design. Vinyl plank flooring is available in a wide range of styles, colors, and patterns, allowing one to create a custom look for the bathroom. Choose a style that complements the overall decor and aesthetics of the space. Lighter colors can help to brighten up a small bathroom, while darker colors can create a more dramatic and sophisticated look. Consider the size of the planks as well; wider planks can make a small bathroom appear larger.
By carefully considering these factors and selecting the right type of vinyl plank flooring, the probability of a successful and long-lasting installation in a bathroom environment can be significantly increased. Choosing a product that is specifically designed for high-moisture environments and that is properly installed will ensure that the flooring remains beautiful and functional for years to come.

How To Install Vinyl Plank Flooring In A Bathroom Fixthisbuildthat

Installing Vinyl Flooring Over Plywood What You Need To Know

How To Install Vinyl Plank Tiles In A Bathroom

Can Vinyl Flooring Be Installed Over A Plywood Subfloor

How To Install Vinyl Plank Flooring In A Bathroom Fixthisbuildthat

Dos And Don Ts For Installing Vinyl Plank Floors In The Bathroom Advice Homeowners

How To Install Vinyl Plank Flooring In A Bathroom Fixthisbuildthat

Can Vinyl Flooring Be Installed Over A Plywood Subfloor

How To Install Vinyl Plank Flooring In A Bathroom Fixthisbuildthat

Can You Renovate Bathrooms With Vinyl Flooring Imagine Floors
See Also