Can You Install Vinyl Plank Flooring On Walls?
Vinyl plank flooring has become a popular choice for homeowners due to its durability, affordability, and ease of installation. While traditionally used for floors, its versatility has led many to explore its potential for wall applications. This article examines the feasibility, benefits, drawbacks, and installation process of using vinyl plank flooring on walls.
Feasibility of Wall Installation
Vinyl plank flooring can indeed be installed on walls, offering a unique and often cost-effective design element. However, certain considerations must be taken into account. The type of vinyl plank plays a significant role. Click-lock or floating floor planks are generally easier to install on walls compared to glue-down planks, as they offer a simpler interlocking mechanism. The wall surface itself also needs evaluation. Smooth, even surfaces like drywall provide the best base for installation. Textured walls or those with significant imperfections might require additional preparation to ensure proper adhesion and a smooth finish.
Benefits of Using Vinyl Plank on Walls
Utilizing vinyl plank flooring on walls offers several advantages. Firstly, it provides a durable and water-resistant surface, making it particularly suitable for areas prone to moisture, such as bathrooms, kitchens, and laundry rooms. This resilience makes it easier to clean and maintain compared to other wall coverings like wallpaper or paint. Secondly, vinyl plank comes in a wide variety of styles, colors, and textures, allowing for greater design flexibility. Homeowners can mimic the look of hardwood, tile, or stone without the associated cost and installation complexities. Finally, vinyl plank flooring is generally more affordable than other wall covering options, offering a budget-friendly way to achieve a high-end aesthetic.
Drawbacks and Considerations
Despite the benefits, installing vinyl plank flooring on walls also presents certain limitations. Weight can be a concern, especially with thicker planks. Ensuring proper wall support and using appropriate adhesives are crucial for long-term stability. Temperature fluctuations can also affect vinyl plank, potentially leading to expansion and contraction. In areas with significant temperature swings, leaving appropriate expansion gaps is essential. Finally, while vinyl plank is water-resistant, it is not entirely waterproof. Prolonged exposure to standing water can still cause damage, especially at the seams. Therefore, in wet areas, proper sealing and caulking are necessary.
Preparation for Wall Installation
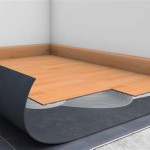
Proper preparation is key to a successful vinyl plank wall installation. The wall surface should be clean, dry, and free of dust, debris, and loose paint. Any imperfections, such as holes or cracks, should be filled and sanded smooth. For uneven walls, applying a layer of thin plywood or underlayment can create a more uniform surface. Acclimating the vinyl planks to the room's temperature and humidity for at least 48 hours before installation is also crucial, allowing them to adjust and minimize the risk of expansion or contraction issues later.
Installation Process for Click-Lock Planks
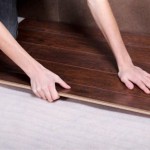
Click-lock vinyl planks are generally preferred for wall installations due to their ease of use. The installation process typically begins by attaching furring strips to the wall, creating a framework for the planks to attach to. These strips should be spaced according to the plank manufacturer's recommendations. Starting at the bottom, the first plank is positioned and secured to the furring strips using nails or screws. Subsequent planks are then clicked into place, working upward row by row. It is essential to ensure a tight fit between planks to prevent gaps and maintain a seamless appearance. Cutting planks to fit around corners, windows, or other obstacles can be accomplished using a utility knife or saw.
Installation Process for Glue-Down Planks
Glue-down vinyl planks require a different approach for wall installation. A high-quality construction adhesive specifically designed for vinyl flooring should be used. The adhesive is applied to the back of each plank, which is then firmly pressed against the wall surface. Working in small sections and ensuring proper contact is crucial for a strong bond. It is important to follow the adhesive manufacturer's instructions regarding drying times and application techniques. Similar to click-lock installation, starting at the bottom and working upward is recommended. Using spacers can help maintain consistent gaps between planks during the drying process.
Finishing Touches and Maintenance
Once the installation is complete, finishing touches can enhance the overall appearance. Trim pieces can be used to conceal edges and create a polished look around windows, doors, and corners. Caulking along the top and bottom edges can further enhance water resistance and prevent moisture infiltration. Regular cleaning with a damp mop and mild detergent is typically sufficient for maintenance. Avoid using abrasive cleaners or scrubbing pads, as these can damage the vinyl surface. Promptly addressing any spills or leaks can also help prolong the lifespan of the wall installation.

Can You Install Vinyl Flooring On Walls L Antic Colonial

How To Install Waterproof Vinyl Plank Flooring Four Generations One Roof

Tips On Installing Vinyl Flooring Walls Ll Lumber Liquidators

Diy Wood Accent Wall Using Vinyl Planks Love Renovations

How To Install Laminate Flooring On Walls 7 Easy Steps Inc

How To Install Laminate Flooring On Walls 7 Easy Steps Inc

How To Make A Laminate Flooring Accent Wall

Diy L And Stick Vinyl Plank Accent Wall Hometalk

Lvt Versatile For Floor And Wall Covering S

Wall Cladding With Flooring Material 2024 09 23 Floor Trends Installation
See Also
