Laying Vinyl Plank Flooring on Concrete: A Comprehensive Guide
Vinyl plank flooring is a popular choice for homeowners and businesses alike due to its durability, affordability, and ease of installation. Concrete subfloors are commonly found in both residential and commercial properties, making it essential to understand how to properly lay vinyl plank flooring on this surface.
1. Surface Preparation
Before laying down the vinyl planks, it is crucial to ensure that the concrete subfloor is clean, level, and dry. Remove any debris, dust, or dirt using a broom or vacuum cleaner. Check the flatness of the surface using a level or straightedge. If there are any uneven areas, they should be leveled using a self-leveling compound or by grinding the surface.
2. Moisture Barrier
Concrete can release moisture, which can damage vinyl plank flooring. To prevent this, a moisture barrier must be installed between the subfloor and the vinyl planks. This barrier can be a plastic sheet or a self-adhering membrane that covers the entire subfloor surface.
3. Underlayment
An underlayment provides cushioning and sound absorption for the vinyl plank flooring. It also helps to smooth out minor imperfections in the subfloor. Choose an underlayment that is suitable for use with vinyl plank flooring and concrete subfloors.
4. Planking Pattern
Determine the desired planking pattern before starting the installation. Popular patterns include the staggered or brick bond pattern, the herringbone pattern, and the straight-line pattern. Mark out the layout on the subfloor to ensure a straight and even installation.
5. Adhesive Selection
The appropriate adhesive for vinyl plank flooring on concrete depends on the type of flooring and the subfloor condition. Some vinyl plank flooring comes with a self-adhering backing, while others require an additional adhesive. Choose an adhesive that is specifically designed for vinyl plank flooring and concrete surfaces.
6. Installation
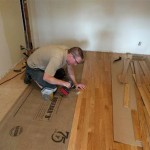
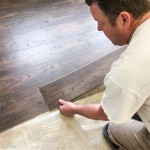
Starting in one corner of the room, apply the adhesive to the subfloor according to the manufacturer's instructions. Place the first vinyl plank into the adhesive and press down firmly. Continue adding planks, aligning them carefully with the previous ones. Use a tapping block and a rubber mallet to ensure a secure fit.
7. Trimming and Finishing
Once the vinyl planks are installed, trim the edges to fit around obstacles such as walls, doorways, and pipes. Use a utility knife or a flooring saw to make precise cuts. Finish the installation by installing baseboards or quarter rounds to cover the expansion gap around the perimeter of the room.
8. Maintenance and Care
To maintain the beauty and longevity of your vinyl plank flooring on concrete, regular cleaning and maintenance are essential. Sweep or vacuum regularly to remove dirt and debris. Mop the floor with a mild detergent when necessary. Avoid using abrasive cleaners or harsh chemicals that can damage the flooring.
By following these steps, you can successfully lay vinyl plank flooring on concrete, resulting in a durable, attractive, and low-maintenance flooring solution for your home or business.

Easy Ways To Install Vinyl Plank Flooring On Concrete

How To Prepare A Concrete Floor For Vinyl Flooring Parrys

Easy Ways To Install Vinyl Plank Flooring On Concrete

Tips For Installing Vinyl Plank Over Concrete Floors Lemon Thistle

How To Install Vinyl Or Laminate Floors In A Basement Over Concrete Slab

Best How To Install Vinyl Plank Flooring Four Generations One Roof

Tips For Installing Vinyl Plank Over Concrete Floors Lemon Thistle

Lvp Flooring Installation How To Install Luxury Vinyl Plank In A Basement Diy

Easy Ways To Install Vinyl Plank Flooring On Concrete

How To Install Vinyl Plank Flooring On Concrete Whole Cabinet Supply
See Also
