DIY Plywood Flooring for Your Home: A Comprehensive Guide
Plywood flooring offers a durable and budget-friendly alternative to traditional hardwood flooring. Installing it yourself can save you a significant amount of money and add a personal touch to your home. Here's a step-by-step guide to help you achieve a professional-looking plywood floor:
Materials Required:
- 3/4-inch or thicker plywood underlayment
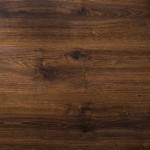
- 5/8-inch or thicker plywood flooring
- Adhesive
- Polyurethane finish
- Underlayment paper
- Circular saw
- Table saw
- Measuring tape
- Chalk line
- Nail gun
- Sander
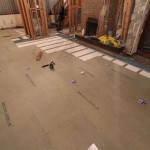
Step 1: Prepare the Subfloor
Ensure your subfloor is level and smooth. Repair any damaged areas or replace sections if necessary. Install underlayment paper over the subfloor to provide a moisture barrier and reduce noise.
Step 2: Install the Underlayment
Cut the underlayment plywood to fit the room. Apply a thin layer of adhesive to the subfloor and lay the underlayment in place. Stagger the joints and fasten it with nails or screws spaced 6-8 inches apart.
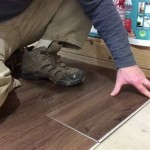
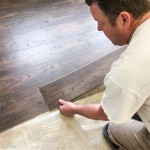
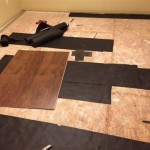
Step 3: Install the Plywood Flooring
Cut the flooring plywood to the same size as the underlayment. Apply adhesive to the underlayment and set the flooring planks in place. Use a spacer between each plank to ensure even spacing. Fasten the planks with nails or screws driven at a 45-degree angle.
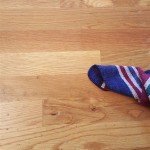
Step 4: Fill Gaps and Sand
Fill any gaps between the planks using a wood filler. Allow it to dry and then sand the floor to smooth the surface. Use a coarse-grit sandpaper for the initial sanding and gradually move to finer grits until the floor is smooth.
Step 5: Apply Polyurethane Finish
Apply a polyurethane finish of your choice to protect the floor and enhance its appearance. Use a brush or roller to apply several thin coats, allowing each coat to dry before applying the next.
Tips:
* Use a chalk line to ensure straight cuts and consistent spacing when installing the plywood. * Allow the adhesive to cure for at least 24 hours before sanding or walking on the floor. * Wear protective gear, including a mask and gloves, when sanding and applying the polyurethane finish. * Sand the floor with the grain to avoid creating scratches. * Apply a minimum of three coats of polyurethane finish for optimal durability and protection. By following these steps and tips, you can create a beautiful and durable plywood floor that will enhance the value and comfort of your home.
Diy Plywood Floors Remodelando La Casa

Diy Plywood Floors Part 2 How To Stain And Seal

Plywood Flooring Diy Examples And Inspiration Of Floors Using Sheets

Diy Plywood Floors Remodelando La Casa

Make Your Own Plank Flooring Using 1 X 12 Lumber Hallstrom Home
.jpg?strip=all "How To Make Plywood Flooring Ibuildit Ca")
How To Make Plywood Flooring Ibuildit Ca

Diy Plywood Flooring Ideas For 100 In 7 Easy Steps

How To Make Wide Plank Wood Flooring From Plywood The Lake And Land
.jpg?strip=all "How To Install And Finish Plywood Flooring Ibuildit Ca")
How To Install And Finish Plywood Flooring Ibuildit Ca

Diy Plywood Floors Remodelando La Casa
See Also