Essential Aspects of Installing Pergo Flooring
Installing Pergo flooring adds a touch of elegance and durability to any home. With careful planning and preparation, you can achieve a professional-looking finish. Here's a comprehensive guide to ensure a successful installation.
1. Preparation
Before starting, gather the necessary tools, including a tape measure, utility knife, tapping block, and spacers. Clean the subfloor to remove any debris or irregularities. If necessary, level the floor using a self-leveling compound.
2. Underlayment Installation
An underlayment provides cushioning and reduces noise. Unroll the underlayment onto the subfloor and secure it with tape or staples. Overlap the seams by at least 2 inches and trim any excess.
3. Layout Planning
Determine the starting point by snapping a chalk line perpendicular to the longest wall. Position the first row of planks along the line, aligning the tongues and grooves.
4. First Row Installation
Place the first plank flush against the wall and secure it with spacers. Tap the next plank into place using a tapping block and hammer. Repeat the process for the entire first row, ensuring the planks are tight and level.
5. Subsequent Row Installation
For the second row, angle the first plank at 45 degrees and slide its tongue into the groove of the previous row. Tap the plank into place and continue the process for the entire row.
6. Wall Expansion Gap
To allow for expansion and contraction, leave a ¼-inch gap between the flooring and walls. Use spacers to maintain the gap throughout the installation.
7. Cutting and Fitting
To fit around obstacles like doorways or pipes, measure and cut the planks to size. Use a utility knife to score and snap the planks for a clean cut.
8. Transition Pieces
For doorways or other areas where Pergo flooring meets other flooring types, transition pieces are required. Install them according to the manufacturer's instructions.
9. Moldings
To finish the installation, add moldings around the edges of the room. This includes baseboards, quarter-rounds, or T-moldings.
10. Cleaning and Maintenance
Once the installation is complete, clean the floor with a damp mop and a manufacturer-recommended cleaning solution. Regularly maintain the floor by sweeping and spot-cleaning to preserve its appearance.
Tips for a Successful Installation
- Follow the manufacturer's instructions carefully.
- Use a tapping block to ensure planks are fitted tightly.
- Check the level of the floor periodically during installation.
- Leave expansion gaps around the perimeter of the room.
- Use a moisture barrier if the floor is installed in a humid environment.
- Protect the floor from direct sunlight to prevent fading.
- Hire a professional installer if you are unsure about the installation process.

How To Install Pergo Flooring Easy Diy From Start Finish

How To Install Laminate Flooring For Beginners

Laminate Floor Installation For Beginners 9 Clever Tips

Guide To Installing Laminate Flooring Diy Family Handyman

A Beginner S Guide To Installing Vinyl Plank Flooring Dumpsters Com

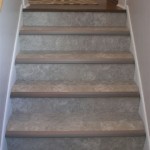
How To Install Laminate Flooring On Staircase Step By Guide

How To Install Laminate Flooring Forbes Home

How To Install Laminate Flooring Easy Diy Guide

How To Install Laminate Flooring Guide 2024

Guide To Fitting Laminate Up 50 Off Free Samples
See Also